
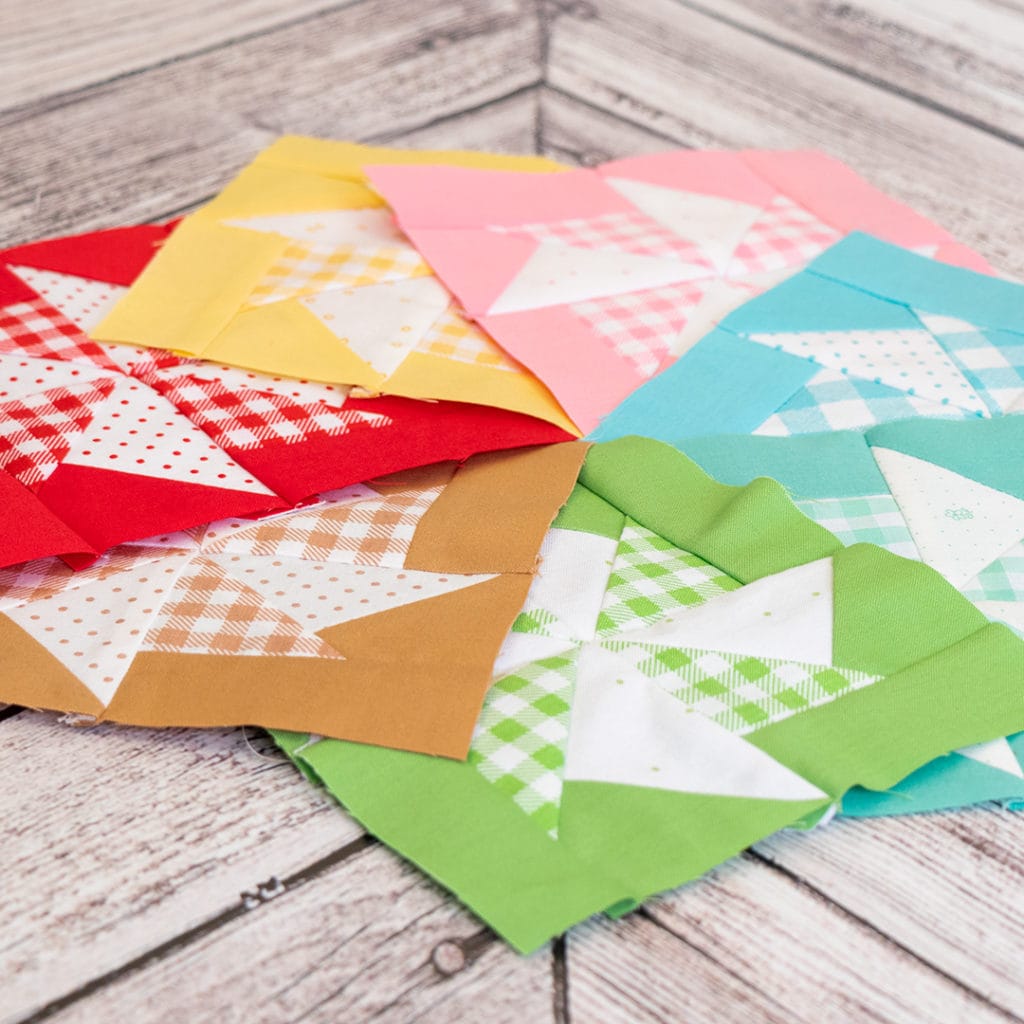
We’re sew excited to continue the Two Color Quilt Sew Along with instructions for finishing the top and quilt back! The Two Color Quilt Sew Along is a spin-off of the Vintage Christmas Sew Along we did with Lori Holt (of Bee in my Bonnet) on the blocks in her Vintage Christmas Book to make the Vintage Christmas Sampler Quilt. However, we were clamoring to do more with the Two Color Quilts she showed in the same book! So this year, we created a sampler quilt with Lori’s block to make the Two Color Quilt, hence the Two Color Quilt Sew Along! You won’t believe how much fun you can pack into a monochromatic fabric set!
This week, we’re assembling the quilt top with sashing, cornerstones and borders, and we’re giving you some tips for attaching Vintage Trim and binding.
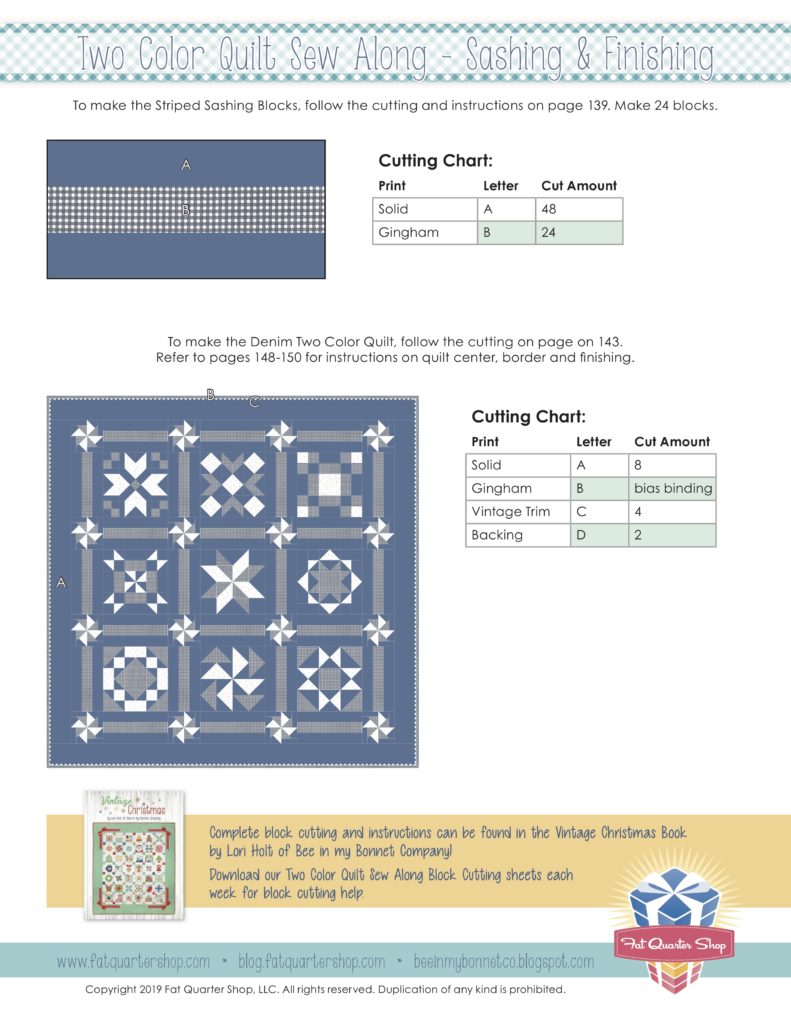
Sashing & Finishing Instructions
Here are the instructions for making the sashing blocks and cutting the borders and binding. Tip: When making the Striped Sashing Blocks, you can save time by cutting A and B units longer, at 2.5″ x 25″, make your strip sets, and then cut those down to size.
Adding Vintage Trim
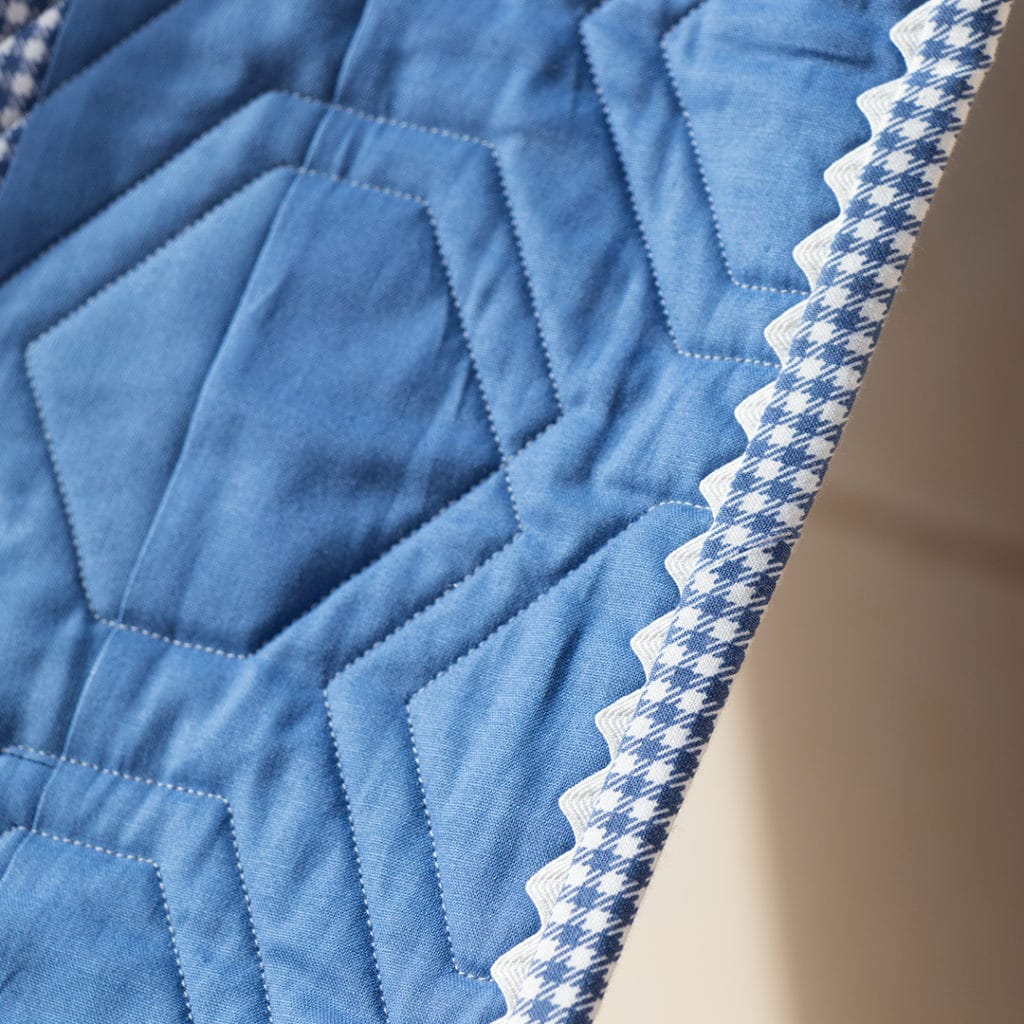
The addition of Large Vintage Trim to the binding is an optional step that adds a touch of charm to the quilt. This step is completely optional.
In this video, Lori Holt shows you how to add Large Vintage Trim (1/2″ Ric Rac) to the edge of a quilt for a layered binding look. For this step, you’ll need one spool of Large Vintage Trim in Cloud (due in September). Cut a piece of Vintage Trim for each side of the quilt, making it a few inches longer than needed. Stitch it to the edge of the quilt with an eighth of an inch seam allowance. Follow along in the video for detailed instructions.
How to Make Bias Binding
For the Two-Color Quilt, Lori Holt suggests bias binding in order to achieve a diagonal pattern on the gingham print. This is completely optional, and if you’d like to try it out, check out Kimberly’s video for tips on making and adding bias binding to quilts.
For more tips on binding quilts, check out our YouTube Playlist of binding tutorials.
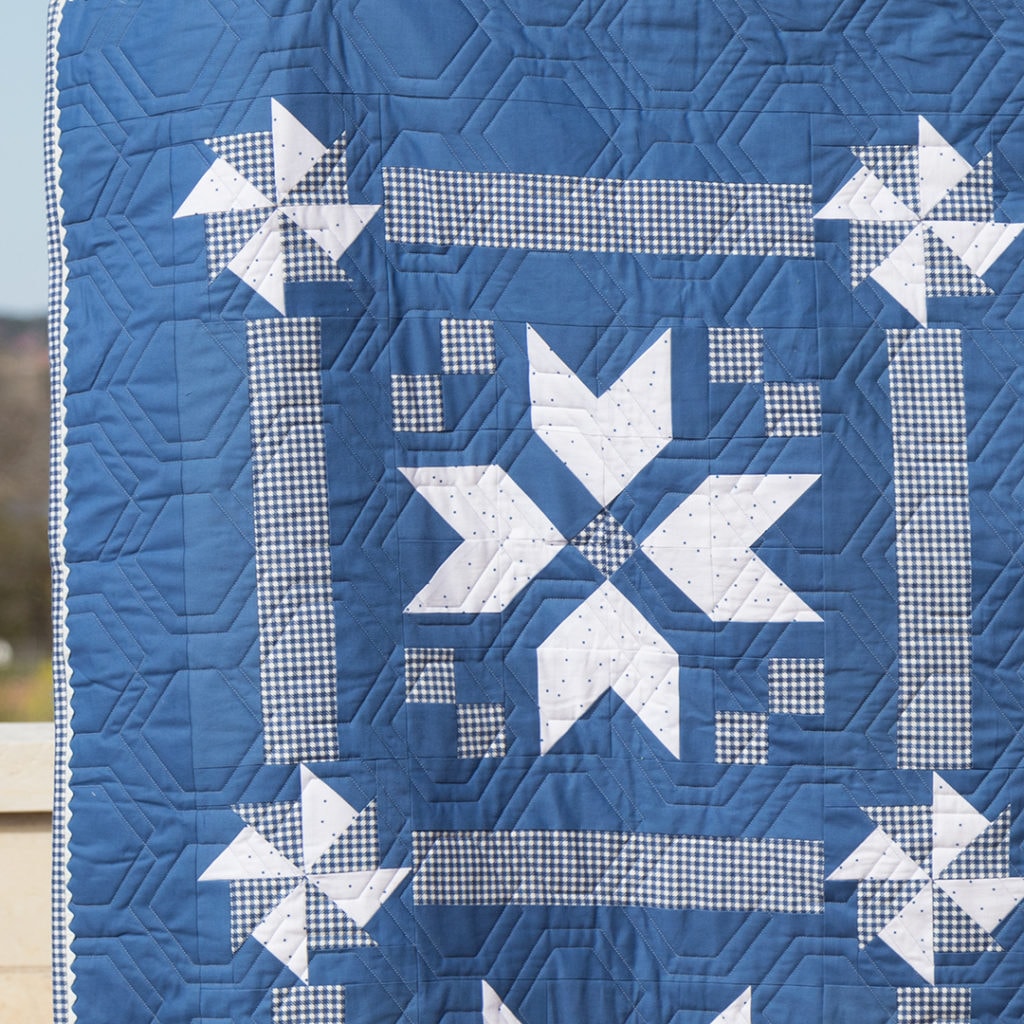
All you’ll need to get started is the Vintage Christmas Quilt Book and your choice of fabrics (get fabric requirements here)! We are making our version of the Two Color Quilts using Confetti Cotton Solids by Riley Blake Designs and Pin Dots and Bake Sale 2 by Lori Holt.
Sew Along Schedule
Now that we’re near the end, we’re going to take some time to get these quilted and add the binding. We’ll be back on the blog on Thursday, July 4 to show the finished quilts. Kimberly will show all the completed quilts in her Livestream on YouTube on Friday, July 12.
Keep up with the Two Color Quilt Sew Along!
Be sure to follow along with the Two Color Quilt Sew Along on Facebook and Instagram! Join the Kimberly Stitch Squad Facebook Group to join our group of quilters who are also quilting along. And be sure to hashtag your Two Color Quilt progress with #twocolorquiltsewalong on Instagram so we can see and share your work!
We’ll see you in a few weeks, on Thursday, July 4, to view the finished quilts!
Happy Quilting!
3 comments
I never name my machines but my friend named hers after me, Martha!
I have a singer that I got last year for Christmas. I have had many, but I love this gal. I named her Forella, which was my mother’s middle name. Now, she hated that name but I love it. My mom taught me to sew when I was only about 5 on an old Feather WEight machine that my aunt used in the late 20’s and early 30’s doing alterations for people. I am just teaching myself to quilt, which is something I have always wanted to learn. Thank you for the great tutorials, you are the best!
I have a newer Brother sewing machine. No name yet. But I love to hear about all the other names.