
Hi, there! I’m Katie and I am a brand-new quilter learning all the basics here at Fat Quarter Shop. I’m sewing my first quilt with the help of my fellow Fat Quarter Shop staffers and I’d like to share my journey with you.
Last week, I learned to cut and piece my fabrics together and absorbed a lot of quilting vocabulary. The week before I chose a pattern, fabrics and gathered my supplies. This week I finally made the magic happen and completed my first quilt! Thanks to the help of all of you who commented helpful advice on my blogs and the help of the other staffers, I now have my first quilt and a whole lot of new knowledge.
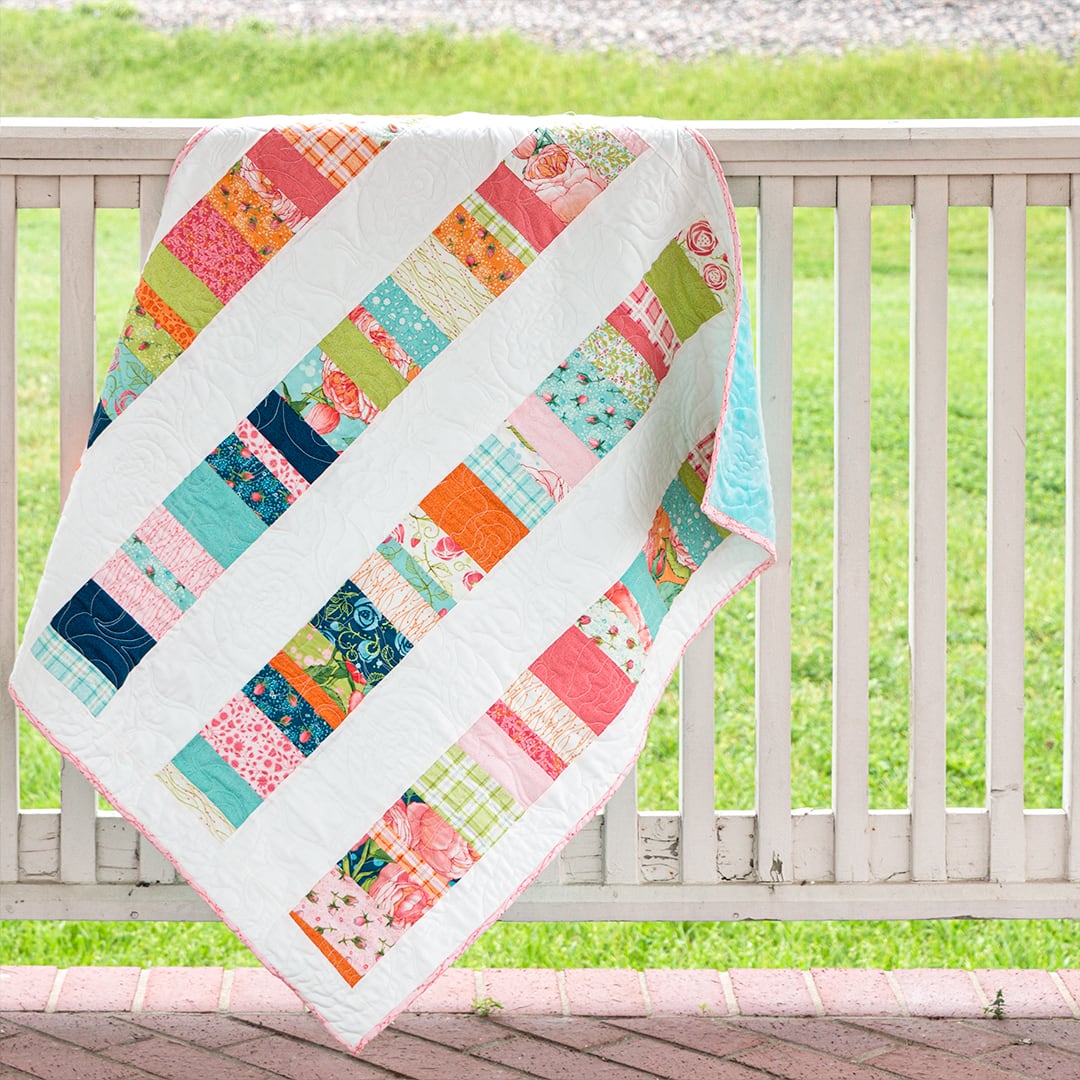
I sewed up the Color in the Lines Quilt from Melissa Corry’s Charming Baby Quilts book for It’s Sew Emma. I highly recommend this quilt and book for first-timers. My quilt used strip piecing which made for easy practice when sewing my seams.
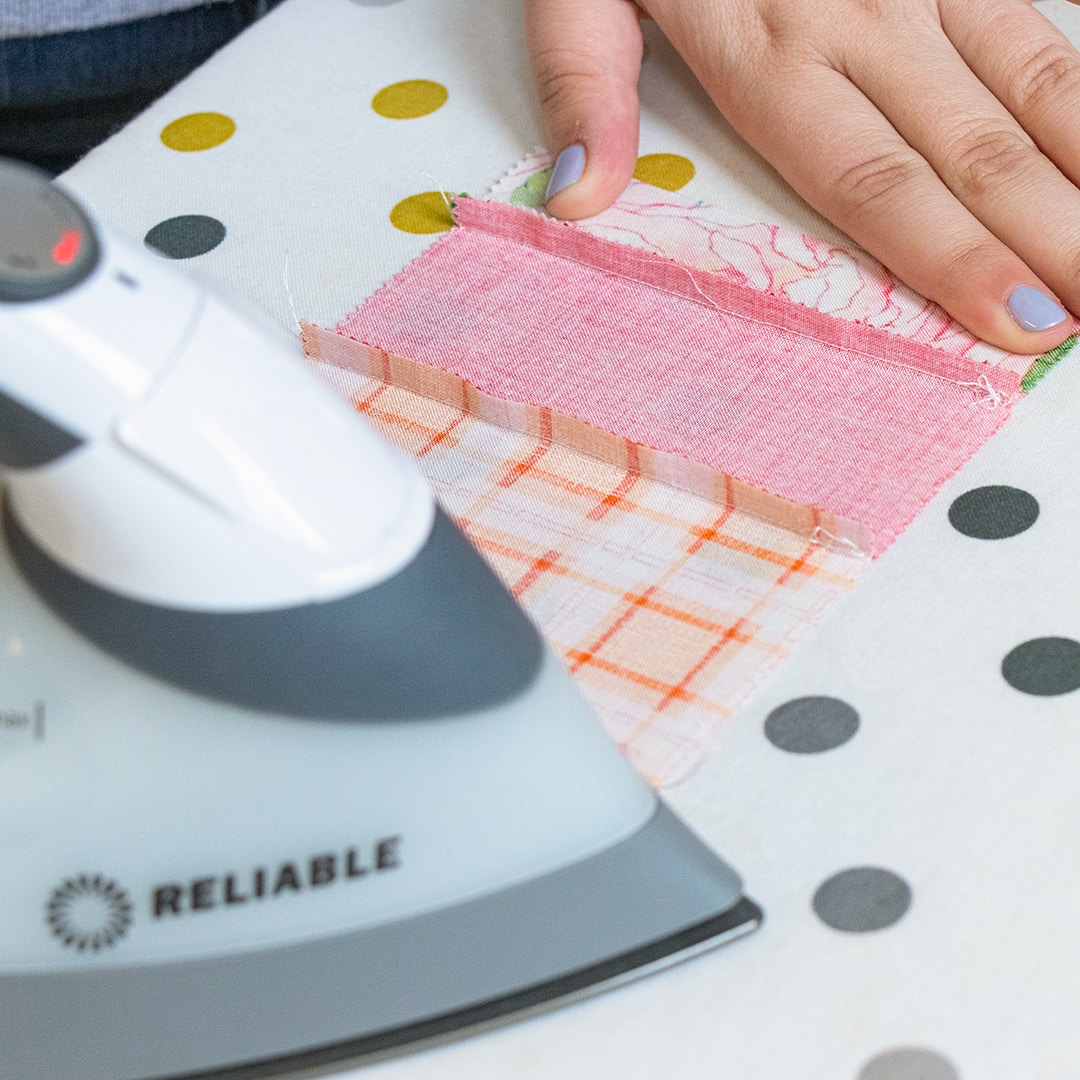
Here is a look at me pressing my fabrics. A helpful quilter on my last blog taught me to press my seams rather than to iron. This saved my fabric pieces from losing shape.
Making the learning curve work for me
Some of the most valuable learning moments came this week. I sewed up four strips, pressed them and pieced them all together with the same number of pieces. However, all of my strips were various lengths! Some of my seams were larger and some were smaller than my desired quarter-inch.
When trouble arises, do you start over? I decided I would cut all my strips to match up with my shortest strip. This way, they were all even. Another option would be to add more fabric, but I had used all of mine. Next time, I will be more experienced and better able to sew even and straight seams.
Tip: Really consider your options before you break out that seam ripper! My quilt ended up slightly smaller than the pattern called for, but it is perfect to me.
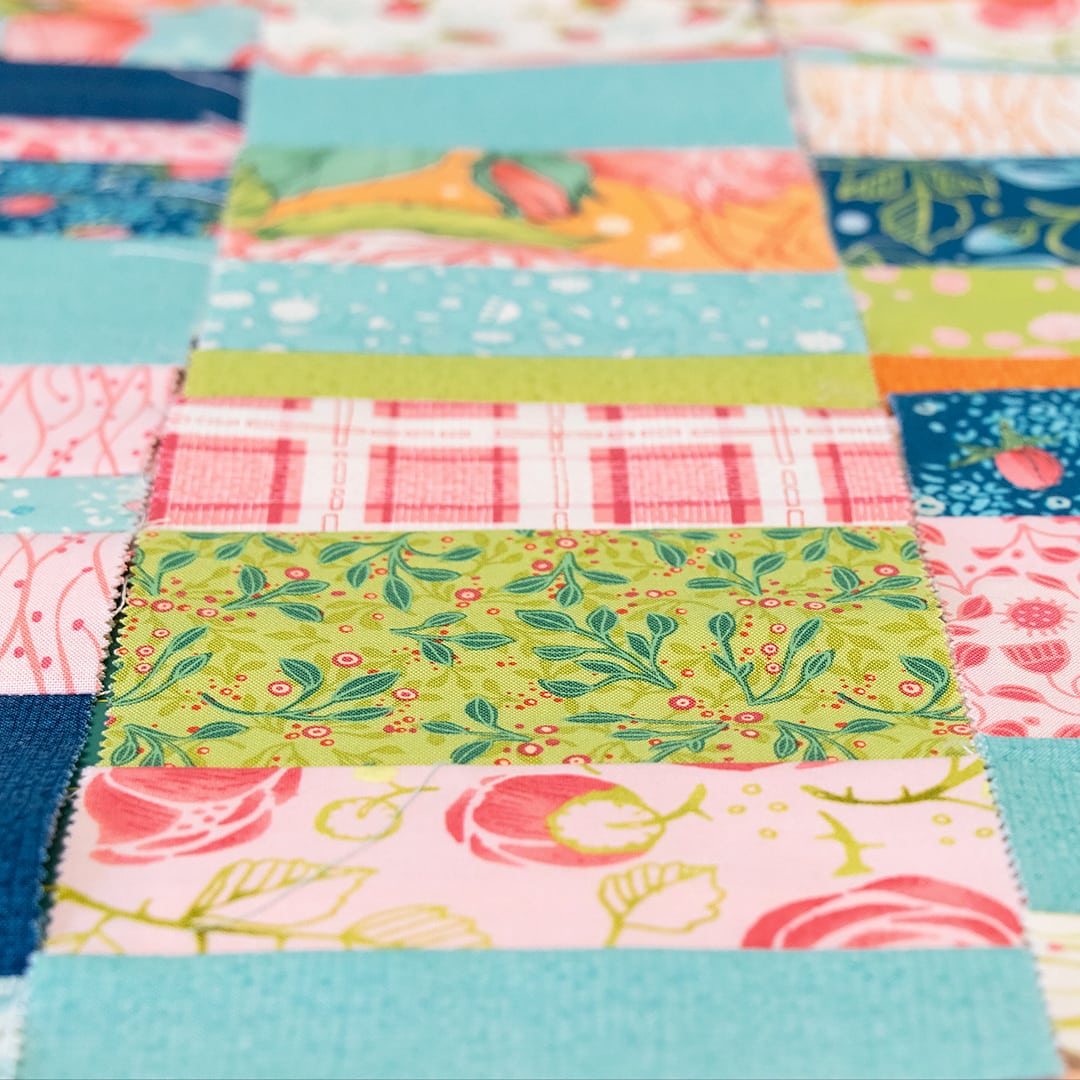
Here is a look at all my strips made from Abby Rose by Robin Pickens. This collection was perfect for the size of my pieces as I was able to fully display my patterns and work with a wide range of colors.
Finishing up the quilt
As a beginner, my quilt was not spot-on to my pattern. Some of the quilters at Fat Quarter Shop advised that I trim the quilt down to make the quilt smaller but even. I love how it turned out and I don’t think I notice it any smaller than I expected it. As a baby quilt, it is just the right size for its purpose.
My next steps included gathering my binding fabric and preparing for the longarmer. I watched some of our binding tutorials on Fat Quarter Shop’s YouTube Channel to get the gist. Then, it turned out that my longarm quilter would put my binding on for me! The art of binding will be awaiting me another day!
When preparing my quilt to send to the longarm quilter, I had even more to learn. I used the Ultimate Beginner Quilt video tutorials to prepare. The longarm quilter will need to make a “quilt sandwich” out of the quilt top, batting and background fabric.
A quilt sandwich is your quilt top and backing placed flat with your batting in the middle. I sent my quilt top with extra backing and my binding. Mike from MyLongarm.com sent my quilt back completed. We used a beautiful rose pattern for matching quilting.
Tip: Give your longarm quilter at least four to five inches of extra backing on all sides of your quilt when you send it off.
A last minute decision
I made a last minute decision when I sent my quilt off. I originally had a couple yards of Abby Rose to use as my backing before I decided to throw some Minky in instead. Minky and Cuddle fabrics are soft and furry fabrics that make excellent and snuggly backings! I used Cuddle Baby Blue Solid Yardage SKU# C3-BABYBLUE. It makes my heart happy and I think it makes my first quilt even more fun. That is what this whole quilting this is all about.
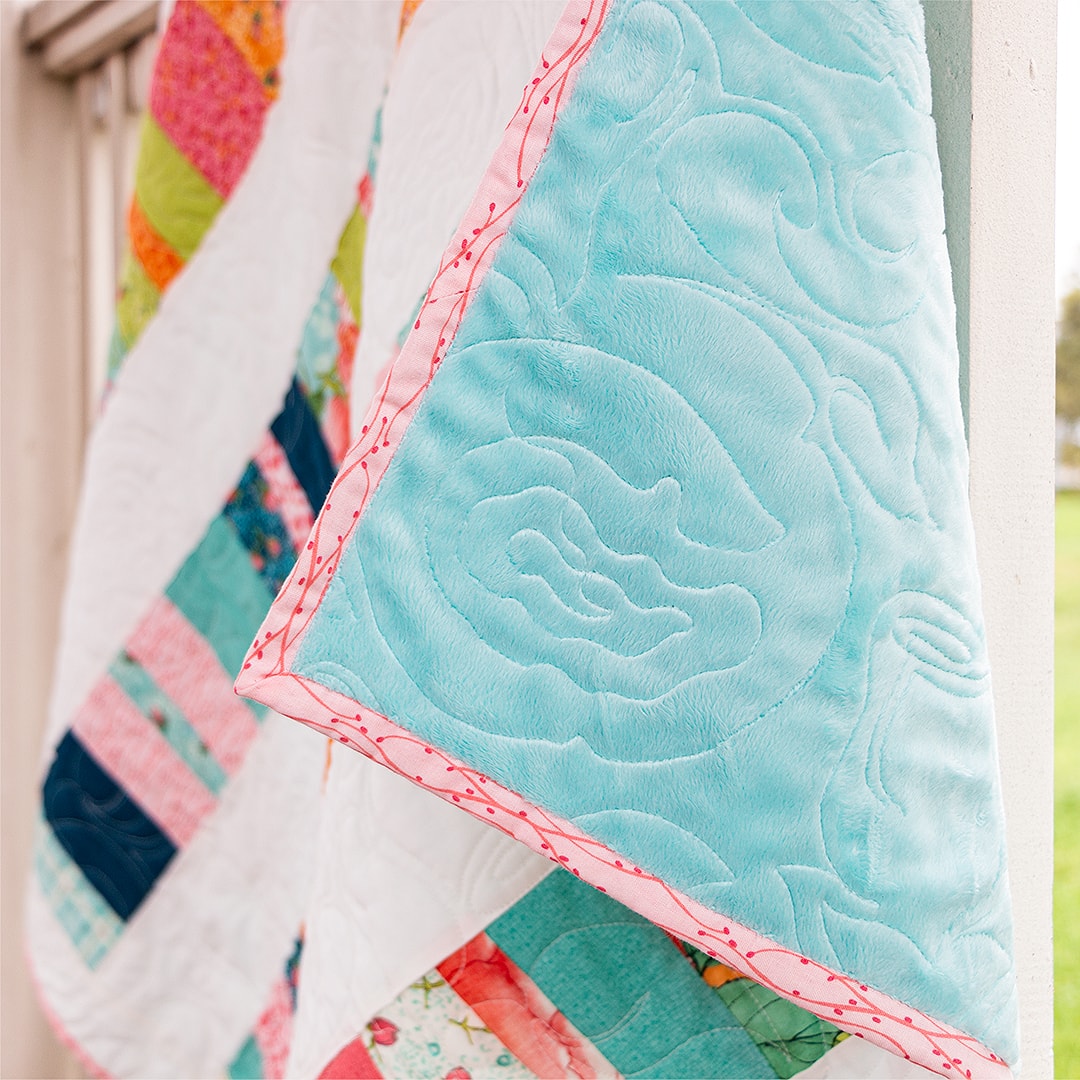
Minky and Cuddle fabrics are available in plenty of colors at Fat Quarter Shop.
Thank you for joining me again this week! I hope you love my first quilt, flaws and all! I have decided that I will be gifting my quilt to a family member who recently had her first child! If you have any ideas on what I should sew up next, please feel free to leave your ideas down below in the comment section along with any feedback.
If you are also a beginner quilter and are wondering where to get started, follow along with me from the beginning as I document my first quilt step-by-step. I tried to note as many important lessons as possible so that you can get started on the right track as well!
Happy Quilting!
Stay connected to FQS!


2 comments
Katie – your first quilt is beautiful. I’m looking forward to reading more of your adventures in quilting. Sometimes those of us who have been quilting for a while lose some of that “first time wonder” and it’s refreshing to see it in a new generation of quilters. Now, your baby quilt is not completely finished…add a label on the back. It doesn’t need to be fancy (believe me, you’ll get to that point later), but it should include the baby’s name, your name, the quilt pattern name/designer, and the longarmer’s name. Be sure to date it. Cheers and happy quilting!
You did a fabulous job! It is so sweet that you are gifting your first quilt! It will be treasured forever. Be sure to put a quilt label on the back as a remembrance of when it was made and who made it! You are on your way with a wonderful, creative, useful new hobby! 💗