
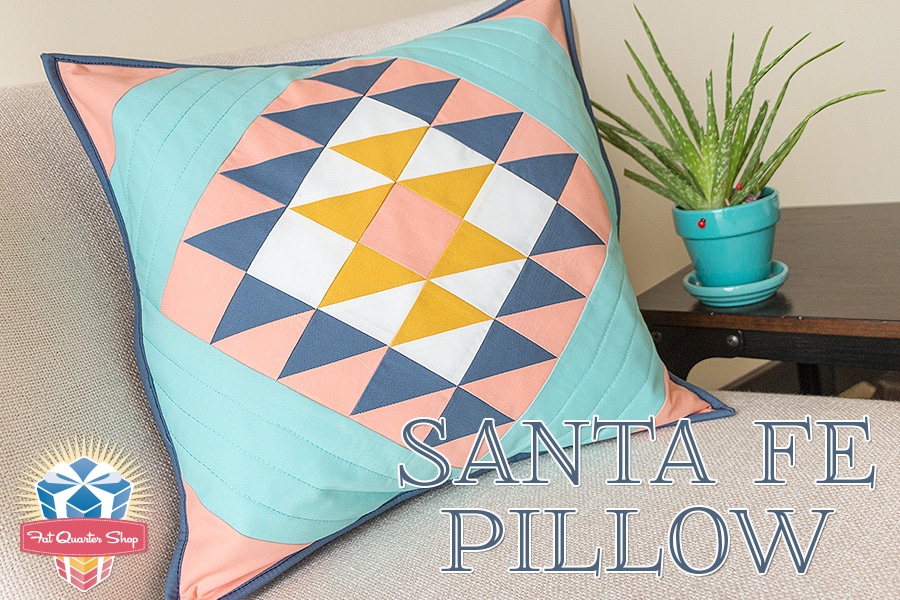
We’ve been doing a lot of quilting lately on the blog, from quilt tutorials to quilt alongs to quilted projects. We wanted to step away from that and get back to the basics with a fun sewing tutorial! Today, we will be showing you how to make this gorgeous Santa Fe Pillow. The vibrant turquiose and geometric patterns definitely take us back to New Mexico and is a great embellishment for your home. Our tutorial will take you step by step with pictures to help you create this version of the Santa Fe Pillow and is great for sewers of all levels! So if you’re ready, let’s get onto the tutorial:
Fabric Requirements
For the pillow, you will need the following:
- Fat eighth (9” x 20”) cream fabric (9900-200)
- 10” square gold fabric (9900-213)
- 3/8 yard pink fabric (9900-297)
- 3/8 yard aqua fabric (9900-263)
- 1 1/2 yards navy fabric (9900-218)
- 20” square of batting
- 20” square of muslin
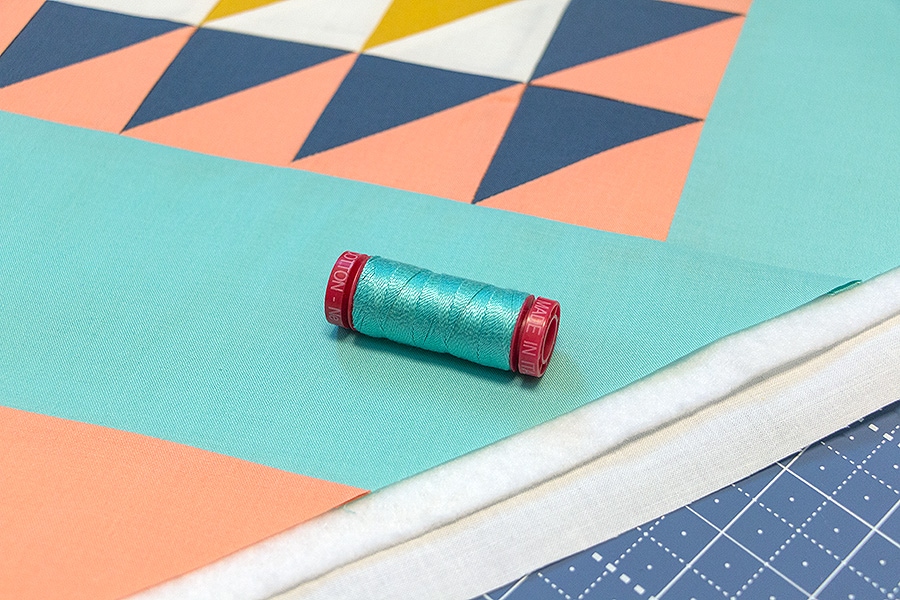
- Coordinating thread of your choice to piece and quilt (we recommend Aurifil 50wt thread for piecing and Aurifil 12wt thread for the embellishment)
- One pillow form (we prefer the 18″ square for extra fullness)

Cutting Instructions:
- Cut the cream fabric into: 3 – 3 1/8” squares and 2 – 2 3/4” squares
- Cut the gold fabric into: 3 – 3 1/8” squares
- Cut the pink fabric into: 4 – 5” x 10” rectangles, 7 – 3 1/8” squares and 3 – 2 3/4” squares
- Cut the aqua fabric into: 2 – 4 1/2” x 19 3/4” rectangles and 2 – 4 1/2” x 11 3/4” rectangles
- Cut the navy fabric into: 2 – 19” x width of fabric strips (backing), 3 – 2 1/2” x width of fabric strips (binding) and 7 – 3 1/8” squares
Piecing Instructions:

1) Draw a diagonal line from corner to corner on the wrong side of the cream 3 1/8” squares. With right sides facing, layer a cream 3 1/8” square with a gold 3 1/8” square. Stitch 1/4” from each side of the drawn line. Cut apart on the center diagonal line. Press open. Gold half square triangle unit should measure 2 3/4” x 2 3/4”. Make six.
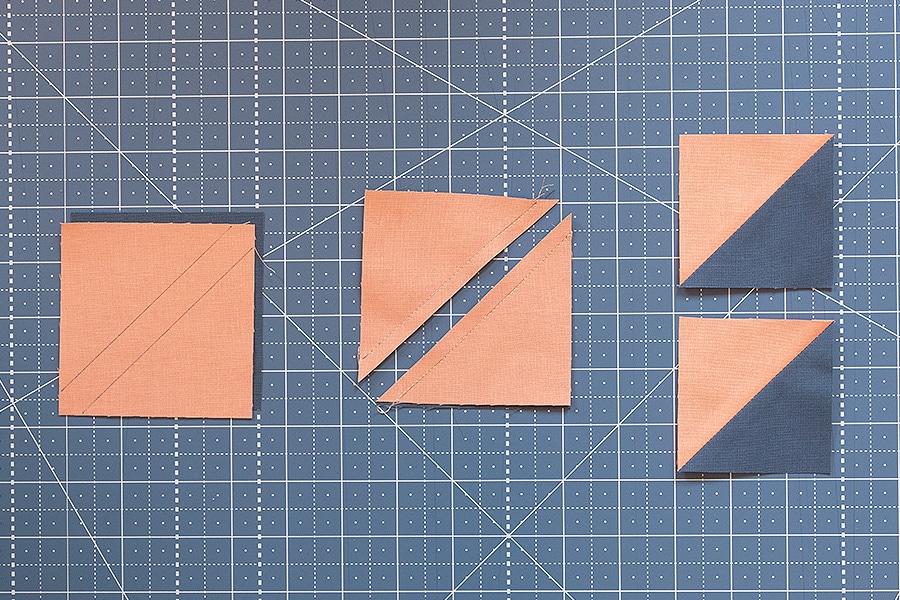
2) Draw a diagonal line from corner to corner on the wrong side of the pink 3 1/8” squares. With right sides facing, layer a pink 3 1/8” square with a navy 3 1/8” square. Stitch 1/4” from each side of the drawn line. Cut apart on the center diagonal line line. Press open. Navy half square triangle unit should measure 2 3/4” x 2 3/4”. Make fourteen.
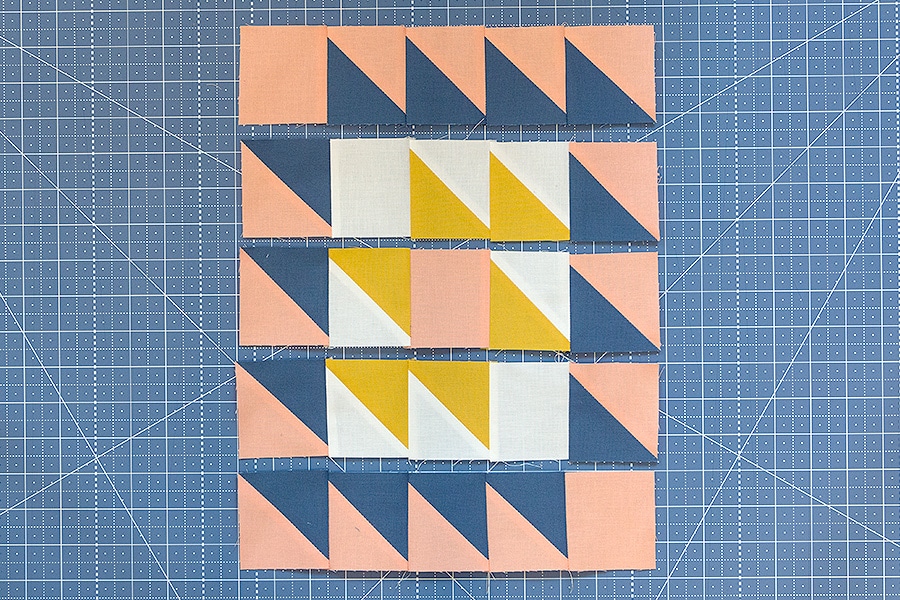
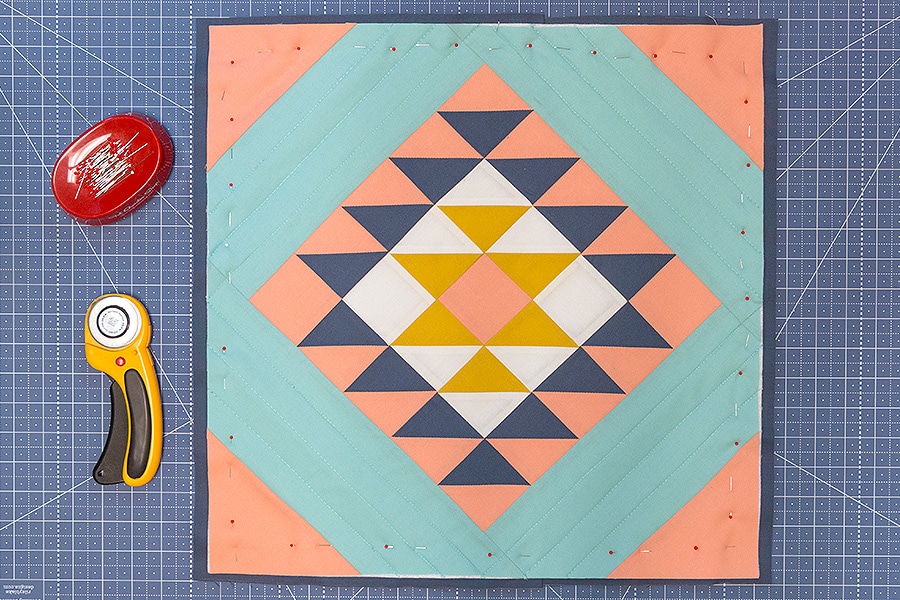
3) Assemble the center of the pillow using the pink 2 3/4” squares, navy half square triangle units, cream 2 3/4” squares and gold half square triangle units. Press rows in opposite directions. Pillow center should measure 11 3/4” x 11 3/4”. Make one.
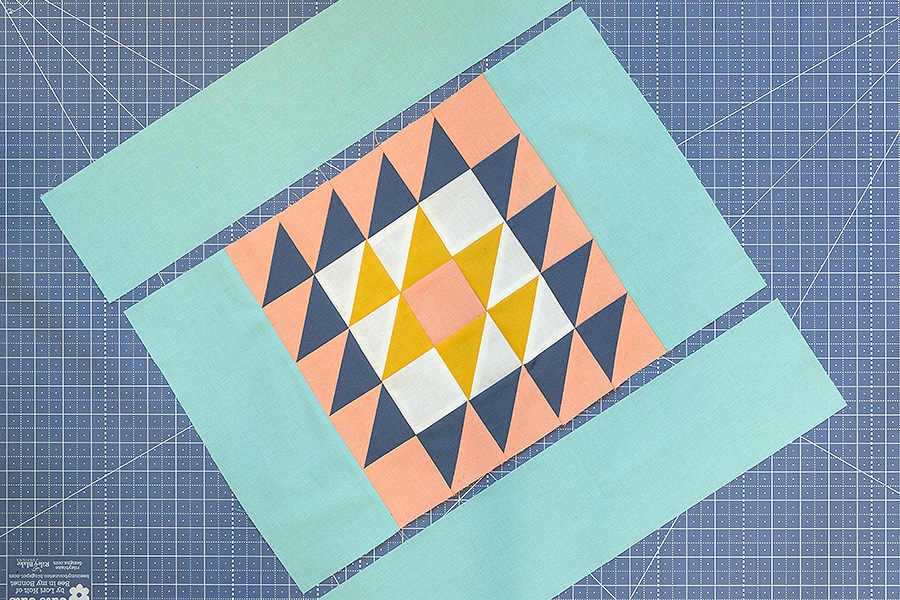
4) Attach the aqua 4 1/2” x 11 3/4” rectangles to the sides of the pillow center. Attach the aqua 4 1/2” x 19 3/4” rectangles to the top and bottom of the pillow center. Press away from the pillow center. Bordered pillow unit should measure 19 3/4” x 19 3/4”. Make one.

5) Fold the bordered pillow unit in quarters to create center creases and fold the pink 5”x 10” rectangles in half to create a center crease.

6) Attach the pink 5”x 10” rectangles to the bordered pillow unit, matching creases.

7) Using an 18 1/2” square ruler, trim the pillow top to measure 18 1/2” x 18 1/2”.

8) Layer the pillow top, batting and muslin, and quilt as desired. Trim excess batting and muslin.
9) We used a combination of Aurifil 50wt thread and Aurifil 12wt thread and increased the stitch length to 4, to give the pillow a hand quilted look. Check out our YouTube tutorial for more information on this technique!!


10) Fold the navy 19” x width of fabric strips in half with wrong sides together for the pillow backing. Layer the two folded rectangles with a 4” overlap with folds in the center and raw edges on the outside.
11) Place the pillow top right side up on the pillow backing, matching centers. Pin together and trim excess pillow backing.
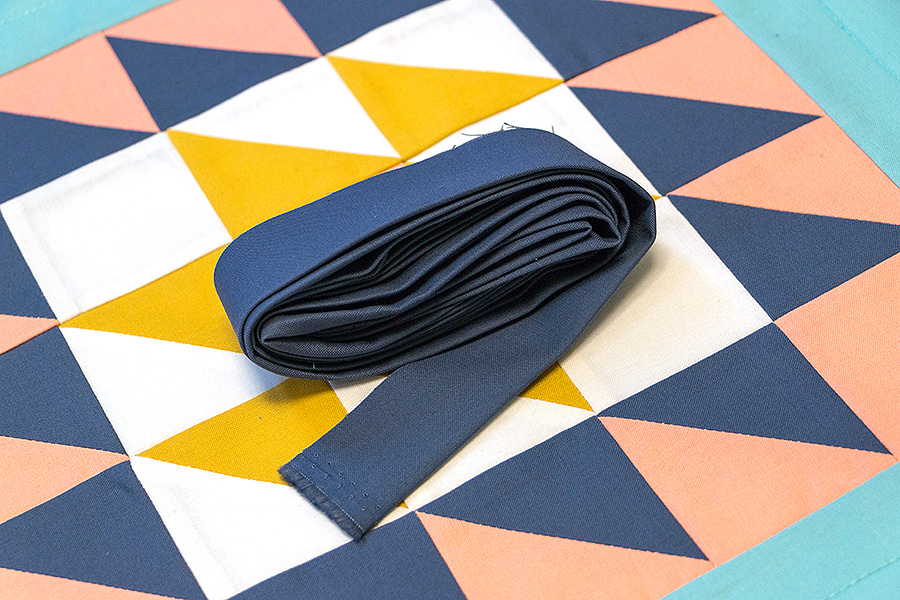
12) Piece the navy 2 1/2” x width of fabric strips end to end for binding. Bind as desired.
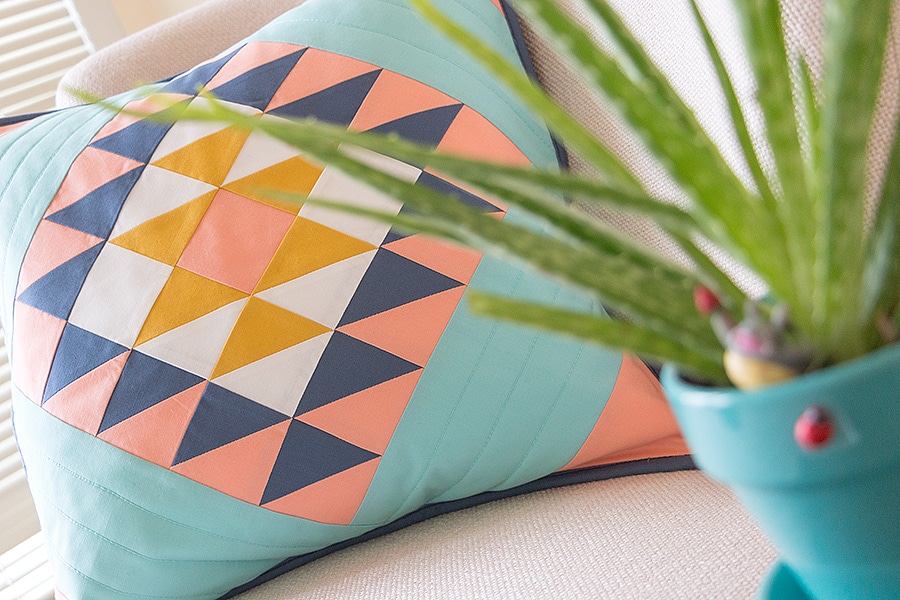
And here’s the finished piece! We love how it looks on our couch and hope you like it just as much as we do.
As always, if you decide to make this pillow, be sure to share your photos of it on Instagram with the hashtag #FQSSantaFePillow so we can see and share your work! Good luck and happy quilting!
Stay connected to FQS!


1 comment
this is a great pillow pattern. I love it Thanks for writing out the instructions. Video Tutorials are too complicated for me, I bet others are fine with that, but I have trouble keeping up — or my kitten steps on the key board and totally opens up iTunes or creates various other mayhem.
I will print out this tutorial. Thanks bunches