

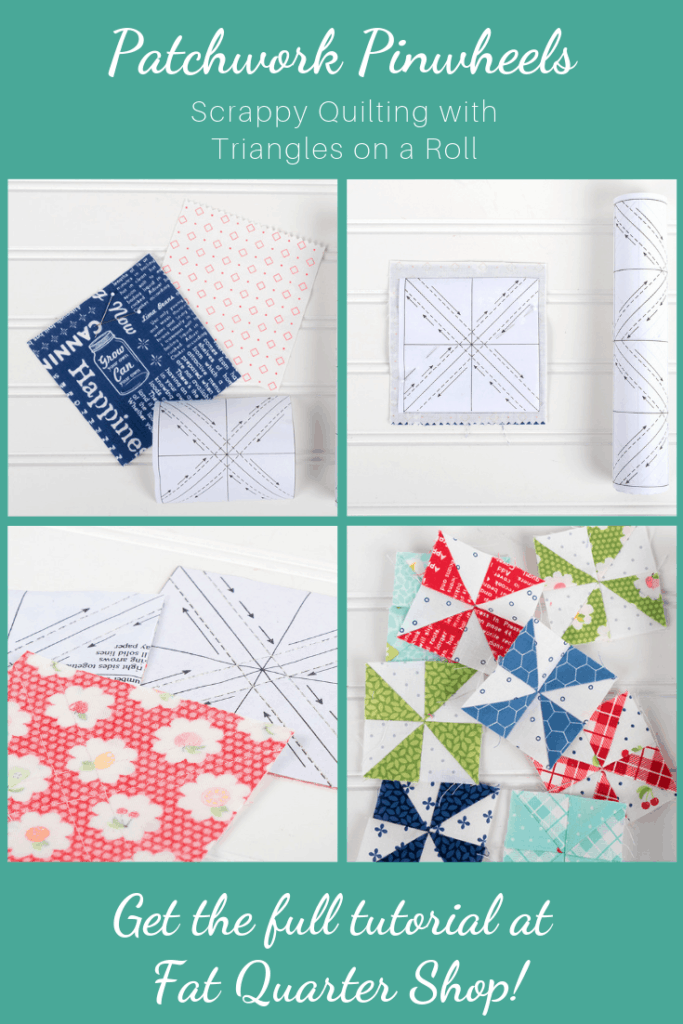
With all my sewing projects throughout the year, I wanted to find a creative way to use up my scraps AND create something memorable that would capture moments from my projects throughout the year. For 2019, I’ve resolved to make patchwork pinwheels from my scraps, and I’ll show you how to do it so you can, too!

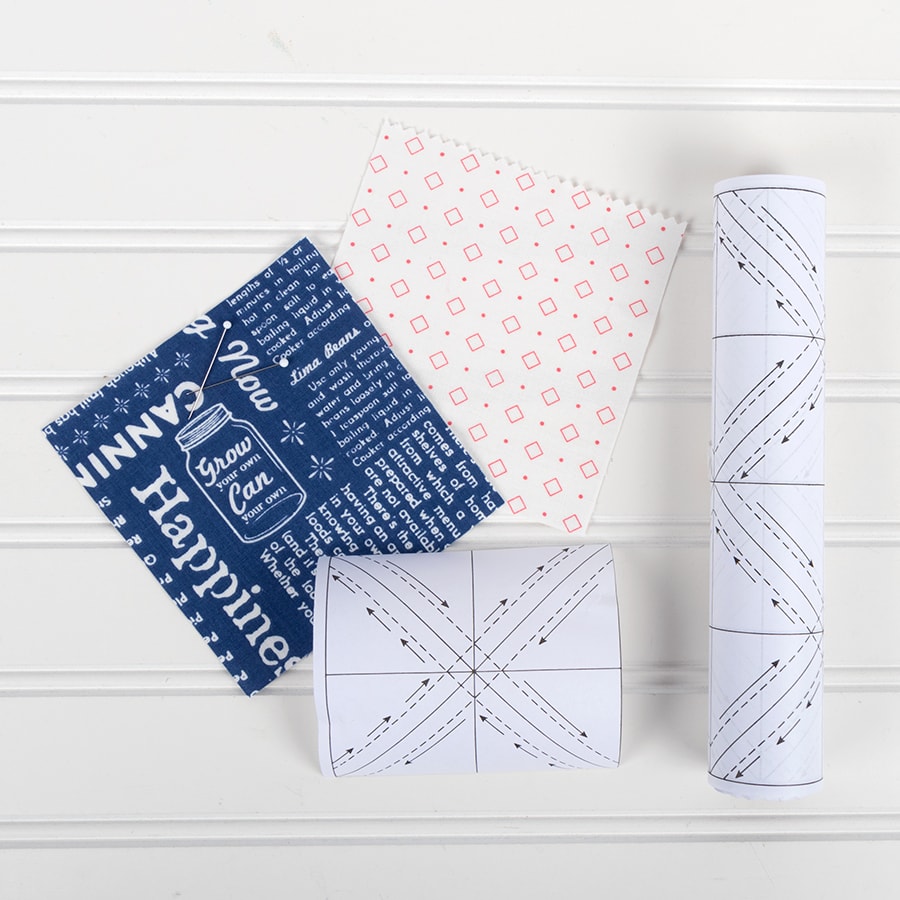
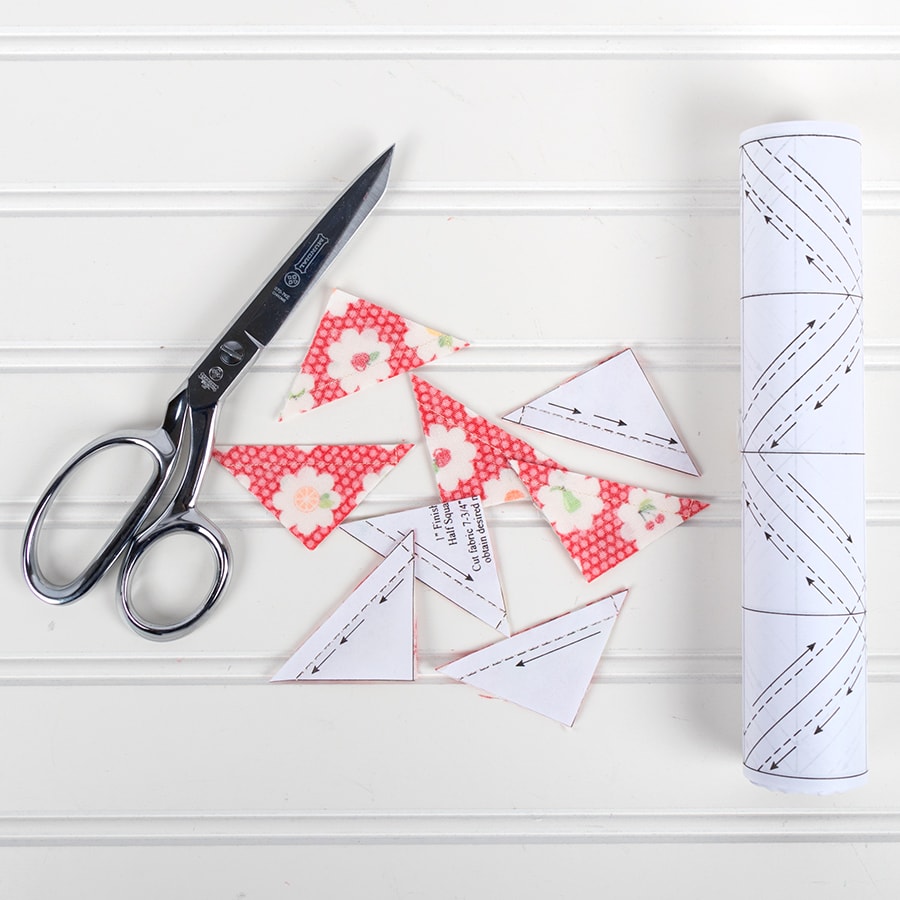
I’m using Triangles on a Roll template paper that finishes at 1″. That’s a pretty small size, but it’s great for using up smaller scraps. You could also use a larger size of Triangles on a Roll Half-Square Triangle Paper using this guide to Triangles on a Roll sizes and half-square triangles.
Triangles on a Roll
Triangles on a Roll is my favorite brand of triangle paper. The paper comes on a roll that’s convenient to store, and it tears off nicely once sewn. It is a time saver that allows me to quickly make eight triangles at a time. I don’t have to draw on lines or measure for each half-square triangle set – just pin the paper to the fabric and start sewing.
I like to keep the triangle paper beside my sewing machine, and when I finish a few blocks from a project, I’ll jump over to the patchwork pinwheels and sew a few from the leftovers.
Maybe you’d like to try this for your scraps too? I’ll show you how. It’s pretty easy.
Patchwork Pinwheels Video Tutorial
Supplies
1″ Triangles on a Roll template paper*
Fabric scraps
Rotary cutter or scissors
*Note: If you’d like to make larger triangles, check out this handy guide to cutting half-square triangles and matching Triangles on a Roll to your patterns.
Step 1
Cut the Triangle Paper into 4-block squares. Select fabric scraps that are 4″ square or larger to cover the entire block. Choose one light and one dark scrap. Place them right sides together with the light side on top.
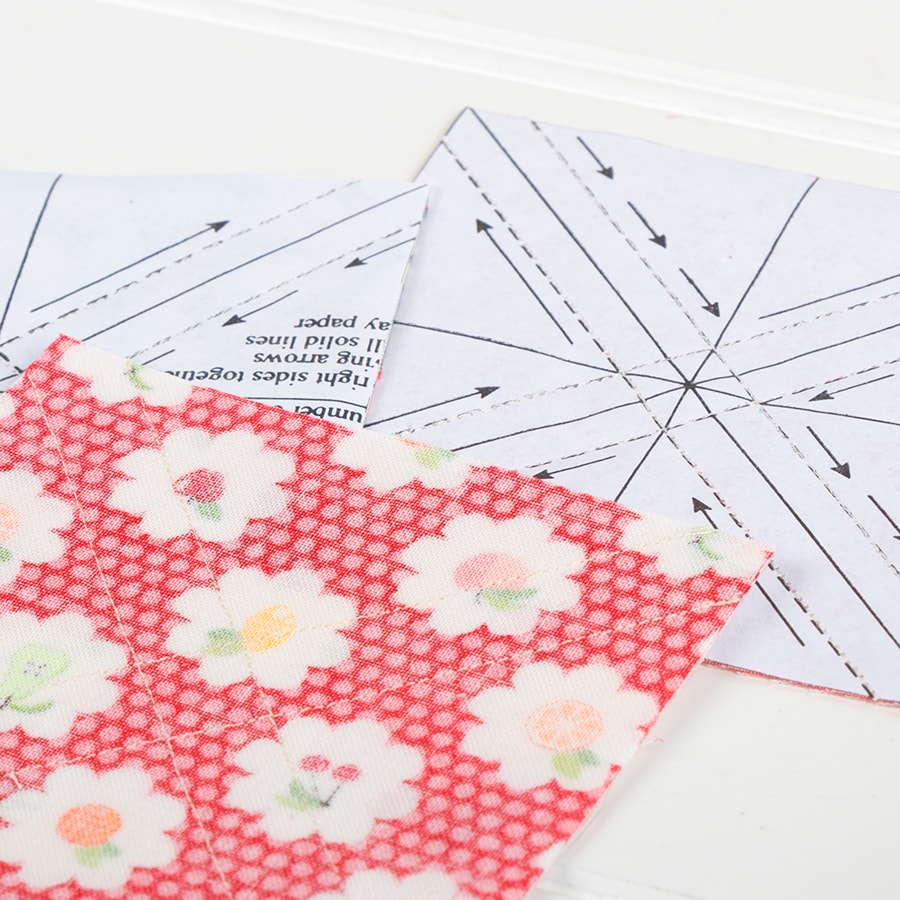
Pin the paper template onto the scraps and pin in place, avoiding the dashed lines for the most part because you’ll be sewing over those lines.
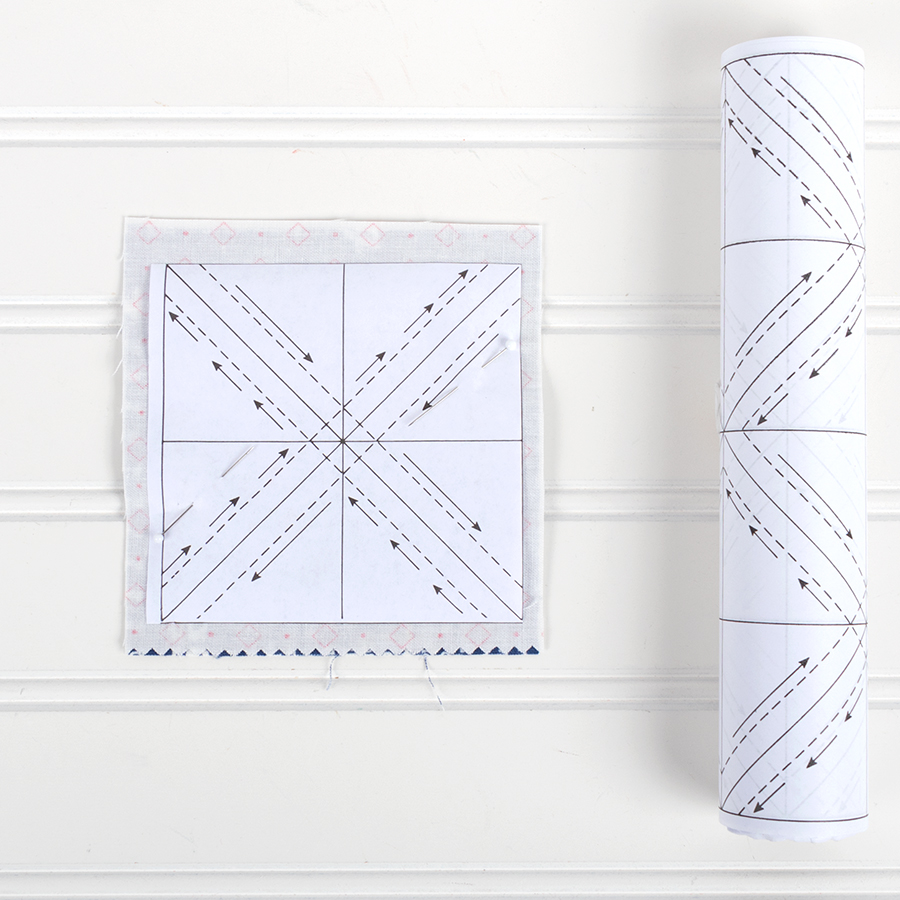
Tip: For easier sewing, cut the block with an X shape, like below, rather than a diamond shape.
Step 2
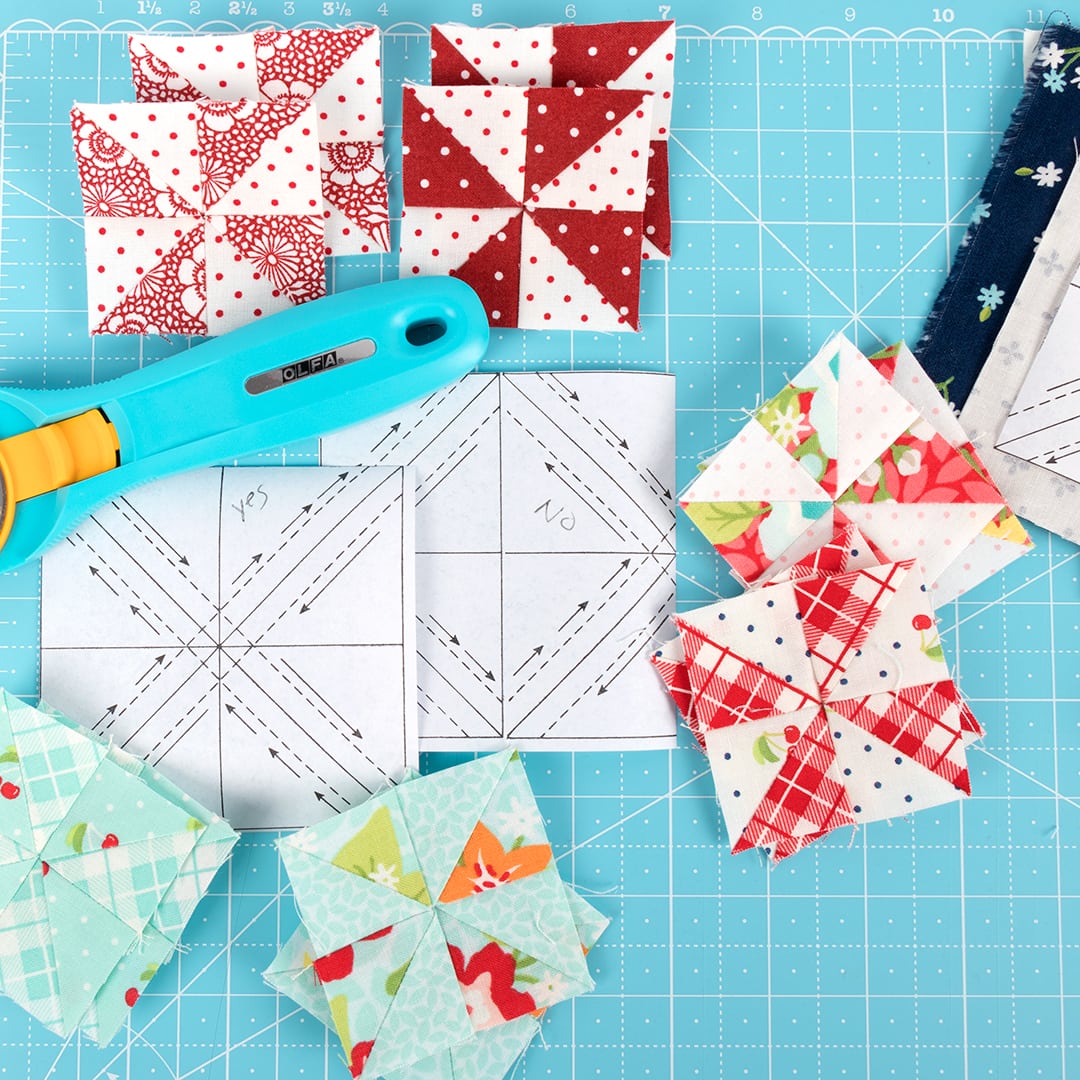
With a shorter stitch length than you normally use (I used a 1.4), stitch directly on the dashed lines.
Step 3
Cut around the outside edges. Then cut on the remaining solid lines. You’ll end up with eight units.
Step 4
Fold the paper along a crease. Then remove the paper. Press toward your darker fabric and trim off dog ears. Now you can sew your 1″ half-square triangles together to make pinwheels.
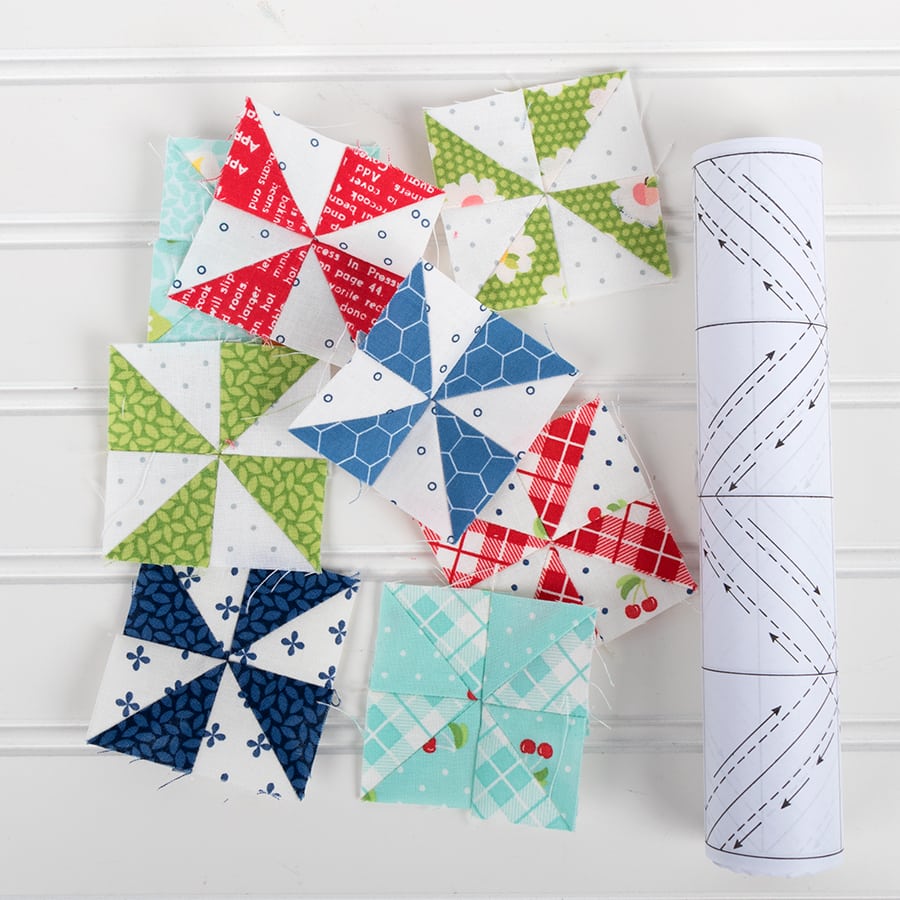
I have about seventy pinwheels now, and by the end of the year, I will have a whole quilt’s worth of pinwheels.
It’s cool to have something that I can look back on at the end of the year and see bits of all the quilts I worked on. What about you? What will you do with your scraps this year? Let me know in the comments below!
Kimberly’s 2019 Challenge: Use Your Scraps Pinwheel Patchwork
After sewing up sew many pinwheels, Kimberly turned them into a beautiful quilt.
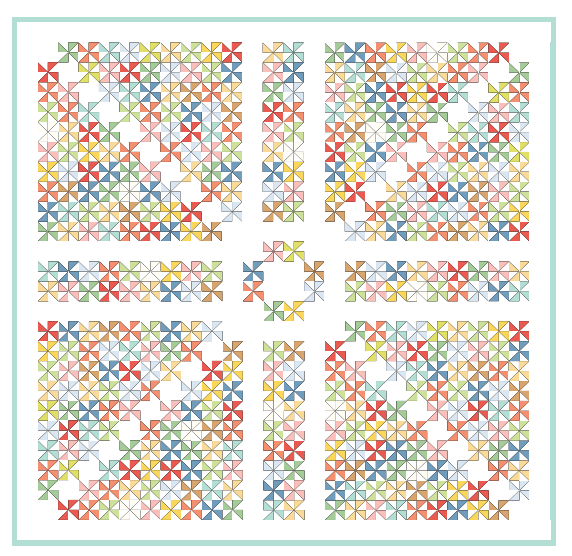
You can find the full pattern and layout instructions for this Pinwheel Patchwork Quilt on our Free Patterns Page.
Sew Pin-able!
Find inspiration on Instagram with #PatchworkPinwheels. Be sure to hashtag #PatchworkPinwheels and tag us (@fatquartershop) so we can see and share your work. All of these images can be repinned on Pinterest so you can share this project with your friends or save it for later!
Stay connected to FQS!


9 comments
Looking forward to making some patchwork pinwheels. Thanks.
Great idea! I have a bag full of scraps to get started with! “Started” being the key word!😬
Great idea! I have a bag full of scraps to get started with! “Started” being the key word!😬
I liked this idea so much I started mine early in the month! I had about 30 made when I watched Kimberly’s live show! Mine are all “right handed” pinwheels🤣🤣 Doesn’t really matter as long as they are the same. Thank you Kimberly for more inspiration❤️
I won triangles on a roll from a giveaway on a blog over a year ago. This has given me inspiration to get it out and use it!
Making hs triangles to make pillows like yours to match my sew in love quilt, then I will make pinwheels after I have enough for my pillows 😻
I’ve got my triangle paper roll now just need to get started. This is such a great idea and a lovely way to look back at what you achieved in 2019. Thanks FQS!
Oh my goodness! You made it seem like I can do this so easily. Thank you for the tutorial. I have plenty of scraps in just the right size and I really need to bite into my stash. (so I can buy more!!!)
I recently tried this for the first time, but I experienced some skipped stitches, which never happens when I am not sewing on paper. I had a new needle and used a 1.4 stitch length. Is there a specific type of needle that is best for sewing on paper?