
Happy National Sewing Machine Day!
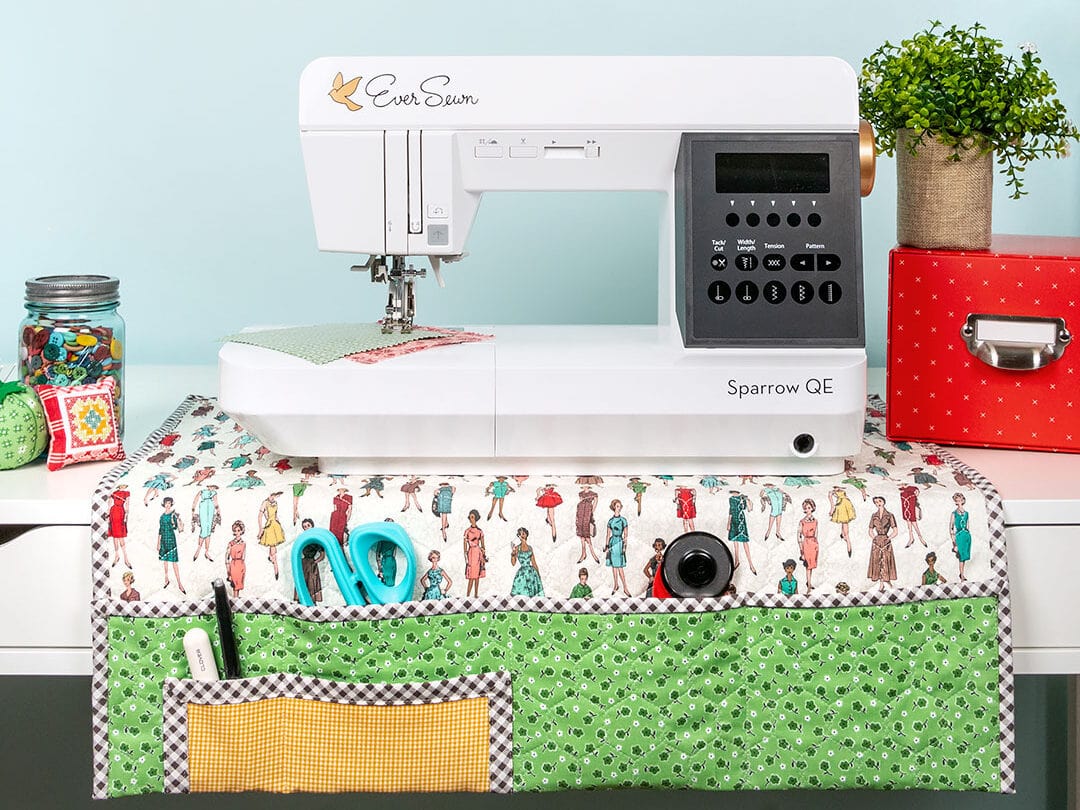
To celebrate this most wonderful of all holidays, I’m sharing a free tutorial to make a sewing machine mat with pockets. With storage where you need it, it keeps your sewing space clear and your notions close at hand.
Supplies:
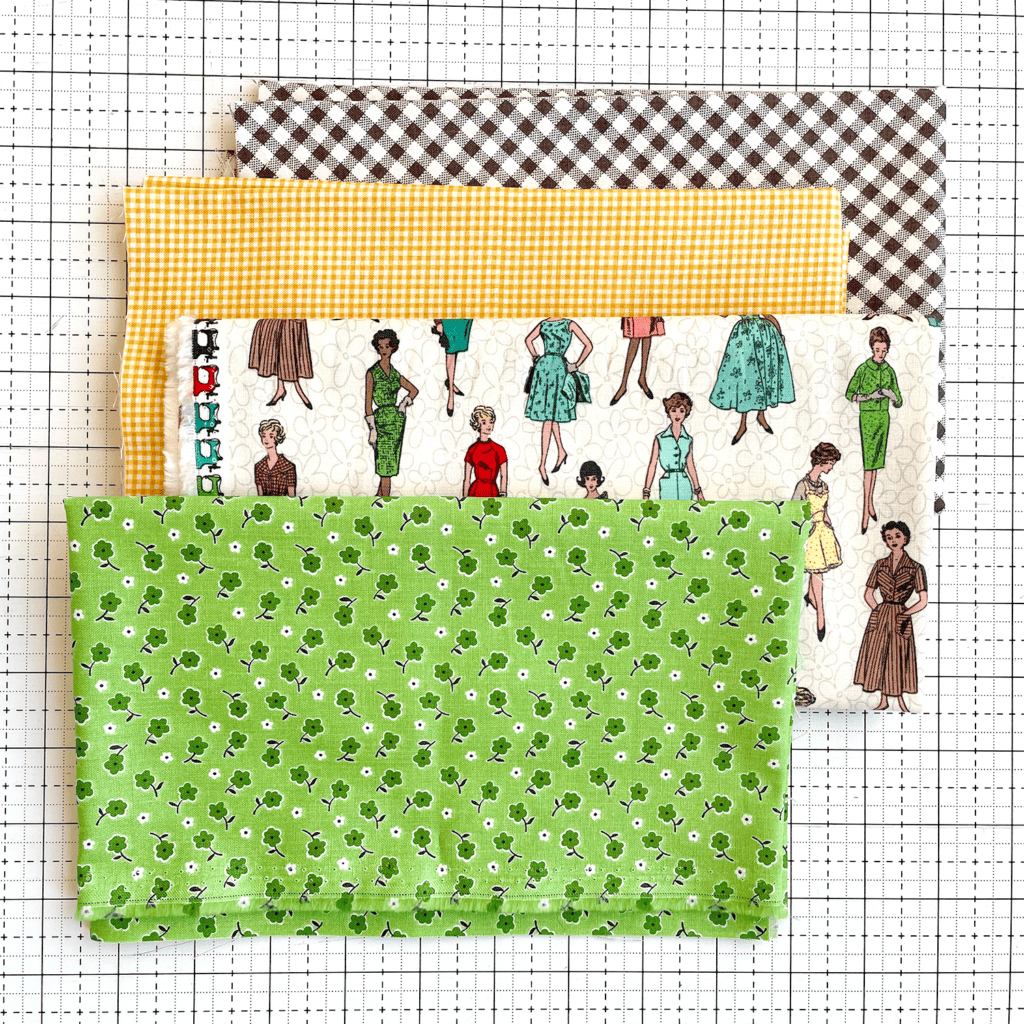
These prints by Lori Holt of Bee in My Bonnet for Riley Blake were too cute to pass up! Aside from the basics, you’ll need some of your favorite fabrics in these amounts:
- 1 yard for the Top (SKU# C10936-CLOUD)
- 1 yard for the Backing (SKU# C10925-GREEN)
- Fat Quarter for Small Pocket (SKU# C12561-DAISY)
- 1/2 yard for Binding (SKU# C12556-RAISIN)
- 1 yard of batting
Cutting:
When it comes to cutting, consider the size of your machine and whether you plan to send the project out for quilting or do it yourself. I wanted to make a mat that measures about 24″ x 28″. Because I planned to send my quilt sandwich to the longarmer for quilting, I added a 4″ margin on all sides of the Backing and Batting. Feel free to adjust the size to suit your preferences!
- Top: 24″ x 28″
- Backing: 32″ x 36″ (make it larger if sending to a longarm quilter. If quilting it at home, go by your preference)
- Small Pocket: 6″ x 18″ rectangle
- Binding: cut four 2.5″ strips
- Batting: cut to the same size as the backing
Instructions:
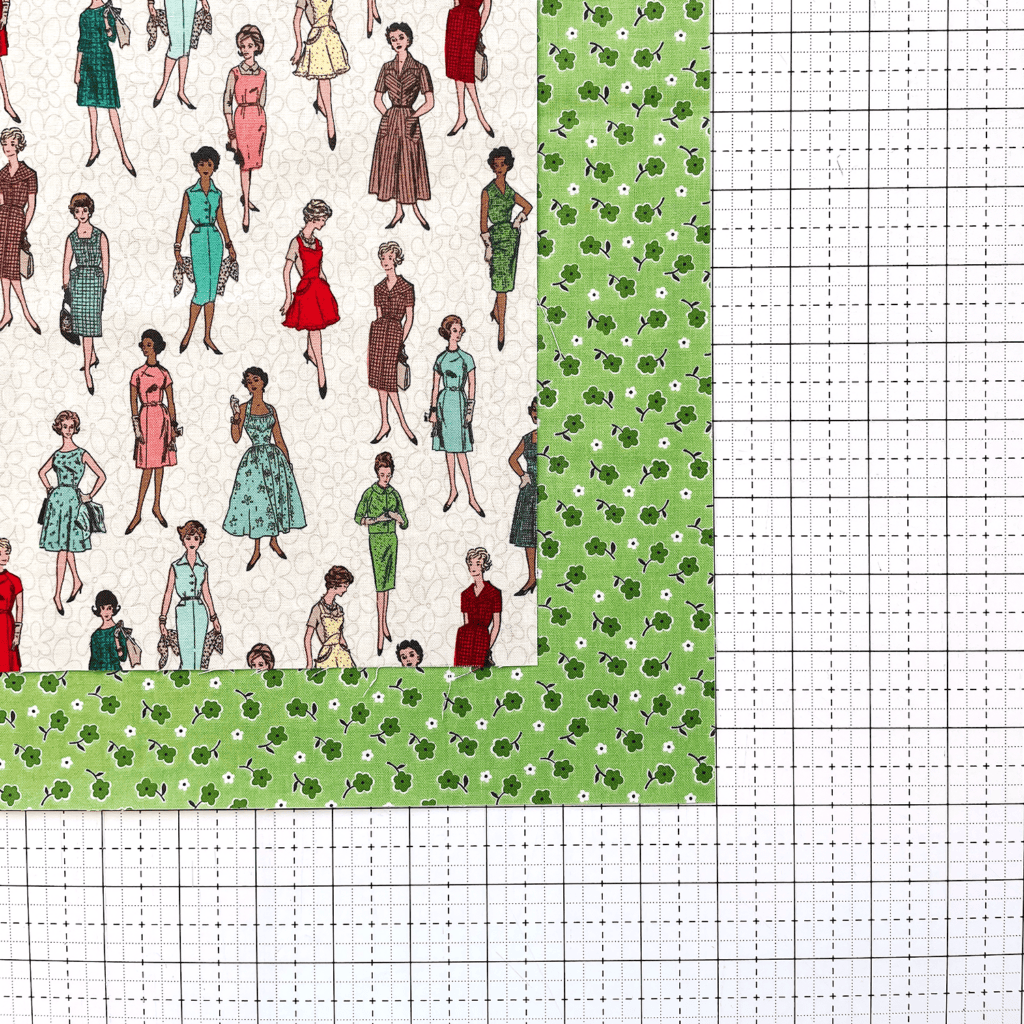
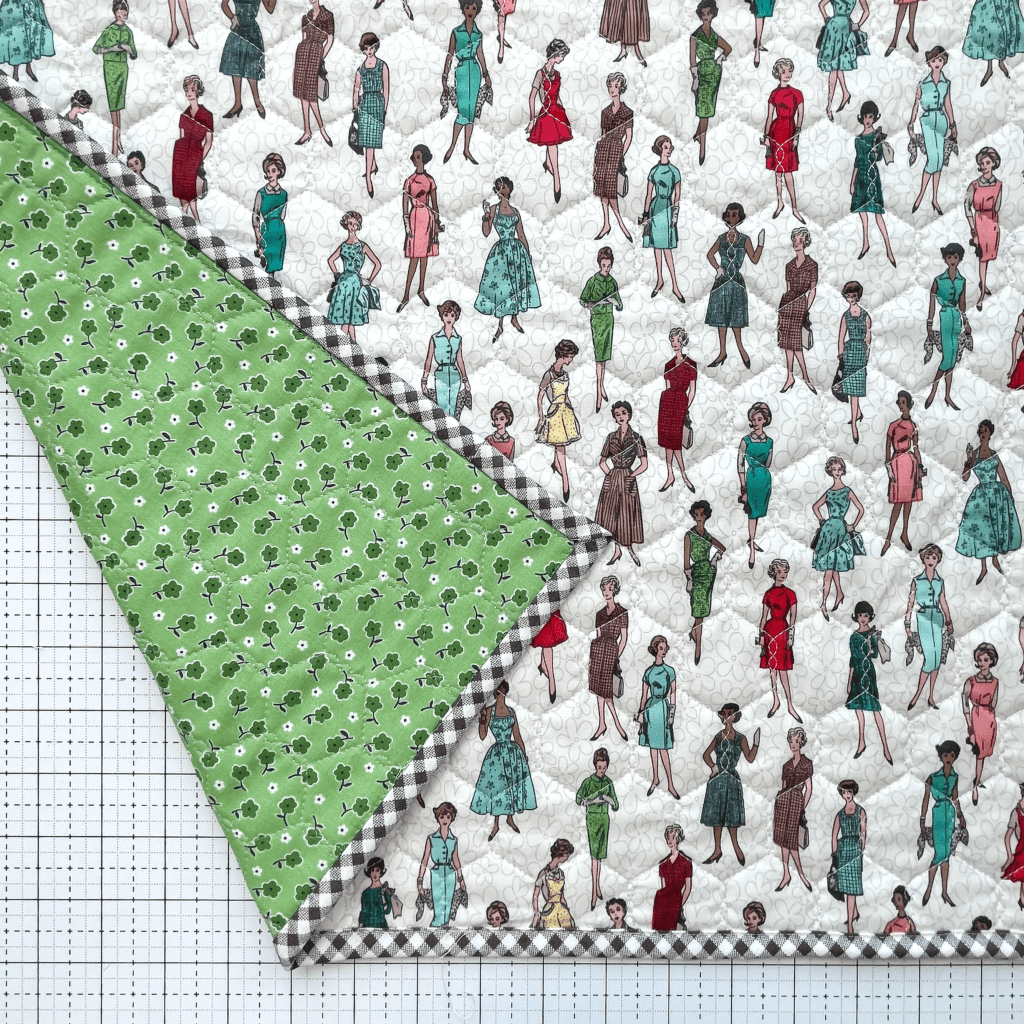
Make a quilt sandwich with the Top, Batting and Backing. I made sure that the people on the fabric were aligned vertically (as you can see in the photo above). Quilt as desired.
After the quilt sandwich has been quilted, trim excess batting and lining to approximately 24″ x 28″ or your desired size.
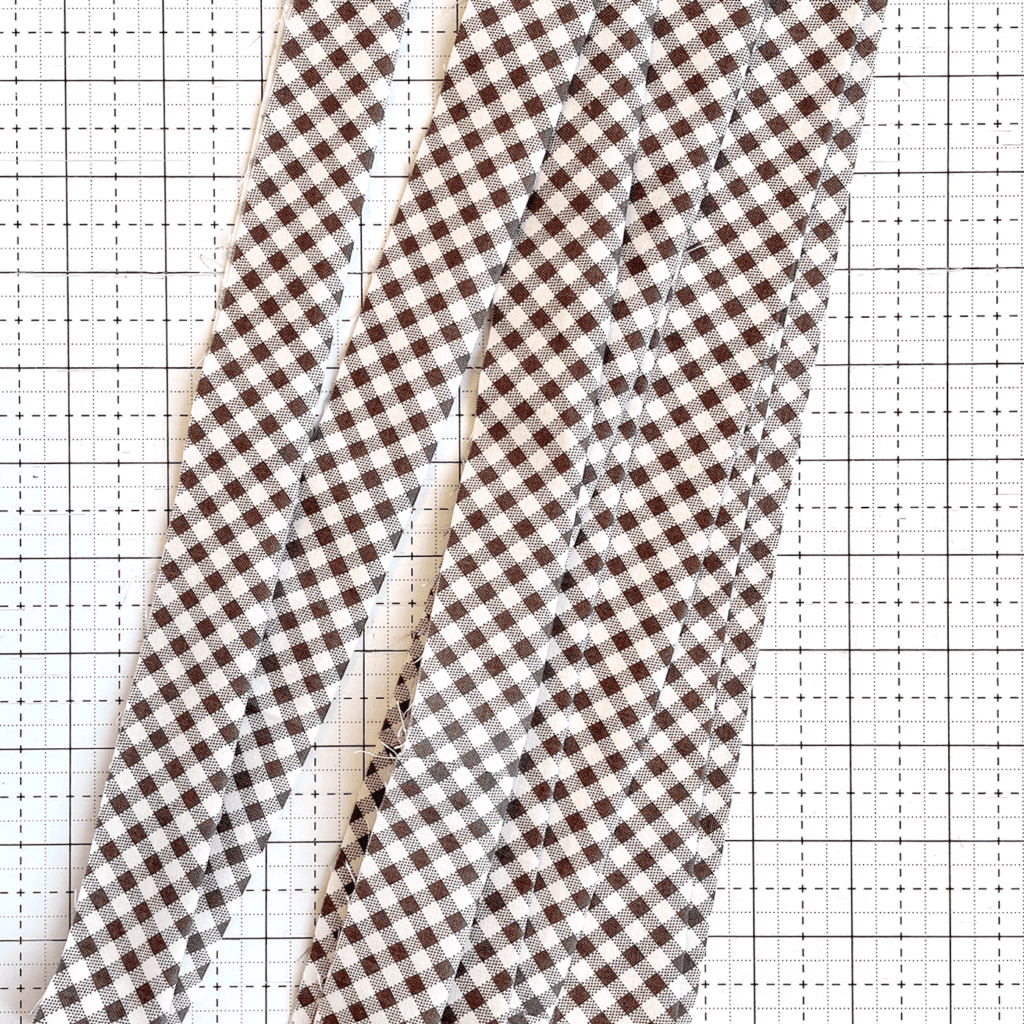
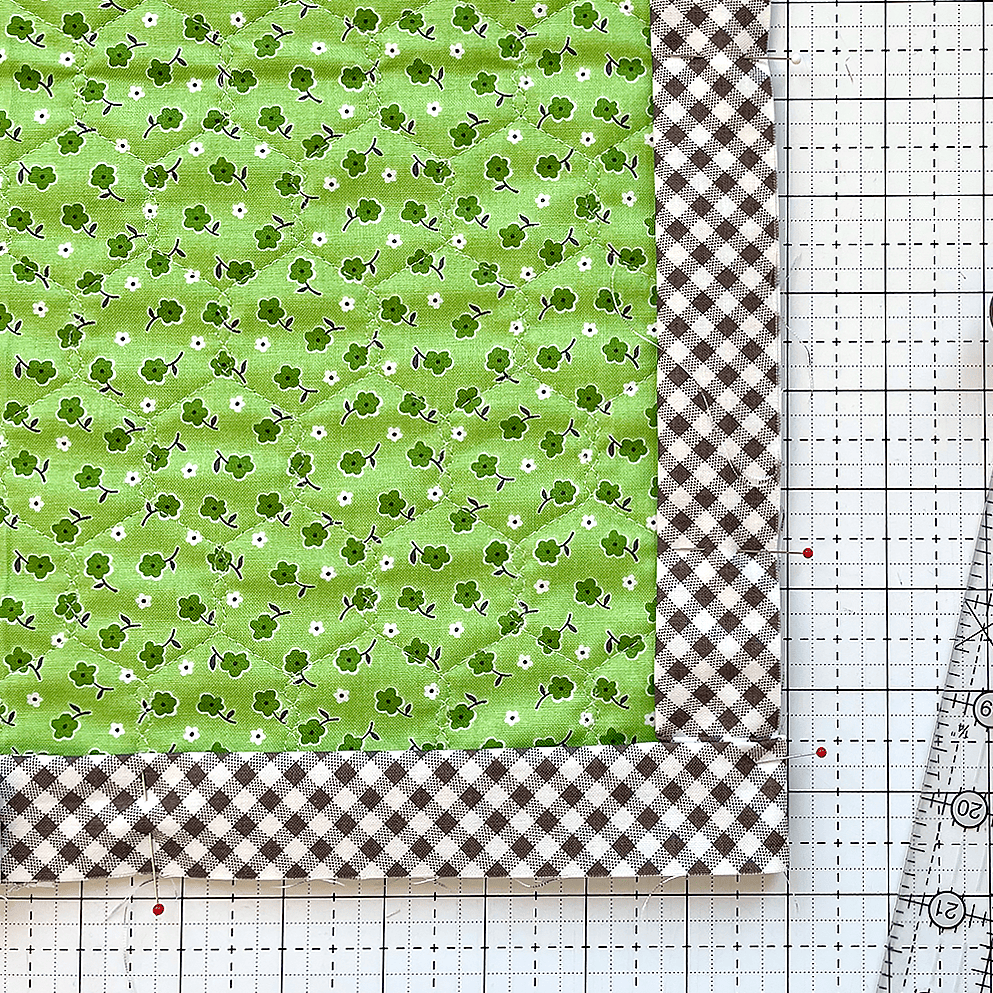
To make the binding, piece the 2.50” x width of fabric binding strips end to end for binding. Prepare binding strips as desired. Then, use your preferred method to add binding to all edges of the mat. I used this binding tutorial by Camille Roskelley.
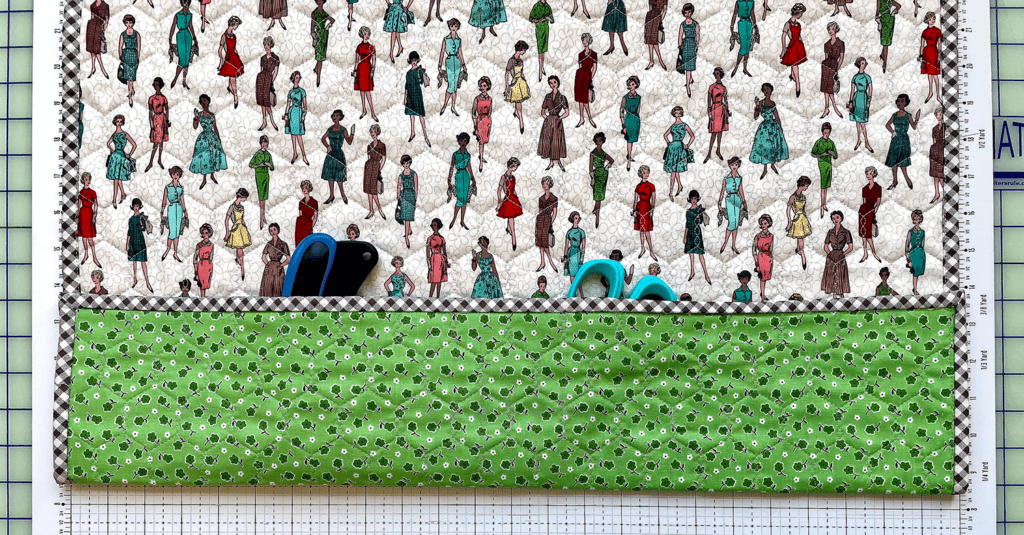
Now you can decide how deep you’d like your pockets to be and where to divide the pockets by placing some of your most-used sewing notions in the fold. I found that folding the bottom up about 5″ works well. Don’t sew the pocket together yet! First, add the Small Pocket.
Add the Small Pocket
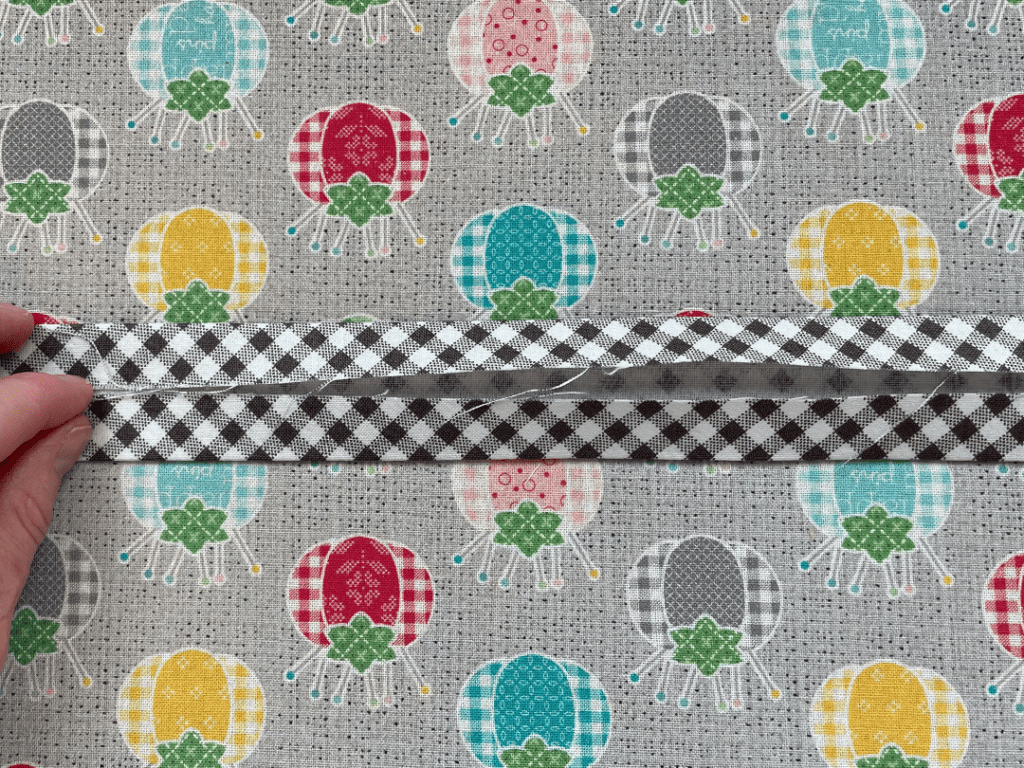
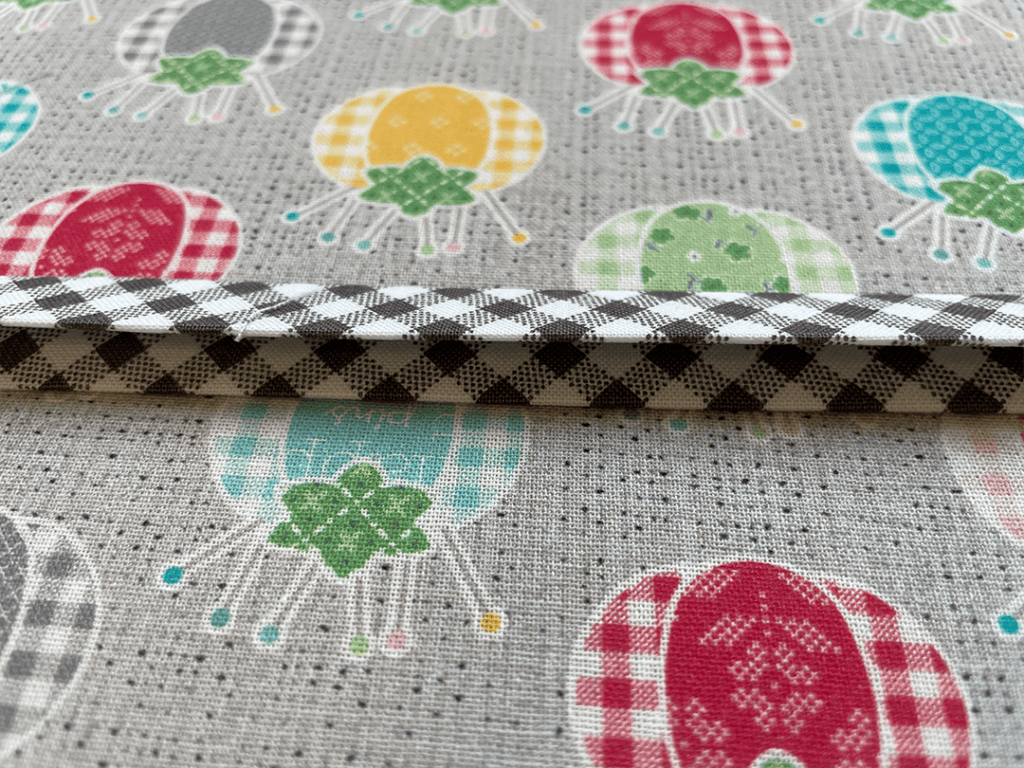
For a nice finish, add double-fold binding to the Small Pocket before attaching it to the mat. To make the double-fold binding, take a length of leftover binding and fold the edges of the 2.5″ strip in to meet the fold mark in the middle. Press.
Fold the 6″ x 18″ rectangle in half for a double layer of fabric. It will be 6″ by 9″. Clip the double-fold binding to the edges of this to give it a clean finish.
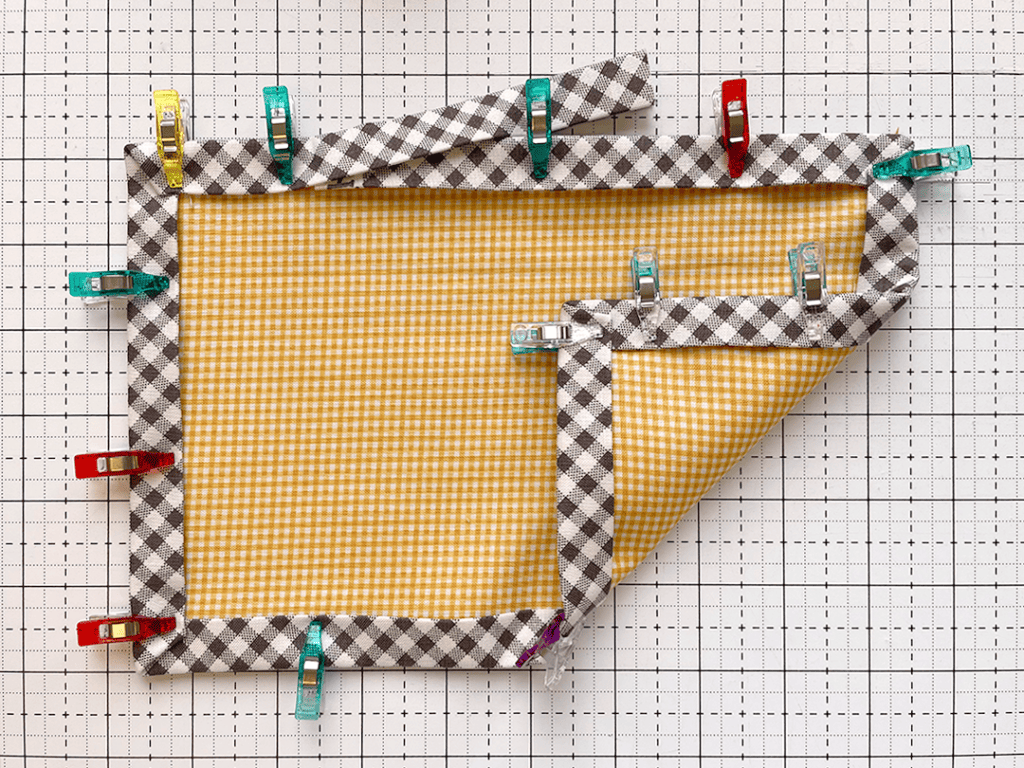

Using your preferred binding method, attach the double-fold binding to all the edges of the Small Pocket. Stitch the binding about 1/8″ from the inner edge. I used a walking foot and a 2.2 stitch length for this part.
Sew the pockets
Now it’s time to sew the pockets!
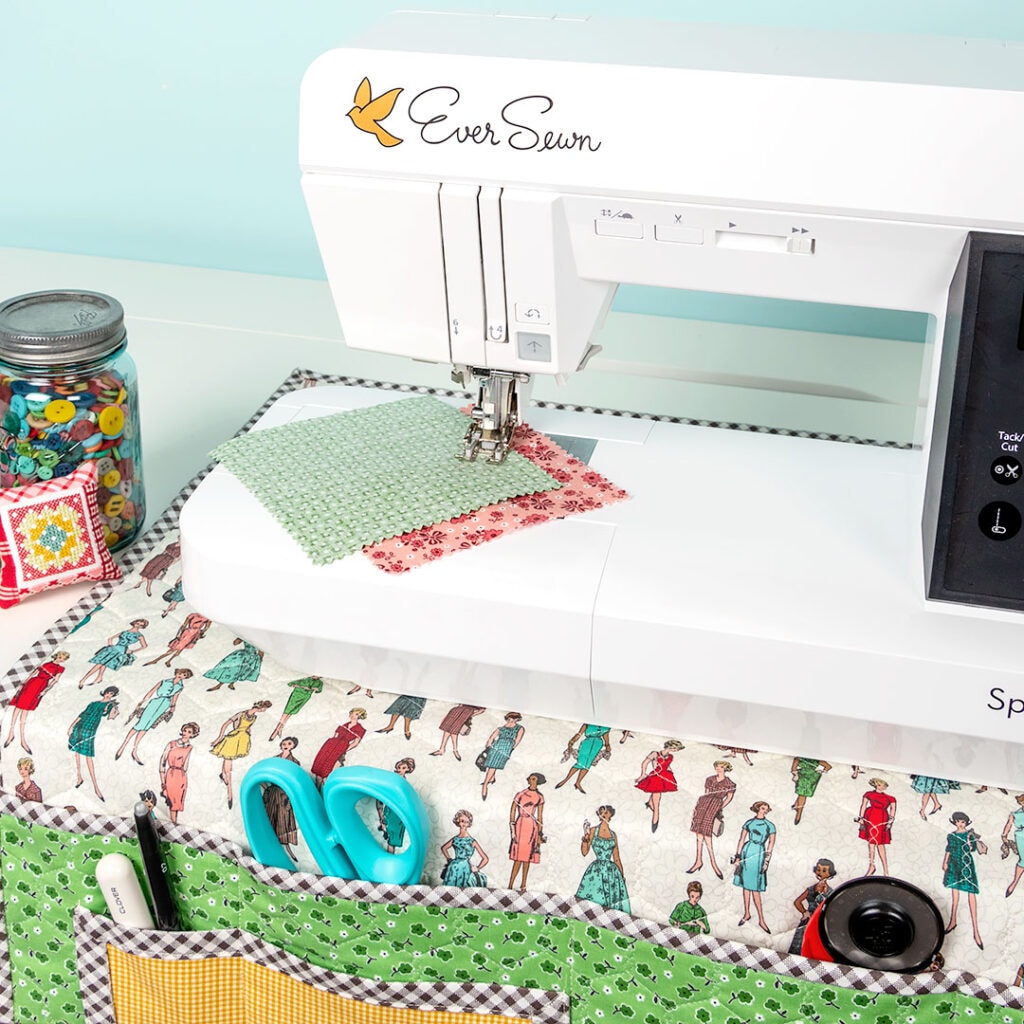
I used a walking foot and a 2.2 stitch length for this part of construction to handle the thick layers of fabric and batting.
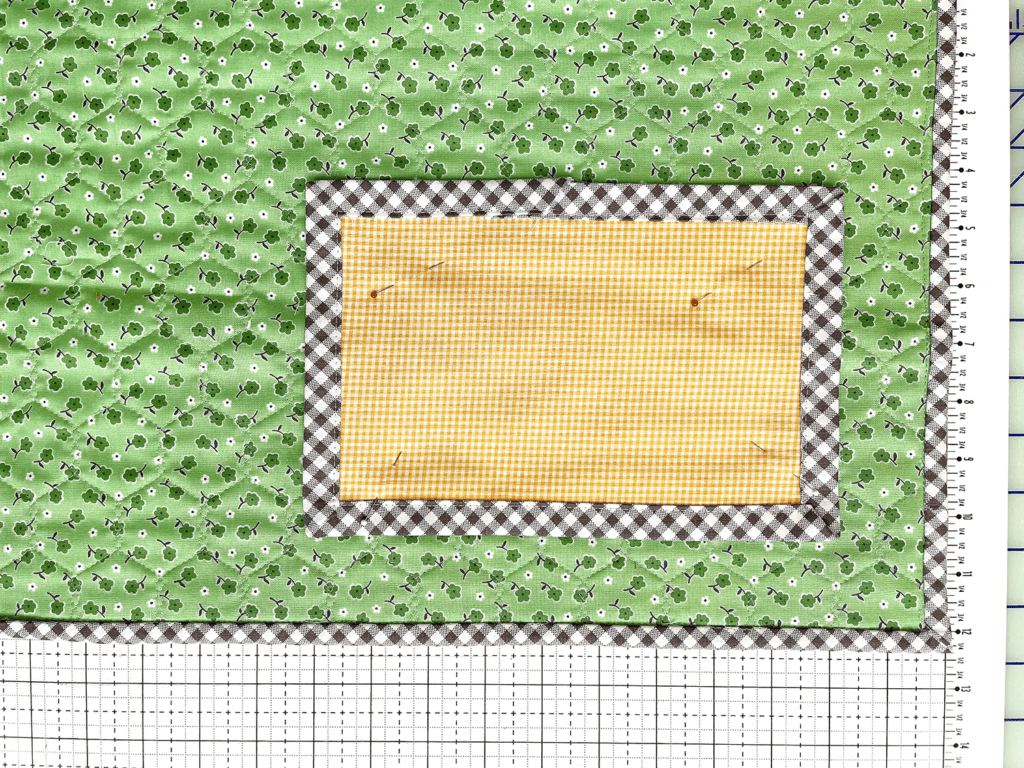
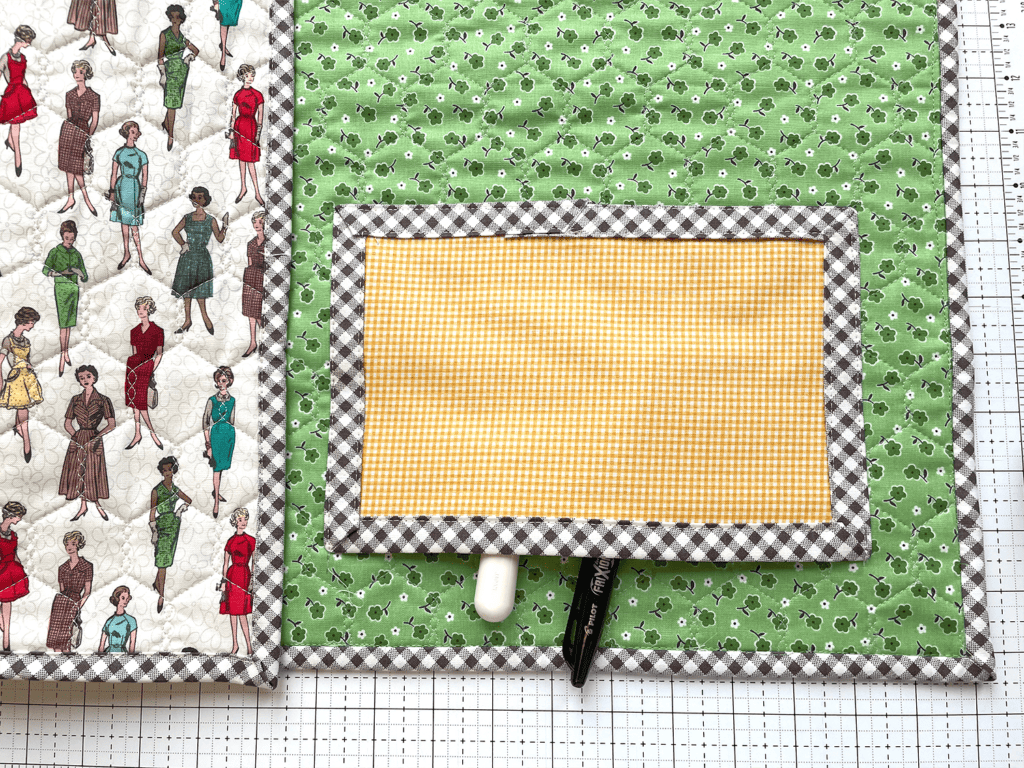
Align placement on the mat where you think it will work best. I placed this one about 1.5″ from the corner. Attach the Small Pocket to the mat.
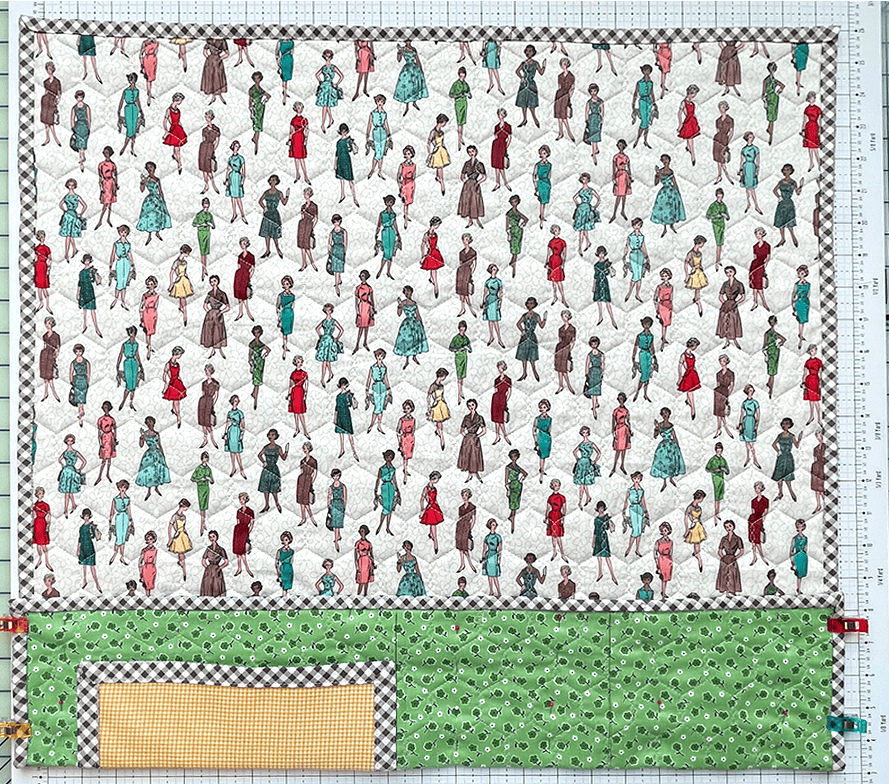
Now, fold the bottom of the mat up to the pocket height you prefer. About 5″ is a good height. Sew vertical lines through both layers of the sewing machine mat where you want your pocket dividers. Backstitch at the beginning and end of each line to secure your stitches.
If you make one of these, please share with #SewingMachineMat, and tag Fat Quarter Shop so we can see it!
Exclusive National Sewing Machine Giveaway
Have you heard? To celebrate National Sewing Machine Day, I’m giving away the sewing machine you see here – the EverSewn Sparrow QE Sewing Machine and a bundle of sewing supplies!
This prize package is worth $930. Click the link below to enter, and good luck!
Happy Quilting!
Stay connected to Fat Quarter Shop!


6 comments
Made one before but I need two more so I’m going to use your way of doing it it looks beautiful thank you
I really like my Janome
i love sewing machine mate i made mine with a heart and 3 other pen and tool pockets!
Thank you for this free tutorial. I’ve been thinking I needed a mat under my machine and the pockets are so practical.