
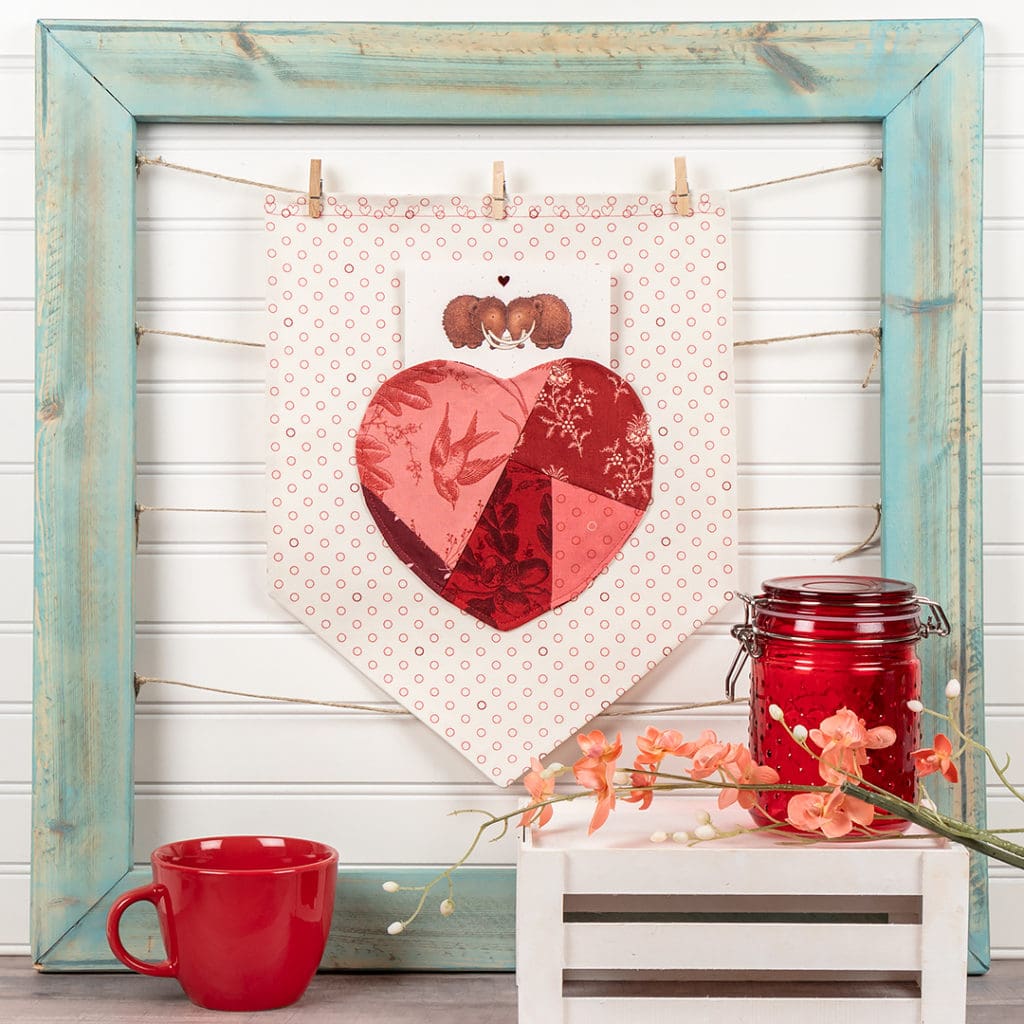
Fill your heart with love with the Hold My Heart Valentine’s pocket. In this easy sewing tutorial, we’ll show you how to make this heart-shaped pennant pocket using Lori Holt’s Crazy Quilt Paper. With some fabric and a few other supplies, you can make one, too! This cute pennant finishes at about 14.5″ x 11.25″.
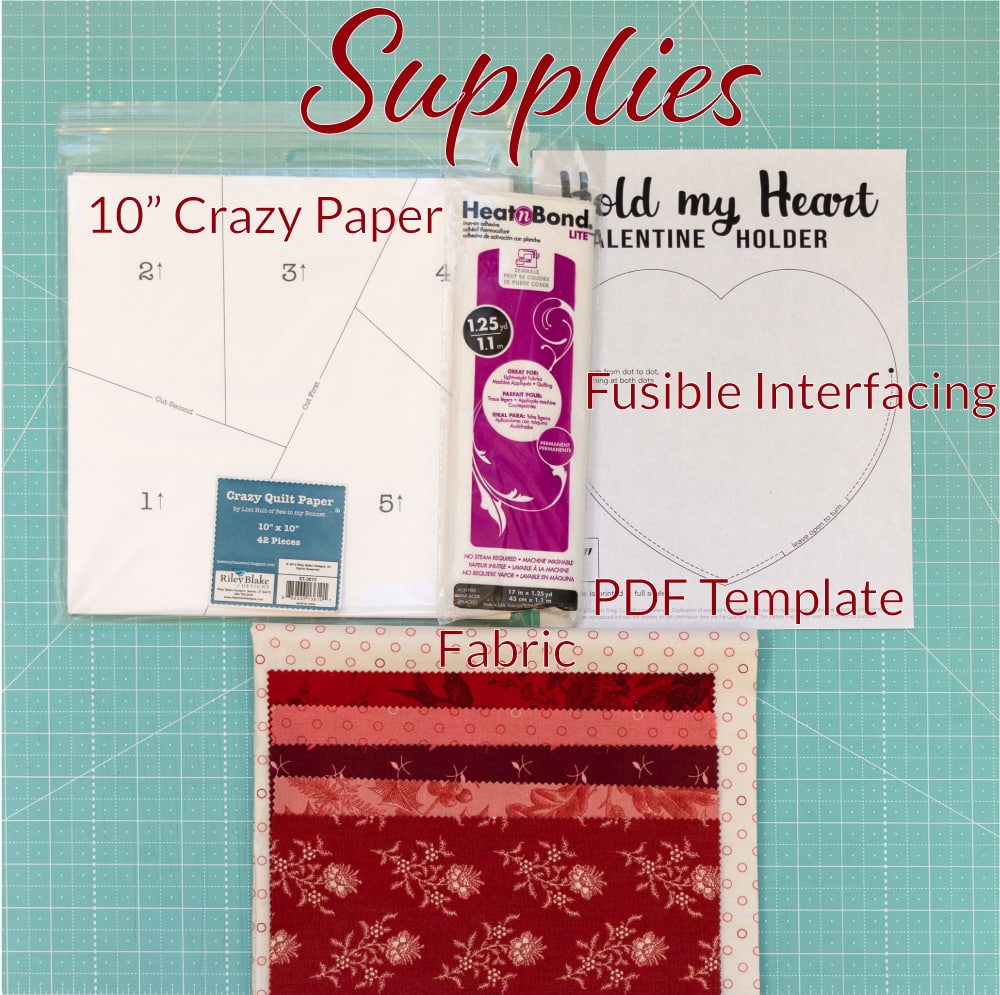
Supplies:
-
- 10″ Crazy Paper by Lori Holt
- 10″ Stacker or Layer Cake. We chose Braveheart by Laundry Basket Quilts
- One fat quarter of fabric (Ecru Bubbles by Braveheart, 8515-RL)
- Heat ‘n Bond Lite or any lightweight fusible web
- Hold my Heart Valentine Holder PDF Template (Print at 100% scale for correct size)
Instructions:

Pick out five prints from a layer cake and sew them together with the Crazy Paper template. You can watch this tutorial to see how to use it.
Cut a heart out of the scrappy block using the PDF template provided. Then cut an additional heart out of one piece of fabric for the back. Interface the back piece for additional stability.
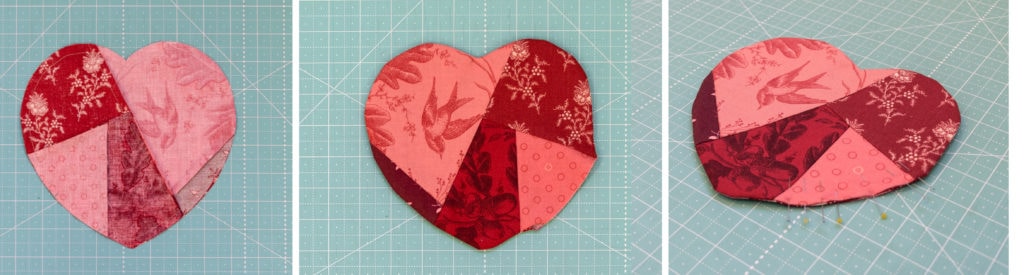
Pin the two hearts together with right sides touching and stitch them together, leaving a 3″ opening so you can turn it right sides out.
Turn it out and gently poke out the edges from the inside. Tuck the raw edges in at 1/4″ and pin them together to sew later.
Press the edges of the heart with an iron. Be careful when you iron because the interfacing may cause both sides to fuse together.

Prepare the pennant by taking one fat quarter and cutting it into two rectangles 15.5″ tall x 12″ wide.
To make the pointed end of the pennant, fold it in half like a taco and measure 5″ up from the bottom on one side. Cut from the center point out to that 5″ mark.

For extra stability, interface both of the fabrics on the wrong side. Pin them right sides together and sew 1/4″ seam around the edges, leaving the top of the pennant open so you can turn it later on.
Turn the pennant right sides out, press it and fold the top edges under by a 1/4″.
Top-stitch it to close up the top. At this point, you could add some cute ric rac or sew some binding or ribbon across the top to hang it with. We used a heart-shaped decorative stitch on ours.

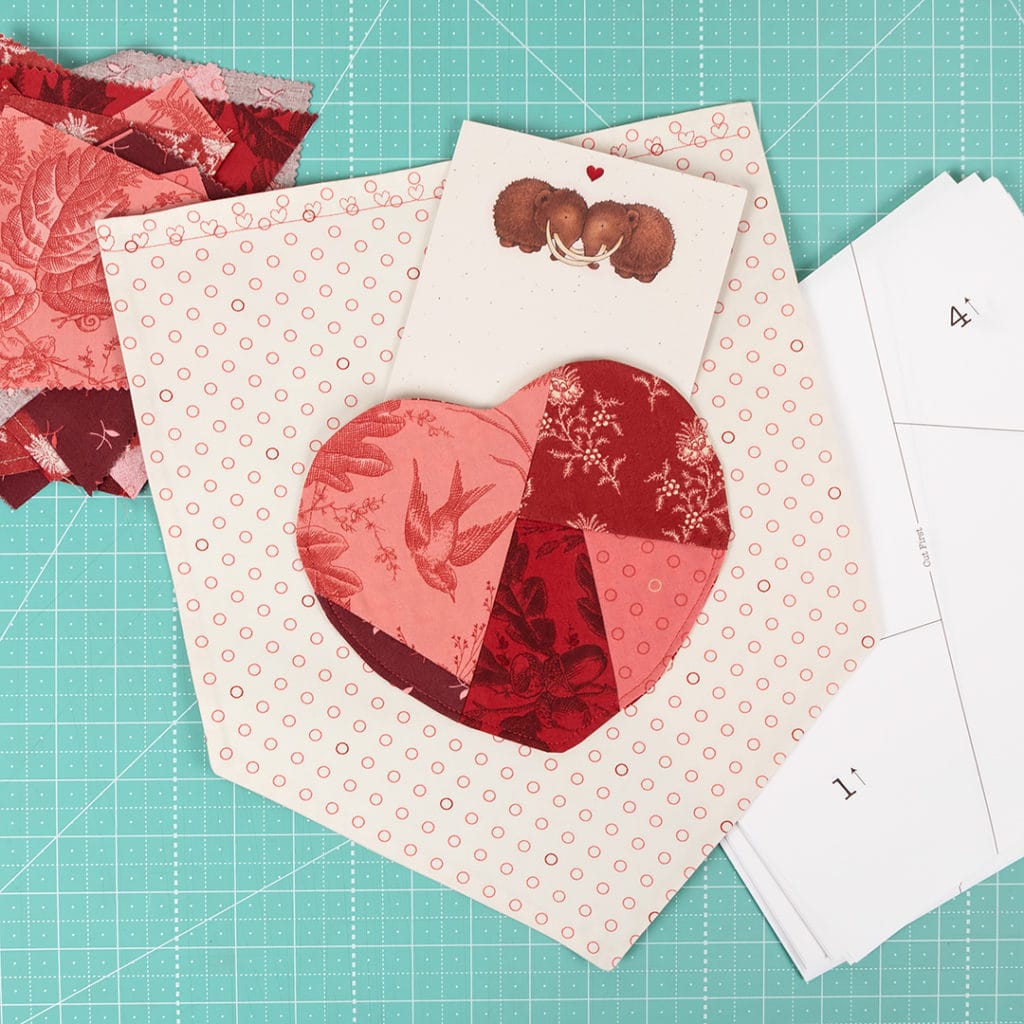
Center the heart on the pennant and secure it with some pins.
With coordinating thread, top-stitch about 1/8″ seam around most of the heart, leaving an opening at the top to hold love notes.
The pennant pocket is now ready to hang! It’s a woolly cute project if you ask us!
Share with #FQSfun
We would love to see your next project – be sure to share using #FQSfun hashtag and tag us (@fatquartershop) so we can see and share your work!
Happy Quilting!
Stay connected to FQS!


4 comments
I love this idea! I may try to use it to incorporate into a photo memory bookshelf quilt I’m making my parents for their 50th wedding anniversary this year. They saved all sorts of cards and letters/notes since they began dating while in high school, and I wanted to recreate one of their cards into fabric…I could use it with your pattern here and add it to my quilt! Thank you so much for sharing this pattern/tutorial!
Love your idea, Gina. Is there a quilt pattern for the photo memory quilt? I am a professional photographer and would love to make one for my son. Thank you for the inspiration. Cathryn
I am so sorry Cathryn, I didn’t see your question until now. Unfortunately I haven’t been able to find a pattern for a photo memory book shelf quilt. All I’ve been able to find are photos of quilts others have made when I Google search. I did find and purchase this pattern: EXCLUSIVELY ANNIE’S QUILT DESIGNS: The Bookcase Quilt Pattern, for $7.99 at anniescatalog.com, and plan to use it as my baseline and customize it from there. I purchased a number of paper pieced photo frame style quilt block patterns from different online sellers… Etsy, Bluprint, etc., and will use those along with photos printed on fabric via Spoonflower.com. I wish I could offer you better information. I will bookmark this page so if I find anything else that might be helpful, I can let you know.
This is so cute and would be great for gifting Valentine candies to the grand girls but I can’t figure out how to get two 15.5 x 12 rectangles from a fat quarter.