
If you’ve been dreaming about making your first beginner quilt but aren’t quite sure where to begin, you’re in the right place. We created this Ultimate Beginner Quilt to take the mystery out of quilting and help you learn one step at a time, even if you’re brand new to sewing.
From choosing fabric to sewing blocks, quilting, and binding, this project walks you through the whole process in a way that feels doable and fun. If you’re looking for an easy beginner quilt that helps you build confidence as you go, this one’s for you.

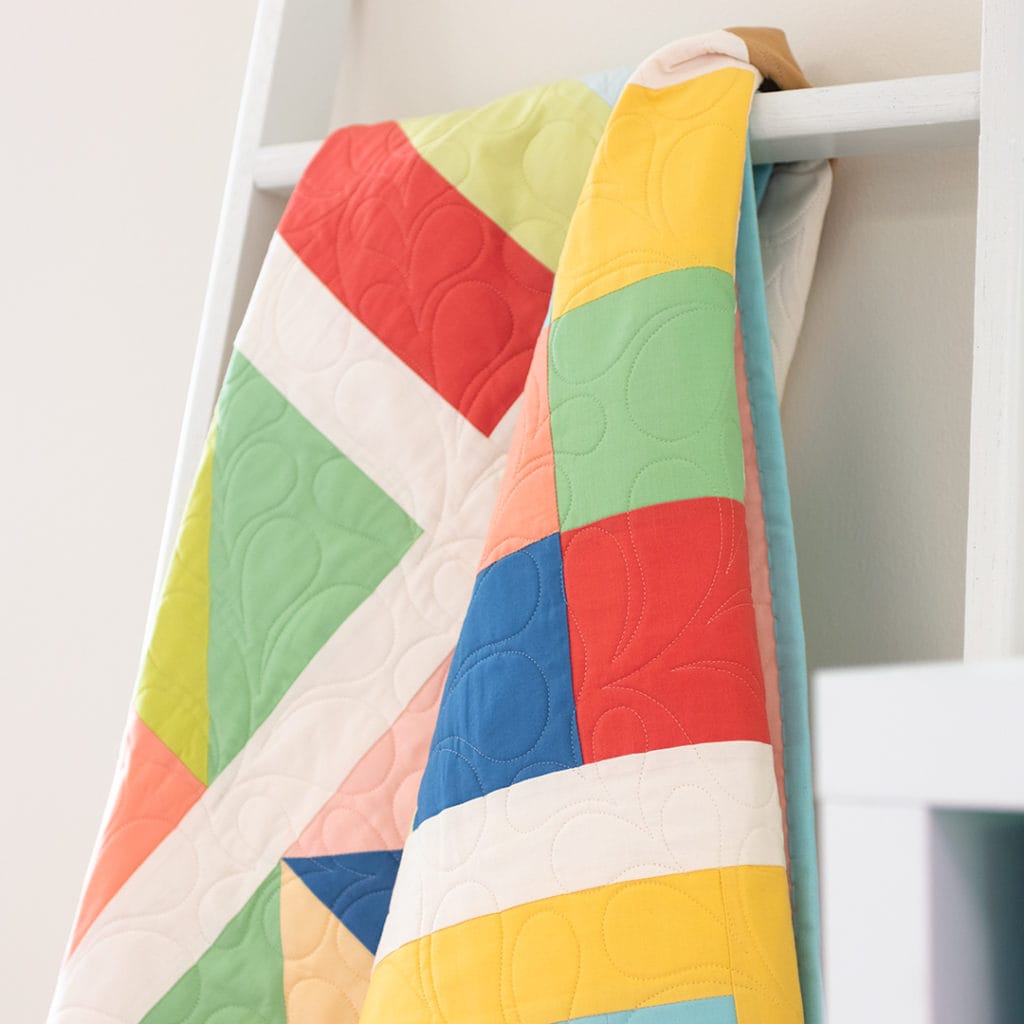
A Beginner Quilt That Grows With You
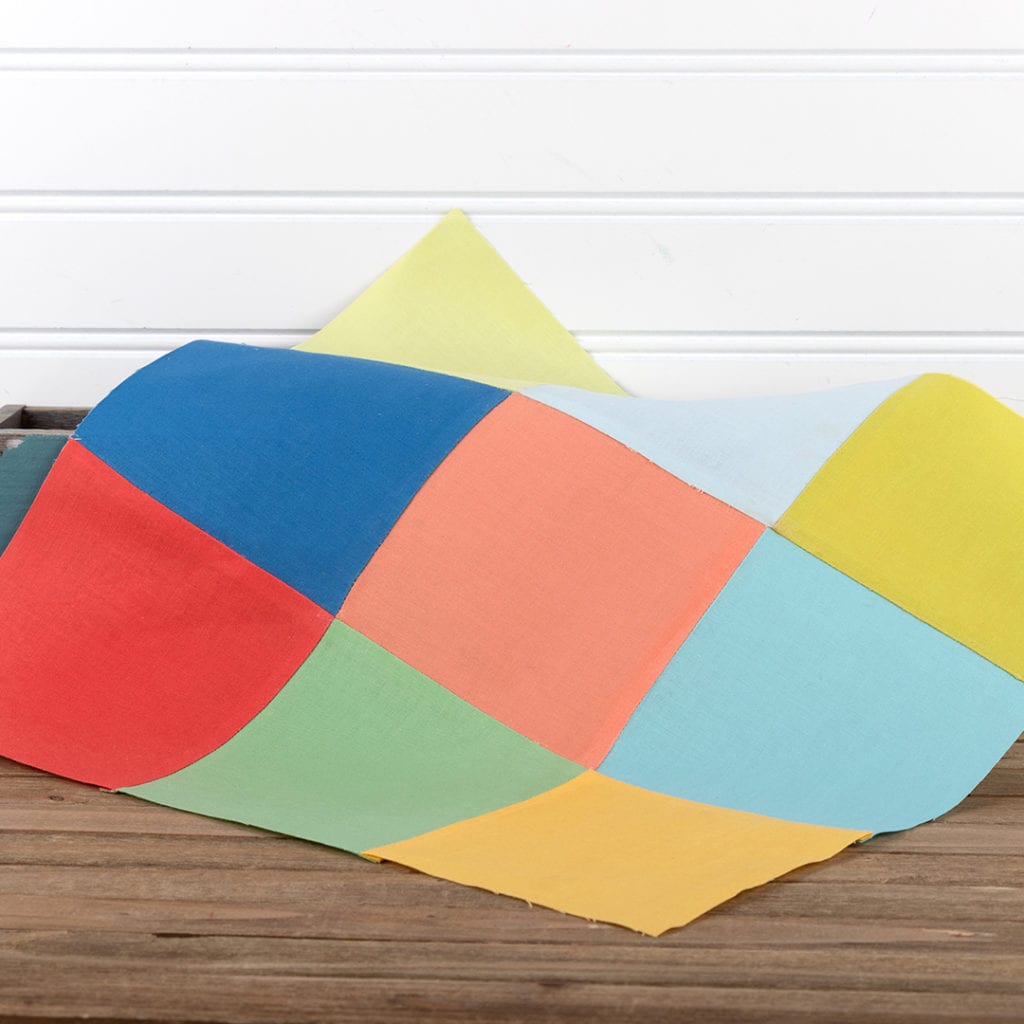
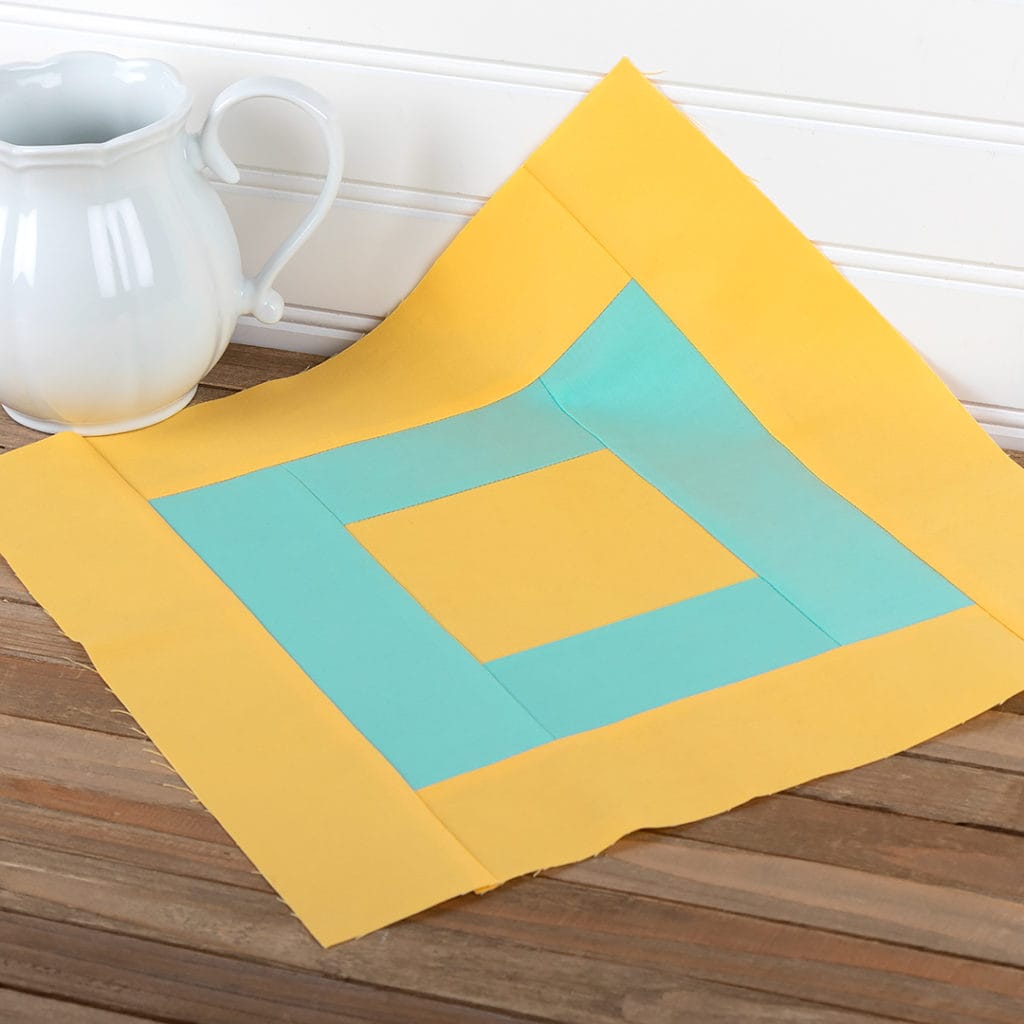
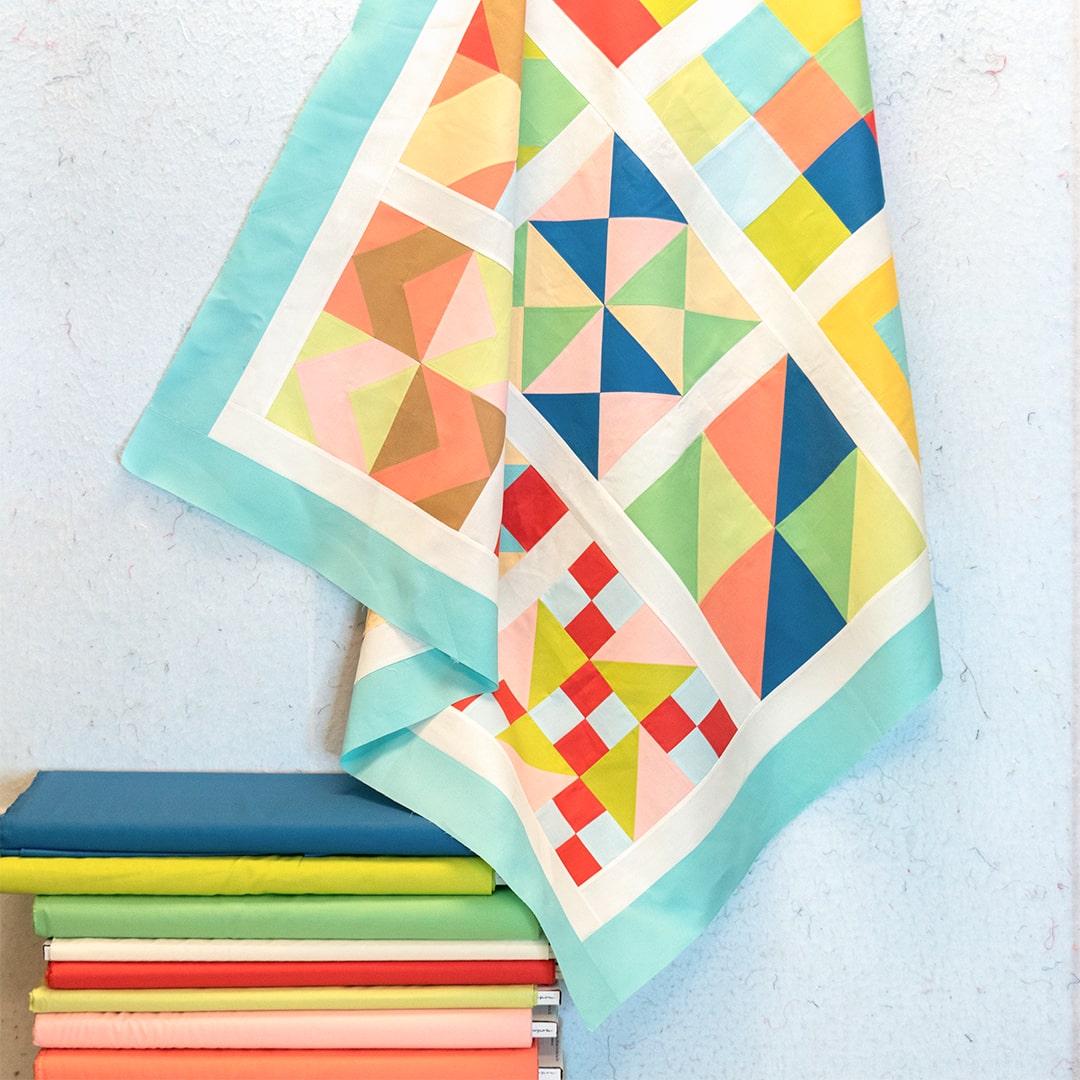
This quilt is a sampler-style design, which simply means you’ll make a variety of different blocks instead of repeating the same one over and over. Each block teaches a new skill, so you’re learning how to quilt as you sew — no pressure, no rushing.
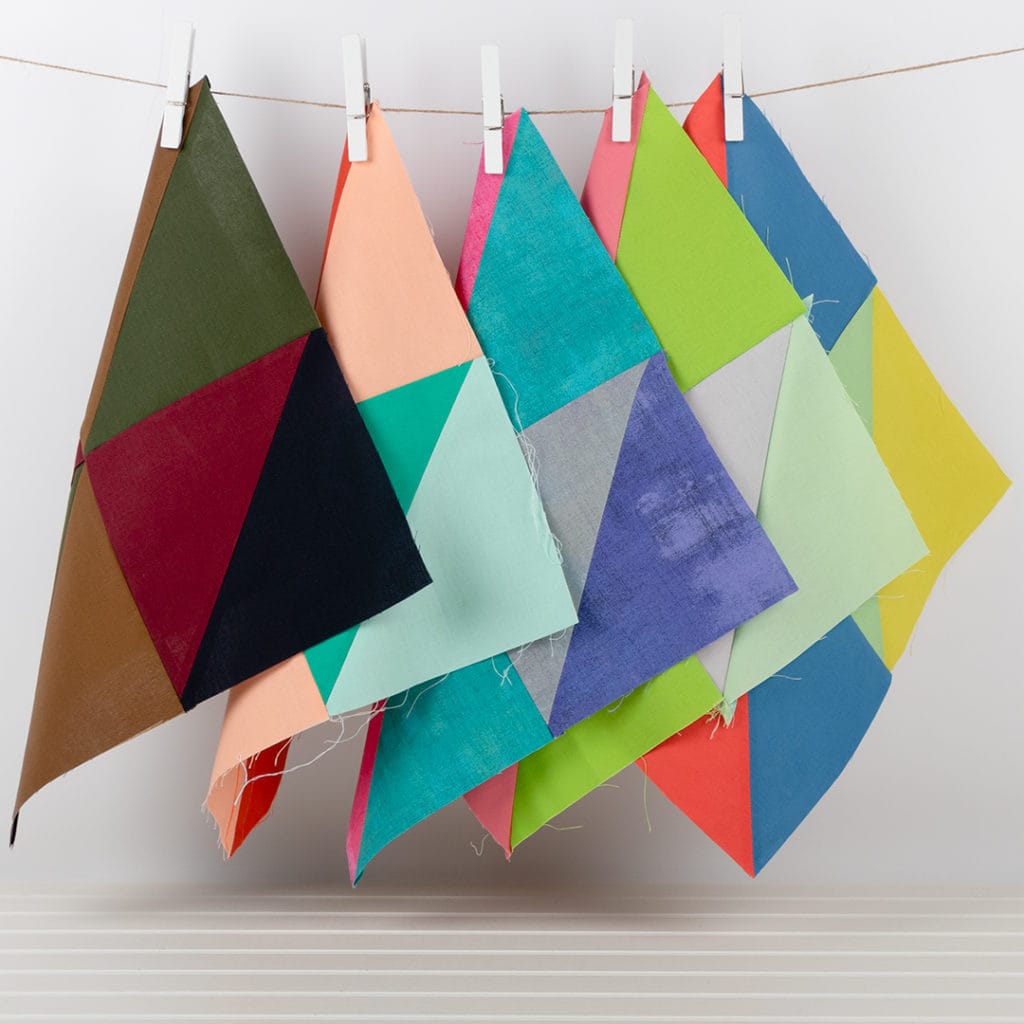
The finished quilt measures 50.5″ square and uses 12 Fat Quarters, plus sashing and border fabric. It’s a comfortable size to work on and a great first quilt to snuggle with when you’re done.

What You’ll Learn
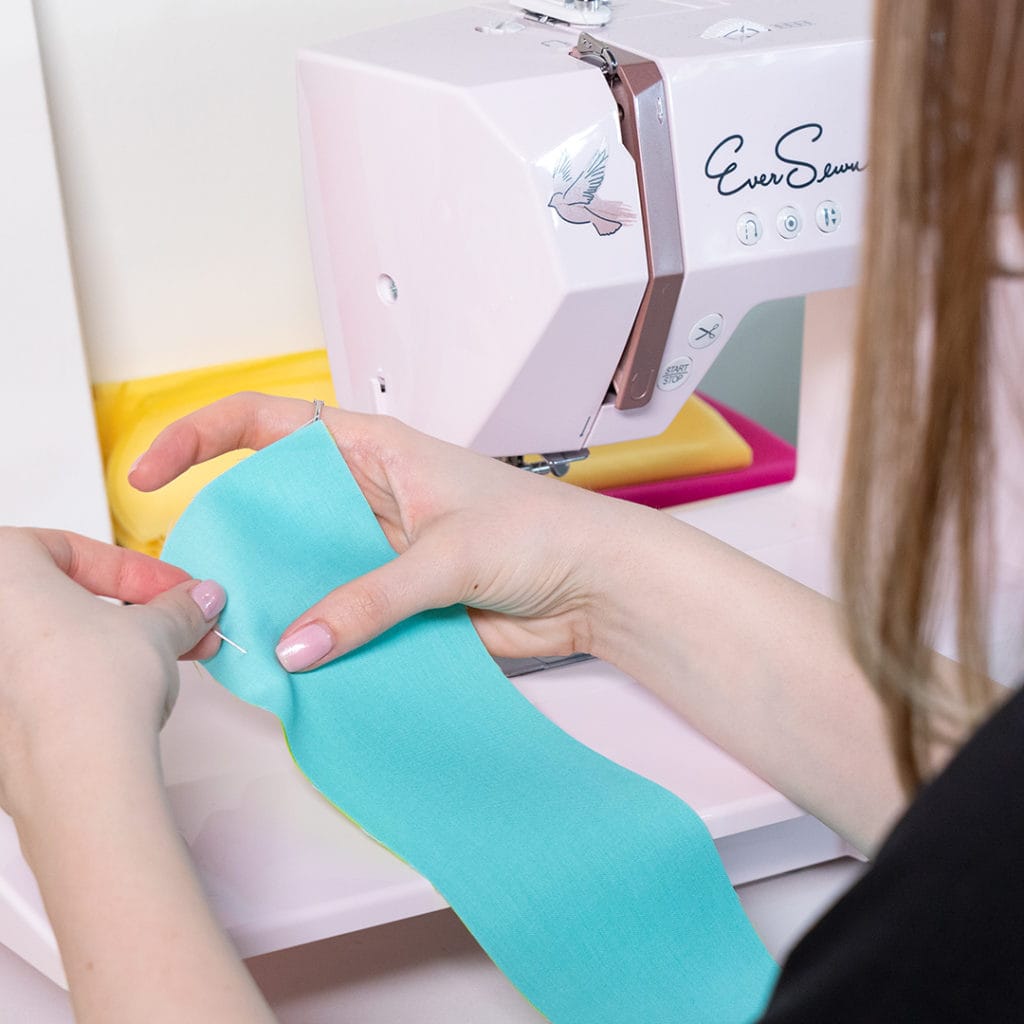
Join Kimberly Jolly as she shows you how to sew each part of this quilt from start to finish. Along with the free video tutorials, we’ll provide additional sewing tips each week on the blog. A new block pattern will be released with each video.
One of our favorite things about this project is how much you learn without even realizing it. By the time you finish, you’ll have practiced:
- Reading and following quilt patterns
- Cutting fabric accurately (yes, it gets easier!)
- Sewing straight seams and classic quilt blocks
- Putting blocks together with sashing and borders
- Quilting your project using straight-line or free-motion techniques
- Binding your quilt for a finished, polished look
Each step builds on the last, so you can move forward with confidence.
Free Block Patterns & Video Tutorials
You don’t have to figure this out on your own. This beginner quilt includes free block patterns and step-by-step video tutorials that walk you through every part of the process.
Kimberly Jolly shares tips, tricks, and encouragement as she sews each block, making it feel like you’re quilting right alongside her.
Quilt Blocks Included:

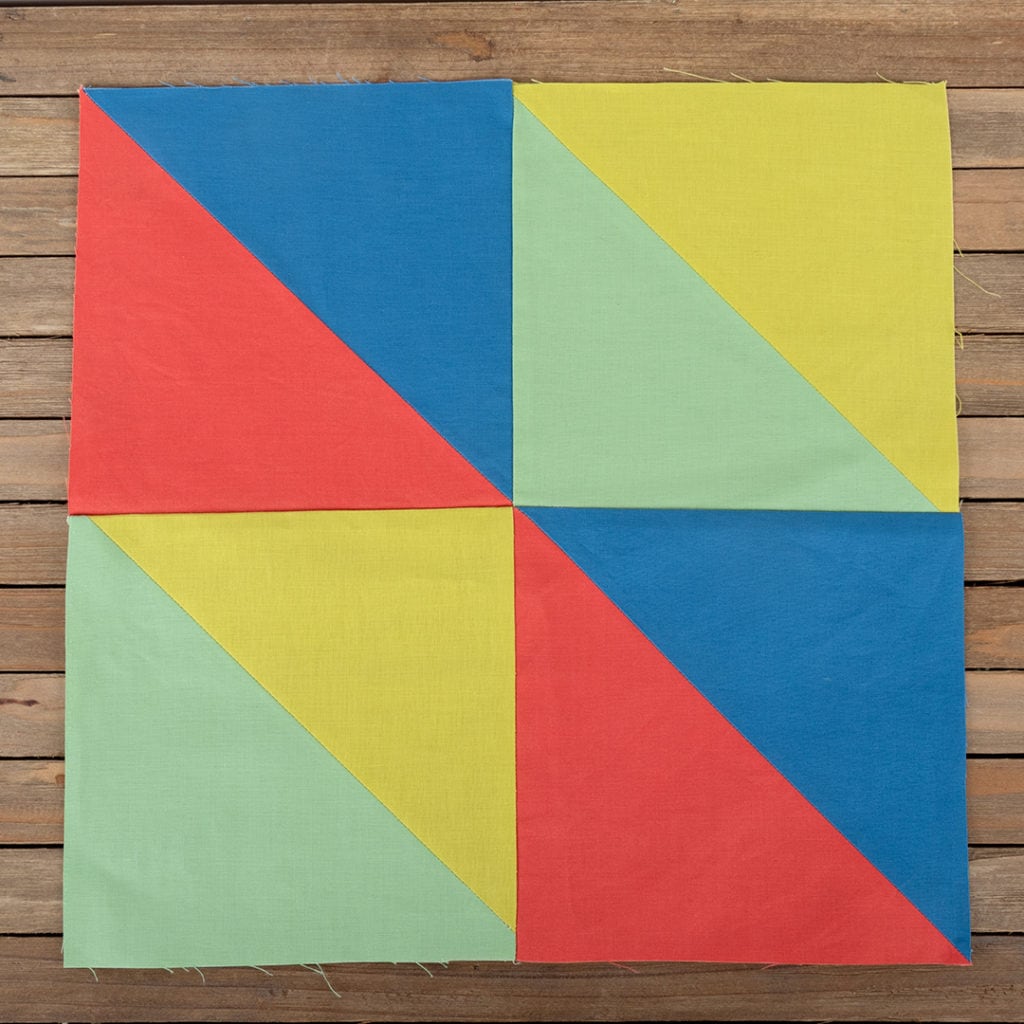
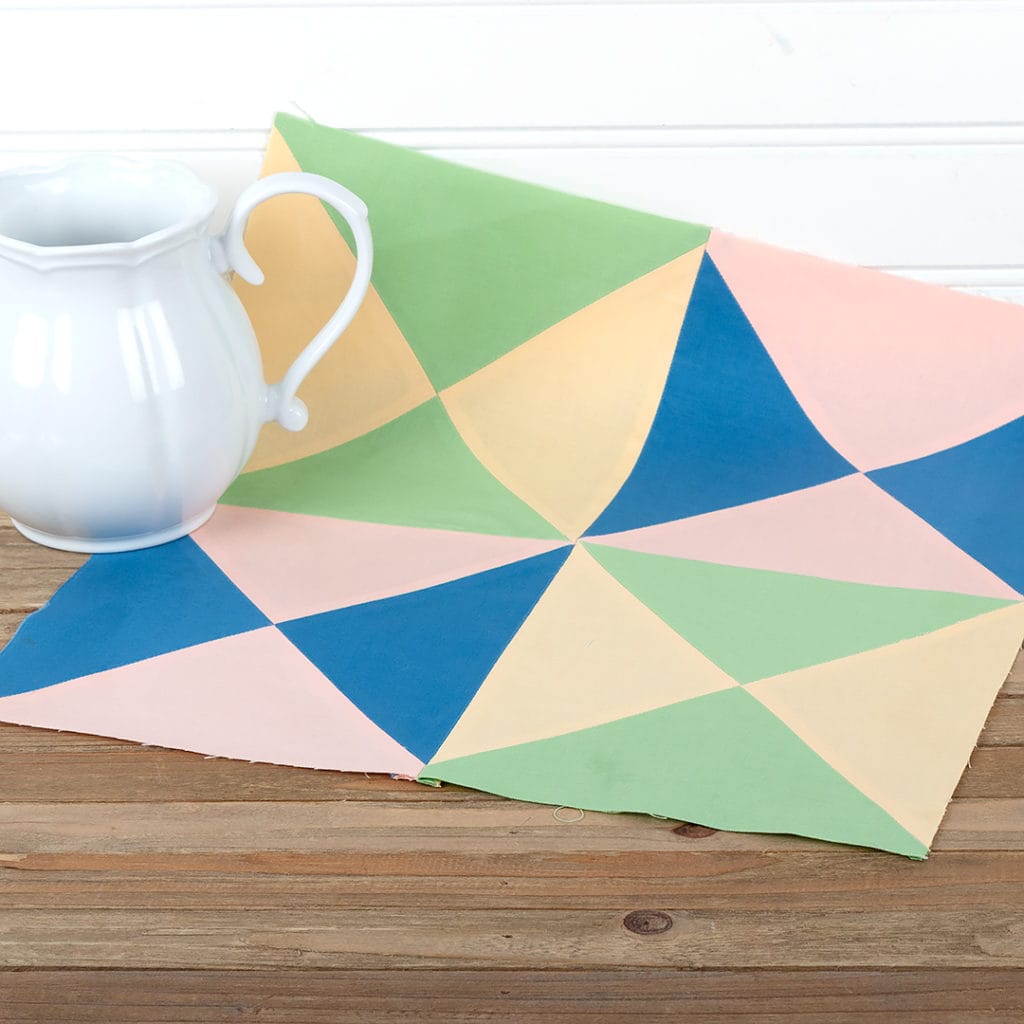
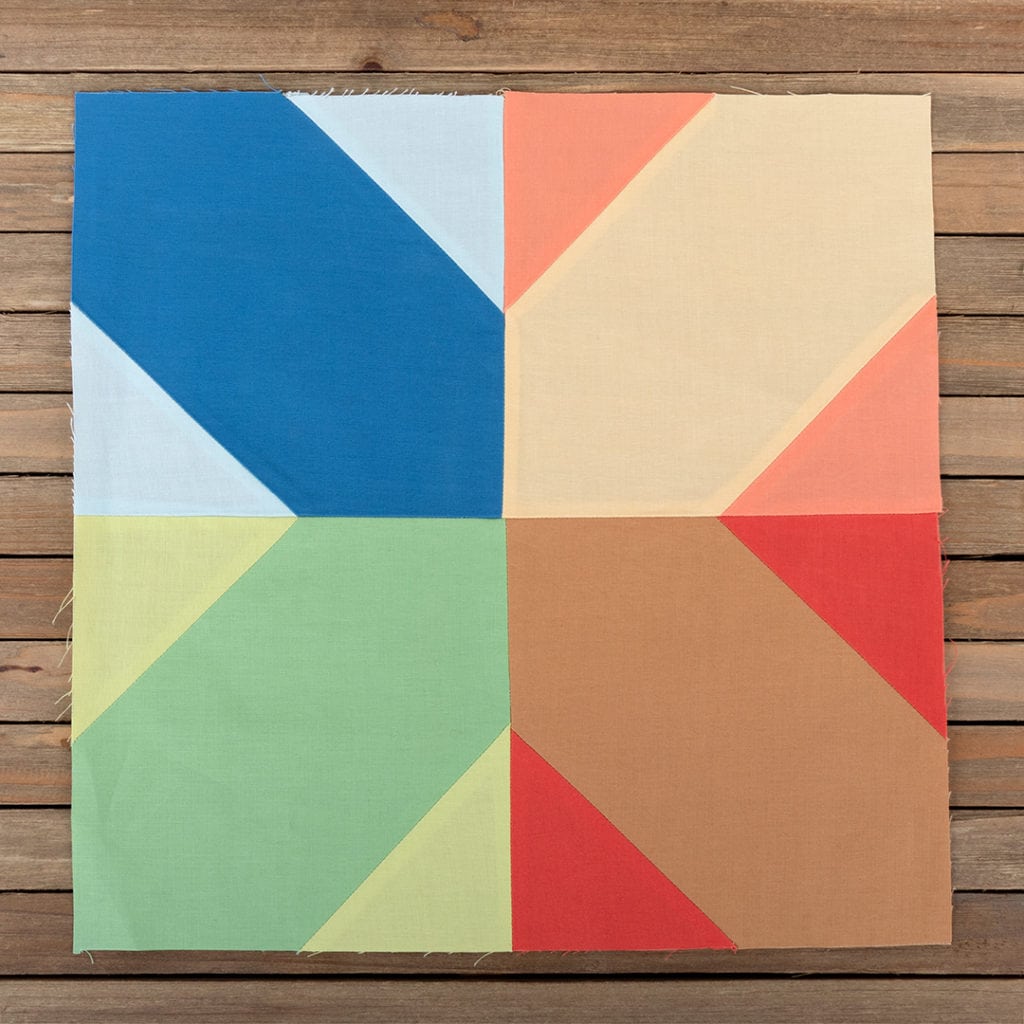
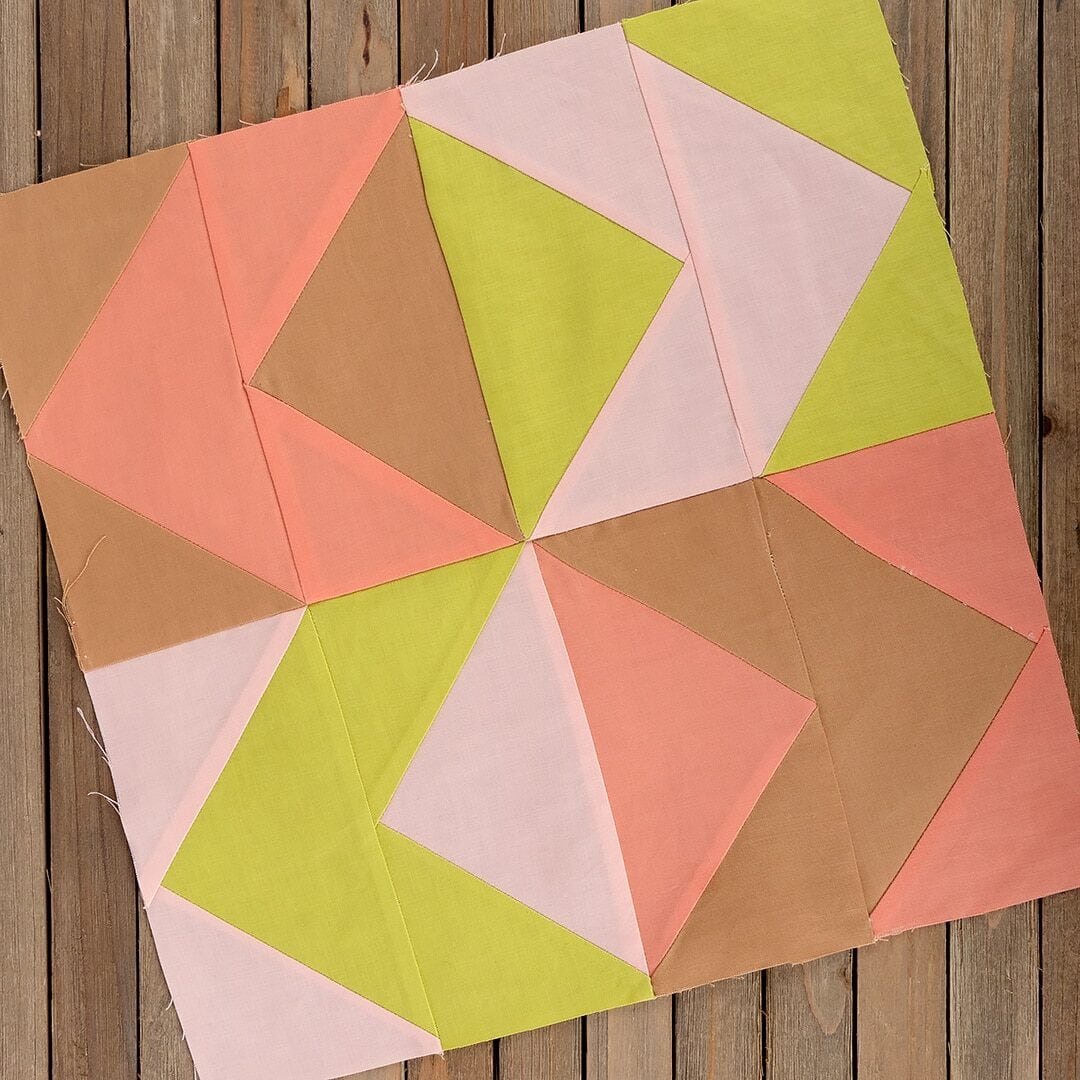
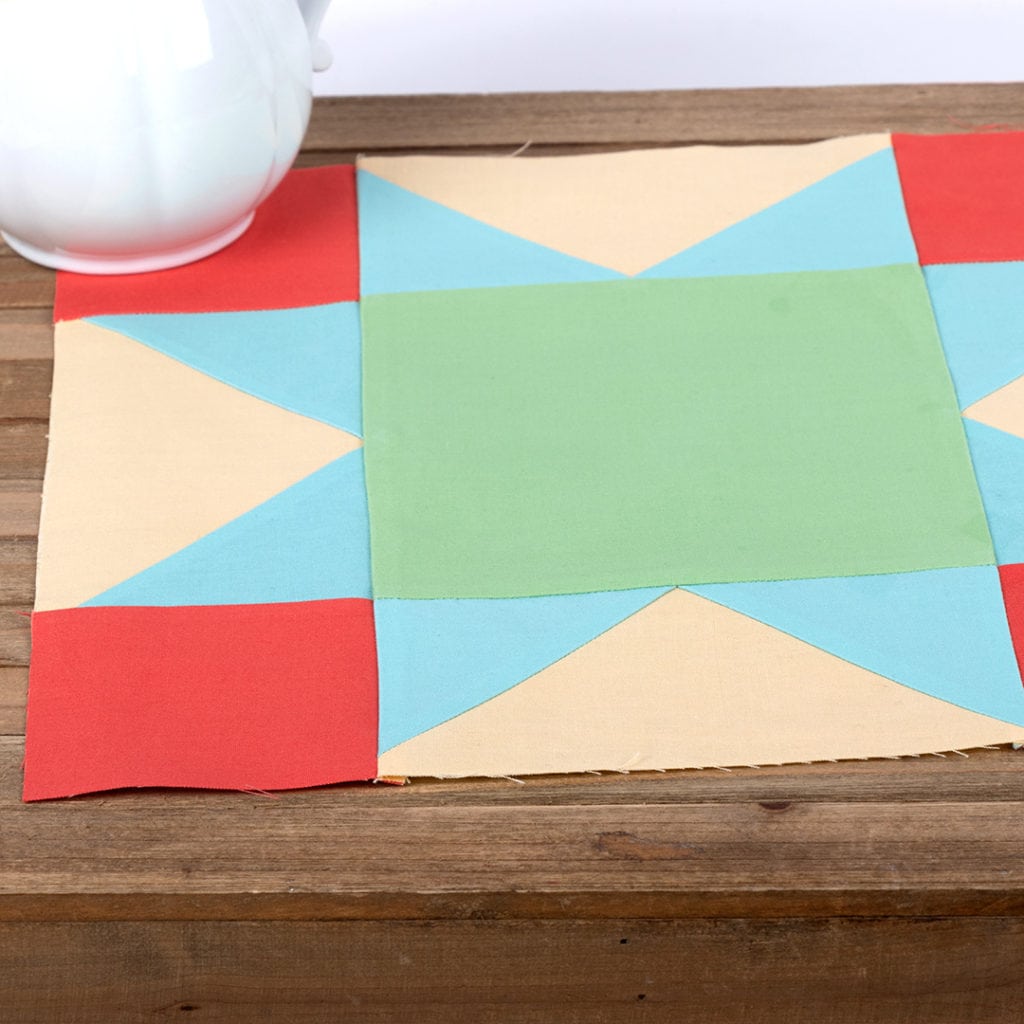
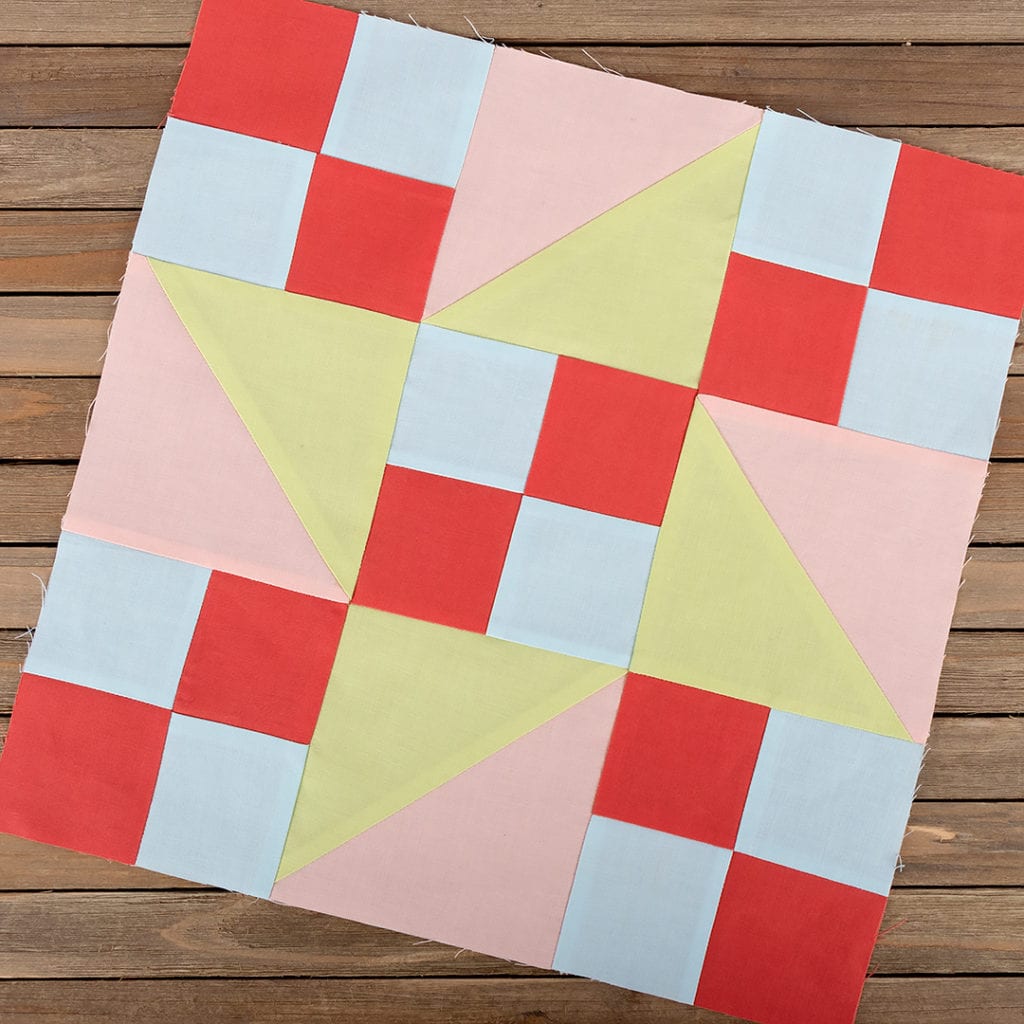
Once your blocks are finished, you’ll move on to assembling the quilt top and getting it ready for quilting.
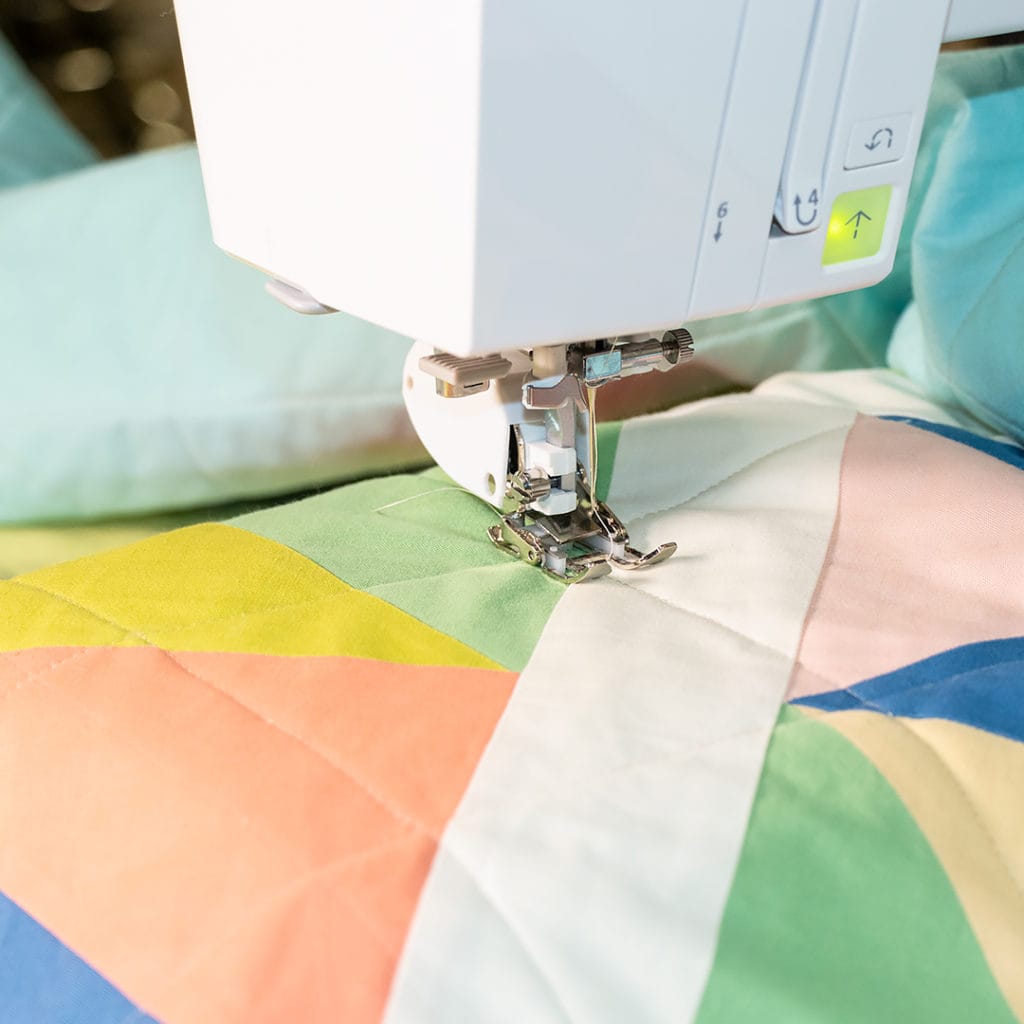
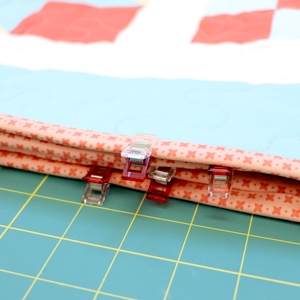
Quilting & Finishing (You’ve Got This!)
Finishing a quilt can feel like the scariest part, but we’re here to help with that, too! We’re with you every step of the way as you prepare your quilt top and backing and apply the binding. Plus, we’ve included a tutorial on straight line and free motion quilting for beginners.
Take your time, pause the videos when you need to, and remember — every quilter was a beginner once!

Choose Your Fabric: Keep It Simple or Make It Your Own
This beautiful sampler quilt was designed to build your skills, block by block. For this sew-along, you have the option to:
- Use the Ultimate Beginner Quilt Kit: If you’d rather skip the fabric decision-making and jump straight into sewing, the kit includes everything you need to create the quilt exactly as shown in the sample. It’s a great choice if you want a smooth, stress-free start.
- Choose your own fabrics: Feeling creative? You can pick your own Fat Quarters and make this quilt your own. Just follow our Fabric Requirements & Color Key.
Supplies & Fabric Requirements
If you’re selecting your own fabrics, here’s what you’ll need:
- 12 Fat Quarters*
- 7/8 Yards neutral color (we chose white) for sashing which goes between the blocks
- 1 1/8 Yards for the border
- 3 3/8 Yards for the back of the quilt
For the batting, we suggest Happy Cloud Batting in Throw Size
*A Fat Quarter is a quarter of a yard that’s cut wider, at 18″ x 21″ so that you have more room to work with. Read more about various types of fabric precuts.
Use this handy Cutting Guide to plan the layout of your cuts for each block.
Let’s Get Sewing
Quilting doesn’t have to be intimidating. With clear instructions, helpful videos, and a project designed just for beginners, this quilt is a wonderful place to start. Whether this is your very first quilt or your first in a long time, we’re so glad you’re here — and we can’t wait to see what you make!
But Wait, There’s Sew Much More!
Once you’ve finished this project, you’ll have a solid foundation and the confidence to move forward. When you’re ready for your next project, check out our many other Beginner Quilt Patterns that are perfect for building on the skills you’ve learned here.
Stay connected to Fat Quarter Shop!


66 comments
This looks like fun
I’m glad kimberly is doing this. Been waiting for this beginner series.
Thank you! We’re looking forward to teaching it.
Clearing my schedule :)! Sounds fun!
It looks like fun.
What a wonderful idea. I am looking forward to being a part of the party. Let education, fun and joy begin.
Count me in! This will knock off one of the major Christmas presents on my list this year!
What a wonderful way to tackle a decades-old deferred dream/desire. I was just at the craft shop admiring gloriously colored fat quarter rolls and enticing quilt kits. Your SAL blog in my feed was perfectly timed. I look forward to joining you and your crafting community in completion of this project.
Can the videos be viewed at other times in case I don’t make a class?
Linda, yes! the videos will stay up on our YouTube channel forever 🙂
I’m tempted. Will the pattern be expensive?
Forget that… just read it properly sorry.
Wow! Can`t wait. I have the stash I just didn’t know what to do with it.
Can I say thank you? I don’t think I can say it enough. I am a complete newby… like in my mid-50’s just bought my first sewing machine newby. I’ve been looking for a beginner sew along that isn’t completely intimidating. I discovered your site, blog and you tube videos and I just love all of it. I’m down!
Sheryl, I’m so glad that we can be a resource for you. We can’t wait to get started!
I’m in for sure!! Thank you!
Hi Sheryl. I’m a 60+ newby to quilting, so I’m glad to see that I’m not the only ” seasoned” person here. We’ll have fun!
This looks like fun & a nice size for a comfy quilt. Thanks.😃
I am looking forward to it!
Oh, this is quite exciting! I am ready.
This will be nice. I’m tired of complicated quilts a I don’t finish. Thank you!
I’m so glad! I think it’s going to be fun for everyone.
Hi looking forward to this beginner sew along. Can Kimberly go over the different rulers and how to read and use them? Thank you!
We only plan to talk about 2 rulers to keep things simple, but Kimberly will definitely talk about how to use them.
Awesome, looks fun
Can we get the pattern now on line?
How do I get the pattern? Or do I not need a pattern?
If we are away the week of the block will it be available so we can catch up ?
Hi Pat. Yes, we will post the pattern with each new video, and those will stay up indefinitely. We’ll also post all the patterns here on the blog so you can reference them later.
Looking forward to making this quilt and getting my daughter-in-law started quilting also.
I need all the help I can get with my quilting, so excited to quilt along with everyone
I’ll be getting my supplies ready! I SEW need this.
Where is the pattern?
The pattern will be released block by block. We’ll link to the free patterns here on the blog and within the notes for each video. Here is the pattern release schedule.
Block 1 Pattern – August 8
Block 2 Pattern – August 15
Block 3 Pattern – August 22
Block 4 Pattern – August 29
Block 5 Pattern – September 5
Block 6 Pattern – September 12
Block 7 Pattern – September 19
Block 8 Pattern – September 26
Block 9 Pattern – October 3
Finishing Pattern – October 10
i see the quilt kit is sold out? what was the cost?
Is there more Information coming out today about the sew along!
The quilt kit is $54.98 per kit and it includes all the fabric for the top, plus the backing. We expect to have more within a week. If you want to use your own fabrics, you can use the Fabric Requirements provided above to pick your fabrics. Let me know if you have any questions.
This is such an awesome idea!
Can I use fat quarter prints or do they have to be solids?
Jayne, you can definitely use prints but keep in mind that all the fabrics will touch. Going with fabrics from the same collection, whether they are prints or solids, will help it look cohesive.
would it matter the size of the print? I’m guessing it would work best for small prints?
Yes, small prints will work better than large scale ones.
I need to know the color of the backing. It says it will vary. I also want to use the aqua outside border, binding and backing. So I need to know if that is what you include or if I must look up this line of fabric and order what I need
Sure! I’ve emailed you to connect you with customer service (service@fatquartershop.com) so that they can assist you.
I came across the recent beginner quilter video tutorial and I realized that it was perfect timing for me. I’ve always wanted to learn how to do some basic quilting. Because I am deaf, it was difficult to find the quilting class or video tutorial that accommodates my needs. These weekly sequential video tutorials which provide plenty of visual aids and closed captioning are exactly what I need in order to learn how to do some quilting as we go. I subscribed that channel and I am looking forward to new videos every week. Thank you! 😀
Thank you, Lizzi! We’ve worked hard to make videos that are informative and easy to follow along with. We feel like the captioning is very important to make the videos accessible to all so I’m glad it’s helpful.
I jumped in feet first on my first two quilts and realized quilting takes different skills than what was taught in school 55 years ago. Your first video was very informative and I can’t wait for each segment of the series. You’re never too old to learn new skills. Thank you.
Thank you! Hope you get a lot out of it!
Really enjoying but struggling with cutting after Lesson. Find my first cuts were exact and looked wavy. Hopefully we can go over more in future videos how to cut properly.
Sure! That’s a good idea.
I have a question for Kimberly about her comments related to fabric in the lesson for Block 1.
Why do you advise beginners not to pre-wash the fabric? What about shrinkage? Other reading I have done says to pre-wash as 100% cotton fabric will 2-3%.
Another question, what about the front or back of the fabric, don’t I need to be sure to always use the same side? This may be assumed, but nothing was said about doing that.
Thanks!
She prefers not to pre-wash because it adds an extra step that rarely makes the quilt better. Unless someone has a sensitivity to the sizing that comes on the bolts from the factory, prewashing doesn’t help a lot. In the video, you can see how wrinkly and frayed it gets when washed. That has to be ironed out, and trimmed. At the same time, you lose some of the stiffness that makes the fabric easy to work with. Please see my notes above in the blog about shrinkage. Those are just a few reasons, but it’s really a matter of personal preference. Experiment and see what works best for you. 🙂
I’m really liking the ultimate beginners quilt but I am wondering if there will be much fabric left over after we complete the entire project? I have 12 fat quarters in mind to use in my project but I haven’t started it yet because I wanted to ask about the amount of fabric used! Thanks !! It’s going to be really pretty!
What is the size of the fabric that goes between the blocks?
Those are 2.5″ strips.
Helpful course. Learning a few new techniques. Will you be having a next level session, intermediate level #2 for a second quilt? Thankyou.
I am excited about making this quilt (my first)! However, I noticed the links to the pattern (and video) for blocks 5 and 6 have not yet been posted to the blog, although it indicates they would be posted on September 5th and 12th respectively. It is now September 15th and neither are there. Can you help? Thanks!
That’s been updated now. Thanks for letting me know. You can find all of the latest posts for The Ultimate Beginner Quilt at this link, as well https://blog.fatquartershop.com/category/the-ultimate-beginner-quilt/