
Happy Tuesday, friends! My name is Amy Gibson and I’m so excited to be a guest designer on the blog today, inviting you to join me in a fresh, new quilt along- it’s the Meriwether Quilt Along!
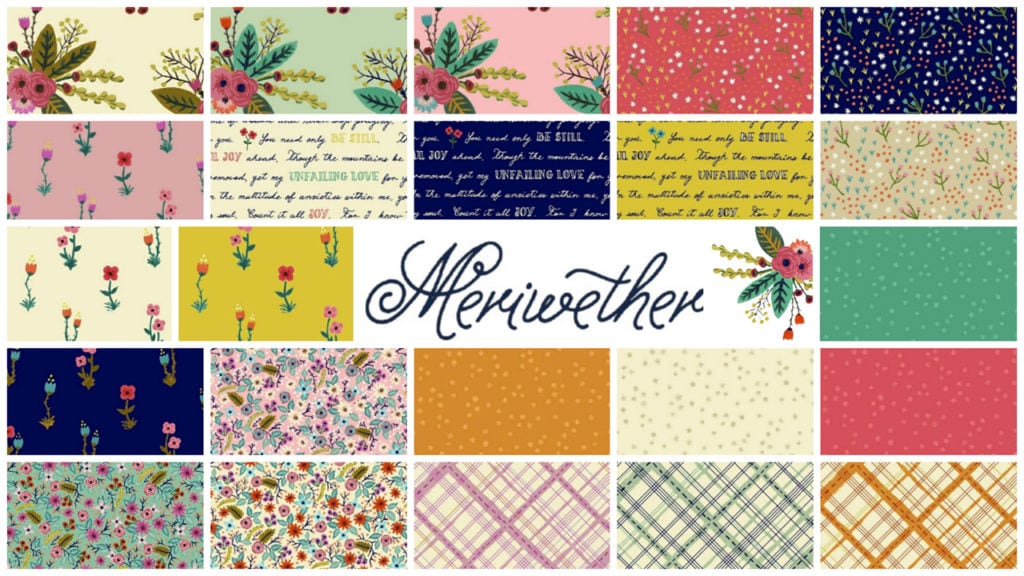
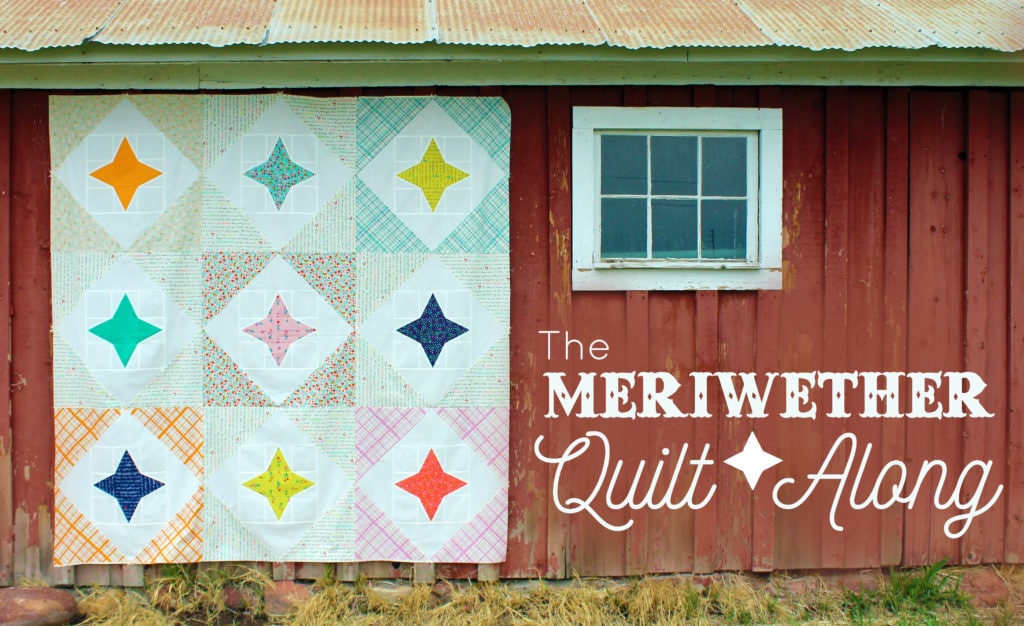 This month at Fat Quarter Shop we’re celebrating the arrival of my brand new line from Windham Fabrics. It’s called Meriwether and it’s a sweet, vintage-y collection of happy flowers, farmy plaids, and even my favorite uplifting scripture verses in old fashioned cursive.
 The quilt we’re making is based on a layout from my recent book, The Quilt Block Cookbook. The layout, called Point Taken, is shown as a sampler quilt in the book, but I’ve been dying to show it made up as a non-sampler in some simple, sparkly floating stars. I just love how it turned out!
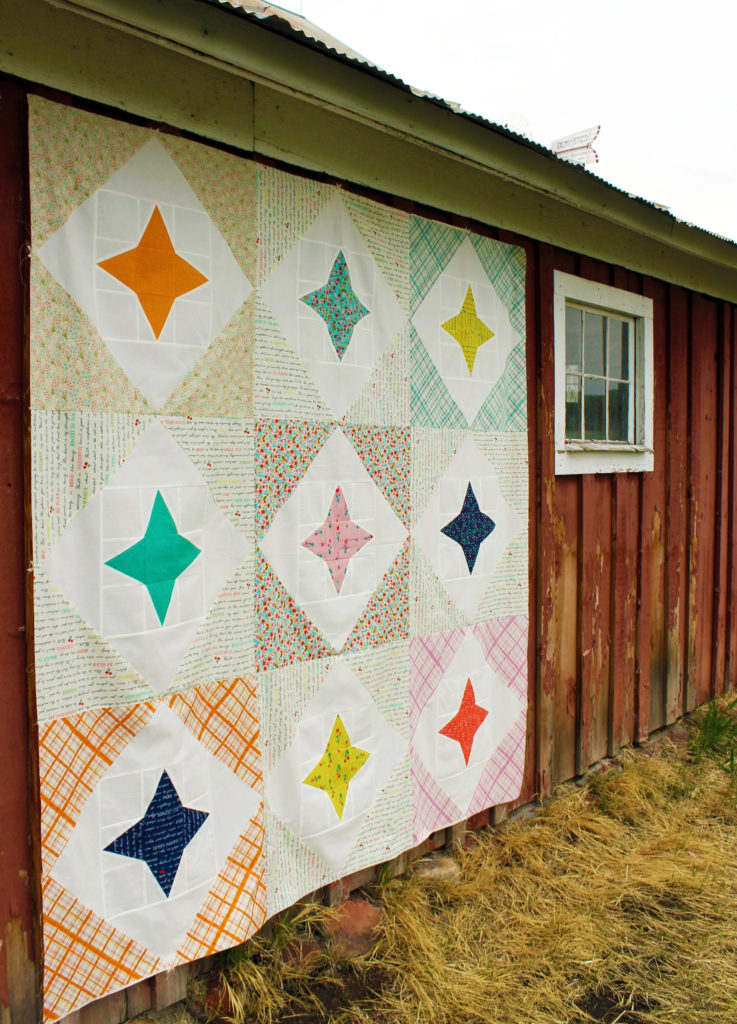 So in this post, we’re going to go through the steps for making up these happy little star blocks, including a simple, straightforward paper piecing tutorial, and then to finish the quilt, just grab a copy of the book and use the Point Taken layout pattern on page 142 to frame out your blocks. The pieces are nice and big so it comes together really quickly, and is perfect for showing off your favorite prints!
 Let’s get stitching!
Fabric Requirements:
For the Quilt Top:
- White: 2 7/8 yards
- Variety of Low Volume Fabrics: 2 3/8 yards total (3/8 or ½ yard cuts, or fat quarters)
- 9 Colored Fabrics: ¼ yard each
For the Quilt Back:
- 4 ½ yards
For the Binding:
- 5/8 yard
Making the Blocks:
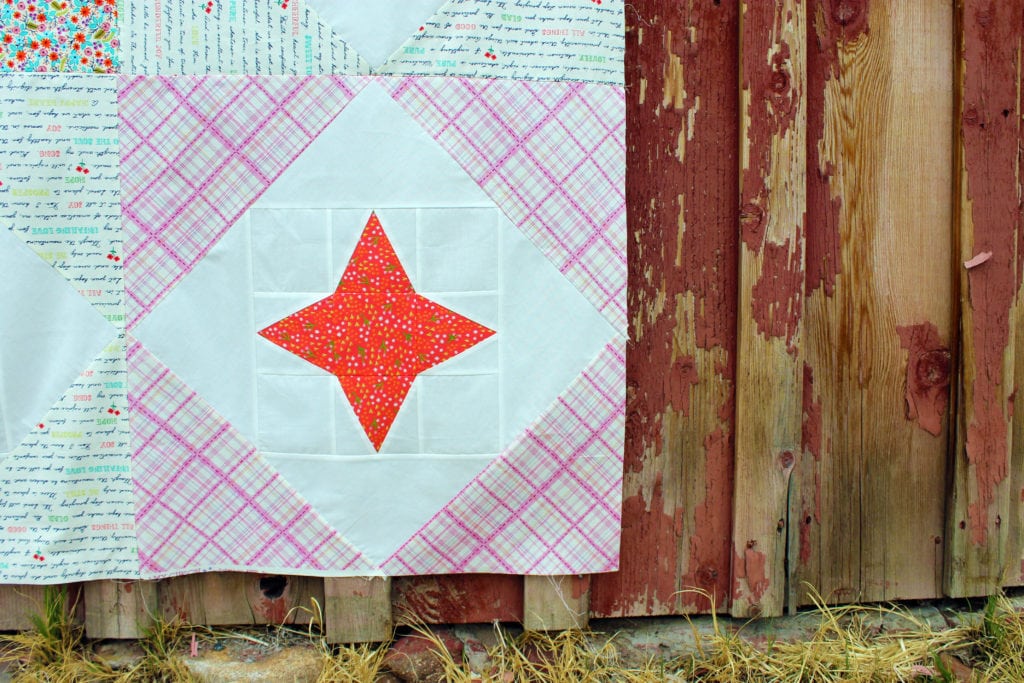
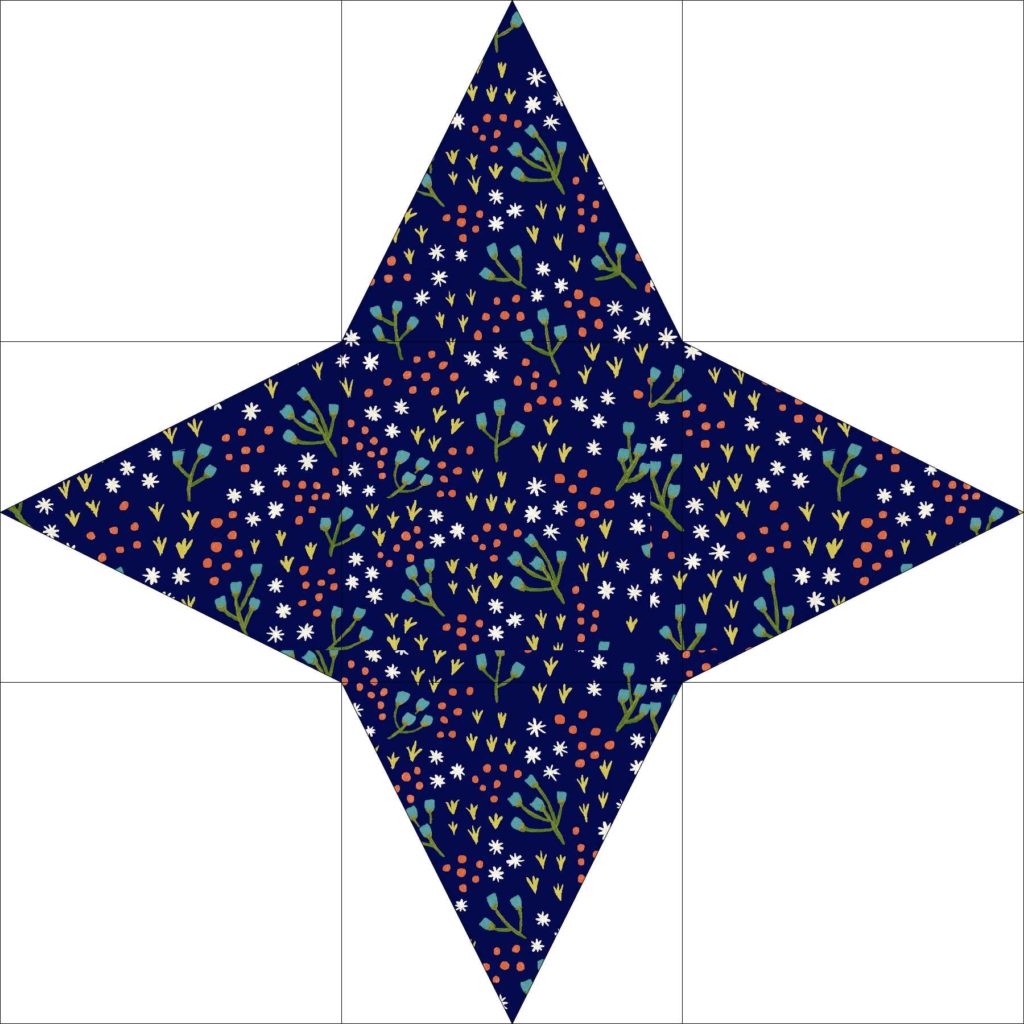
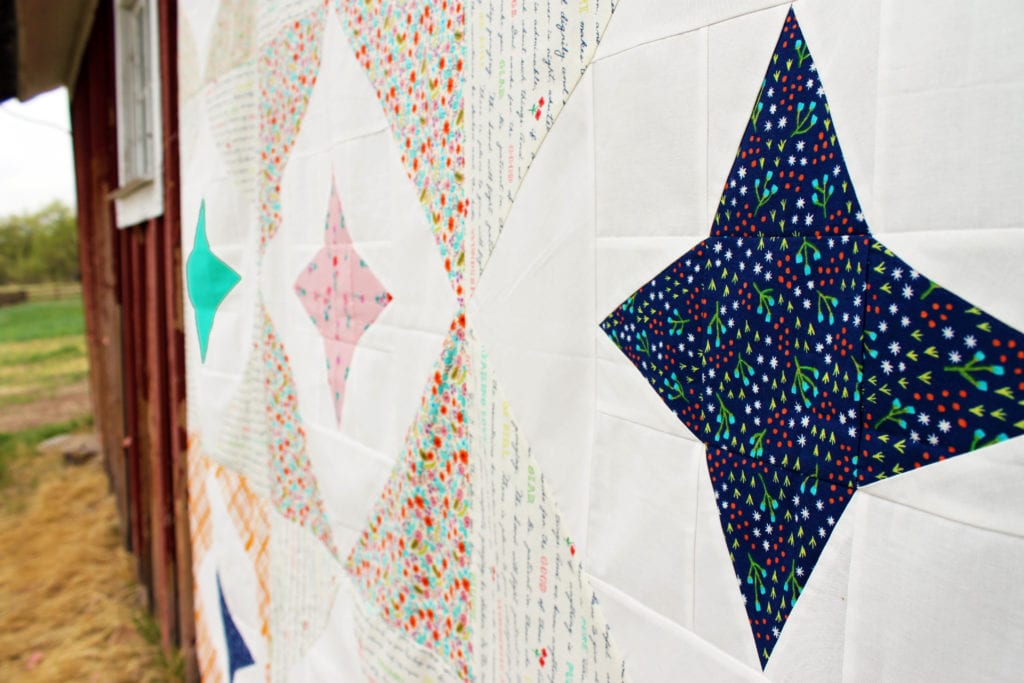 These simple 12’’ floating stars are super duper easy 9-patch blocks made from the quickest little foundation pieced triangles. They’re the perfect unit if you’re brand new to FPP (or even if you’re not!). Here’s what you’ll need to cut for the 9 star blocks-
For the Star Blocks:
- From the White:
- Cut (4) strips 4 ½’’ x WOF, then subcut into (36) 4 ½’’ squares
- Cut (6) strips 5 ½’’ x WOF, then subcut into (72) 5 ½’’ x 3’’ rectangles
- From each of 9 Colored Fabrics:
- Cut (4) 5’’ squares
- Cut (1) 4 ½’’ square
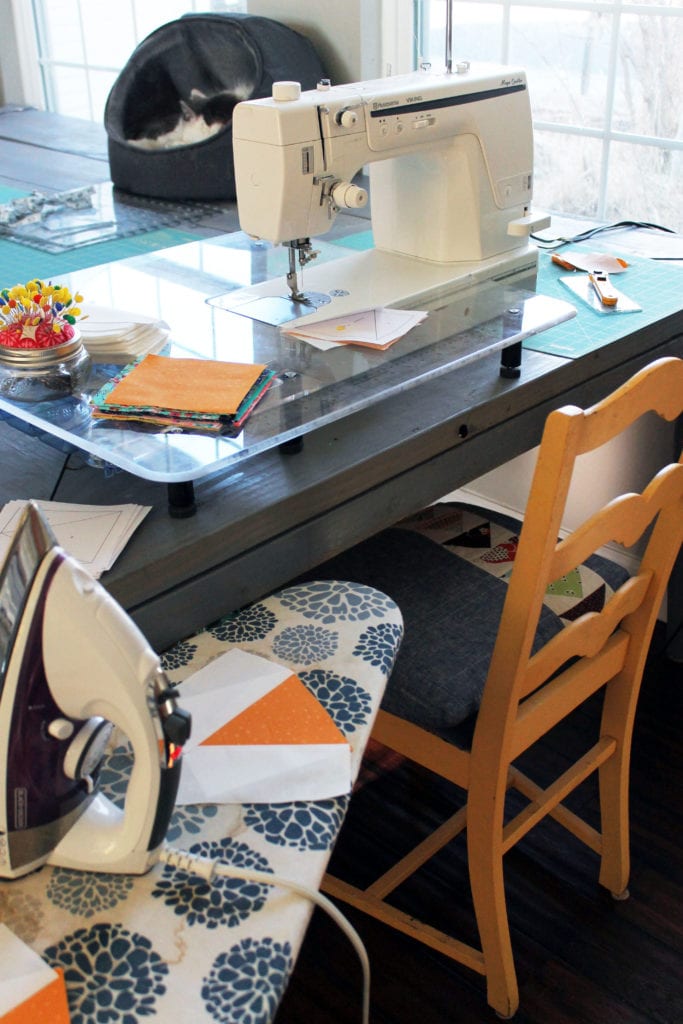
 Before we start piecing the blocks, I want to share a little tip that will help make your foundation piecing life so much simpler- If you can, temporarily arrange your workspace so that you can trim, stitch, and press without getting out of your chair. I know it sounds crazy! You might need to get creative, like moving in a little side table, lowering your ironing board. You also won’t need a huge cutting mat- just a little one, with a small ruler, will be perfect for the quick little trims you’ll be doing.
 I can’t tell you how much of a time saver this is! Instead of standing up and sitting down 999 times as you go through the steps for each unit, you’ll be sitting the whole time, getting a nice rhythm down, and speeding through the process.
Now on to the stitching!
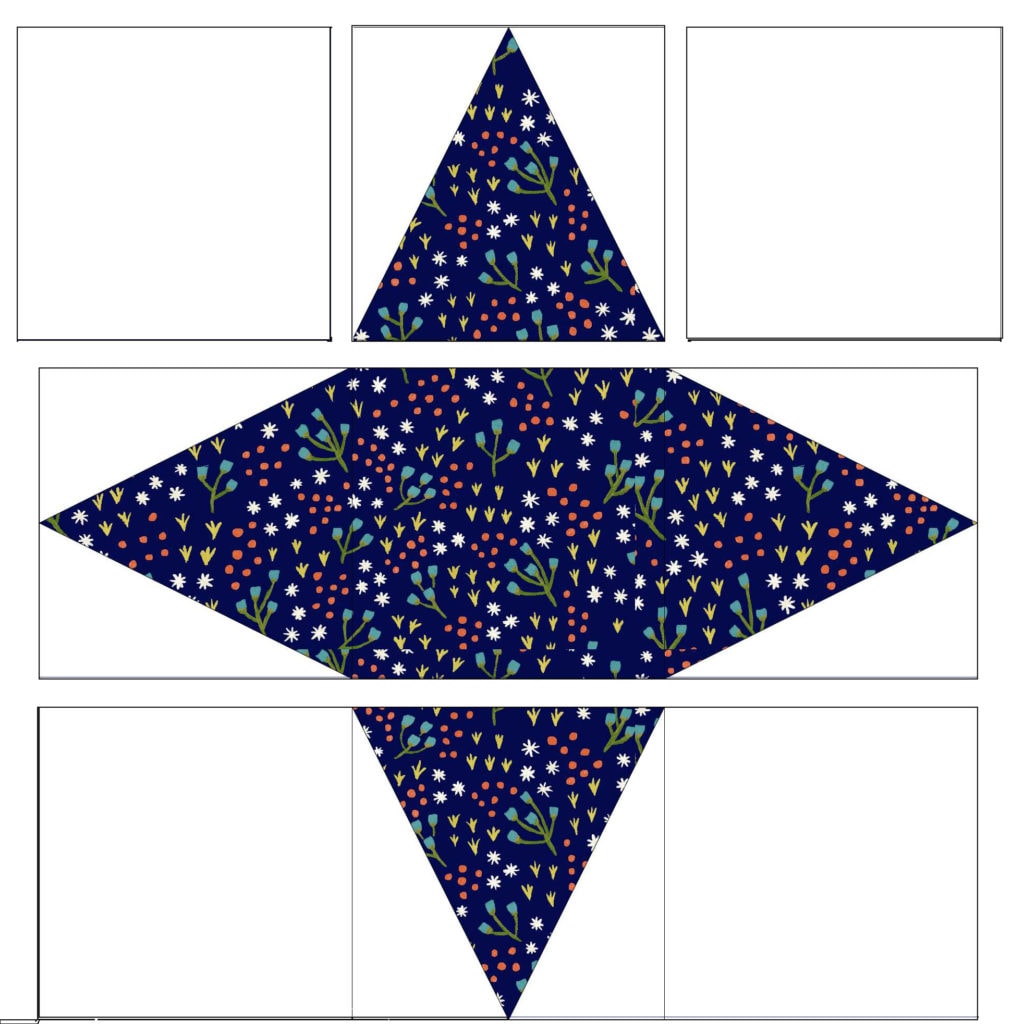
- Print 18 copies of the template page here.
- Cut out templates outside trim lines, and perforate the interior stitch lines with a tracing wheel or unthreaded machine stitch (I prefer the tracing wheel because it’s portable and so quick!).
- Reduce stitch length on your machine to 1 or 1.5 so that it’s easier to remove the paper in the last step.
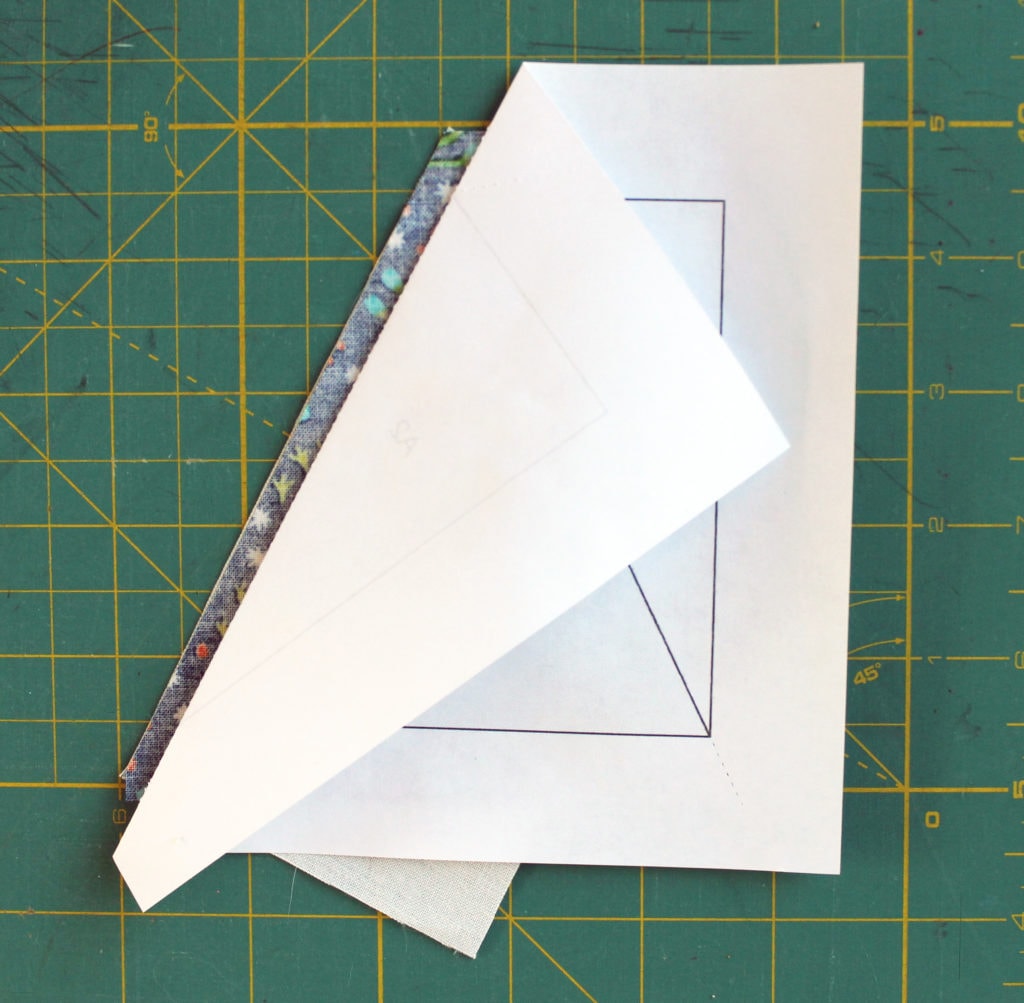
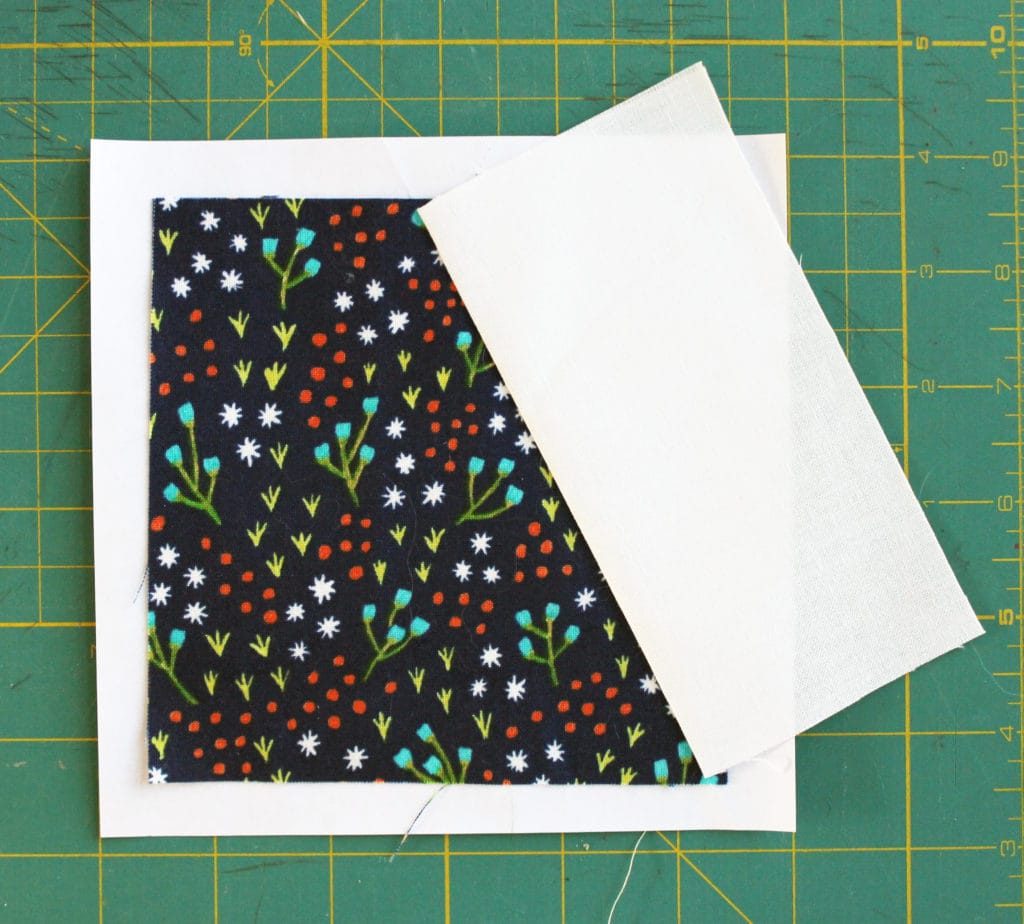
- Align one of the colored fabric 5’’ squares behind Patch 1, with the printed part of the paper facing you and the right side of the fabric facing away from you. The fabric should extend at least 1/4’’ outside all points of the patch. Hold your paper up to a light source to make sure that the fabric is centered underneath Patch 1, then secure it to the paper with a pin or dab of fabric glue.
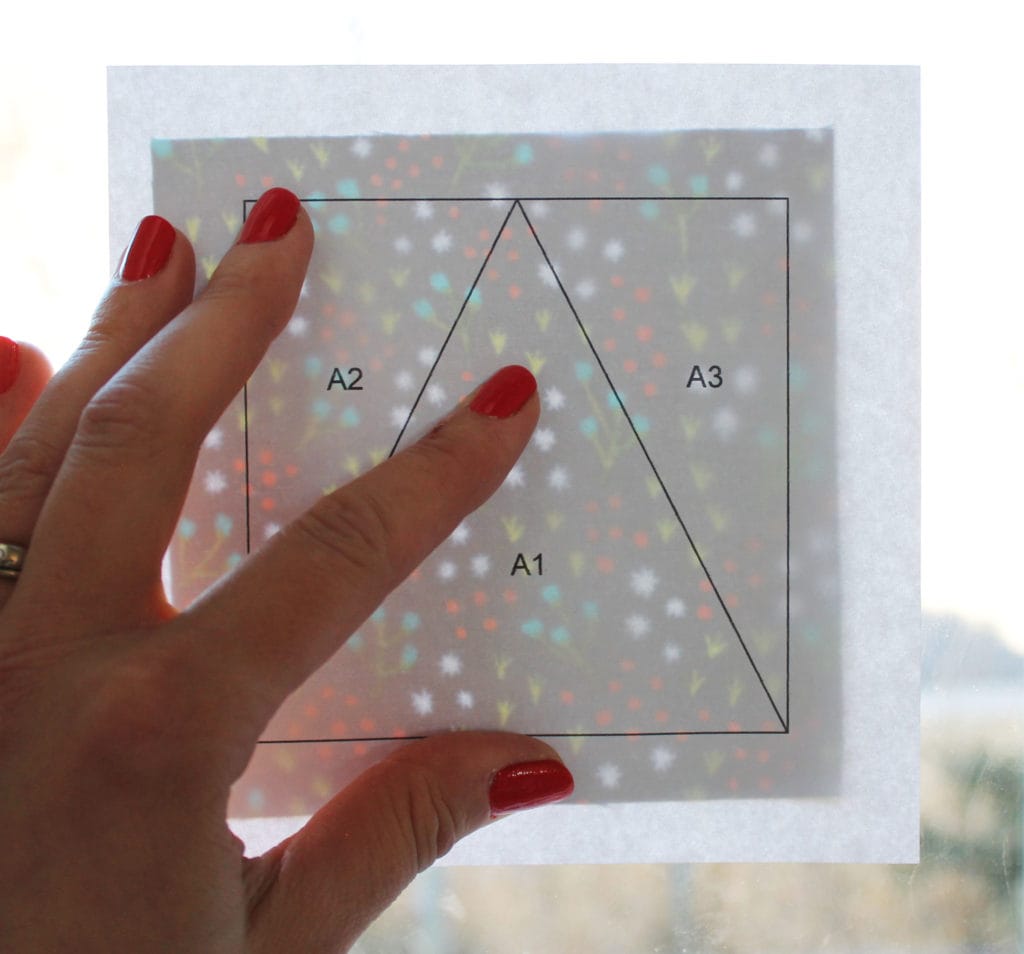
- Lay the piece on a cutting mat, and fold the paper on the perforated line between Patches 1 and 2. Align a ruler 1/4’’ past the fold line and trim.
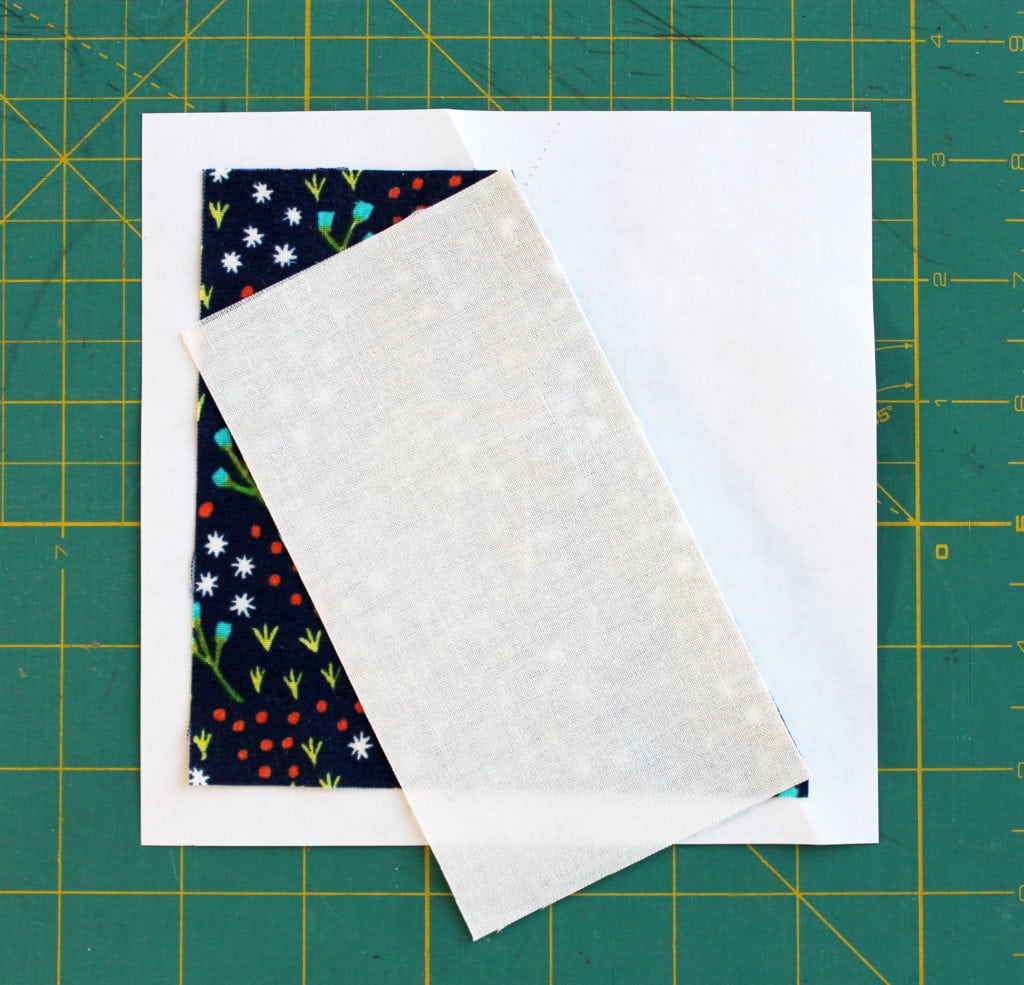
- With the paper still folded, align one of the 5 1/2’’ x 3’’ white rectangles under Patch 2, right sides of the fabric together, so that the top raw edges meet. Patch 2 is folded down toward you at this point and showing through to the wrong side of the paper. Just as before, make sure the fabric extends at least 1/4’’ past the edges of the patch on all sides.
(The photo below shows the back side of the piece in this step.)
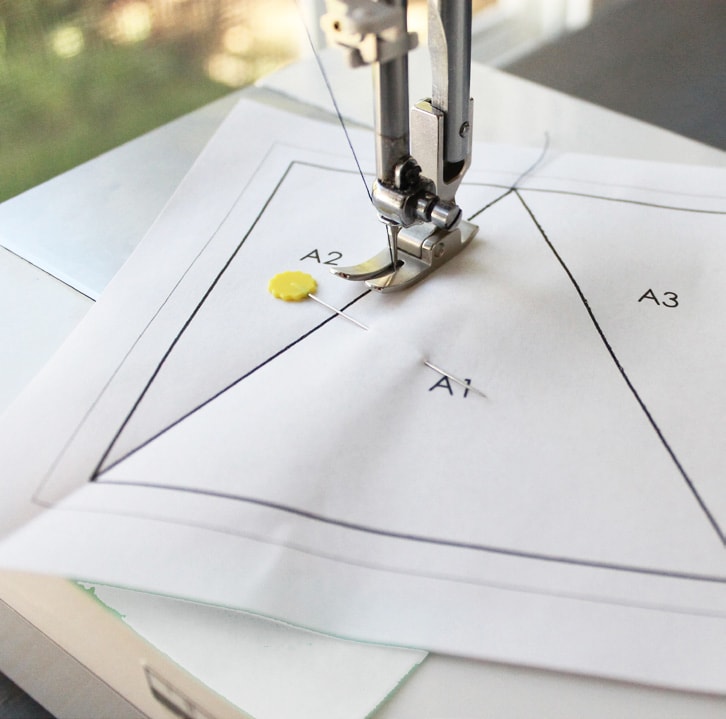
- With the printed side of the paper facing you, carefully hold these pieces in place as you unfold the paper, and add a pin. Now, stitch directly on the line between Patches 1 and 2, from beginning to end, removing the pin as you stitch. Flip piece over and press the white patch open.
Flip piece over and press the white patch open. Here’s what the piece looks like from the fabric side.
- Now flip back so the paper side is up, and begin this same process again for Patch 3, folding on the line between Patches 3 and 1, then trimming the seam allowance to 1/4’’.
Now line up a second white rectangle for Patch 3 (in the exact same way you did with Patch 2 in Step 6), then open the folded paper, pin, and stitch on the line.
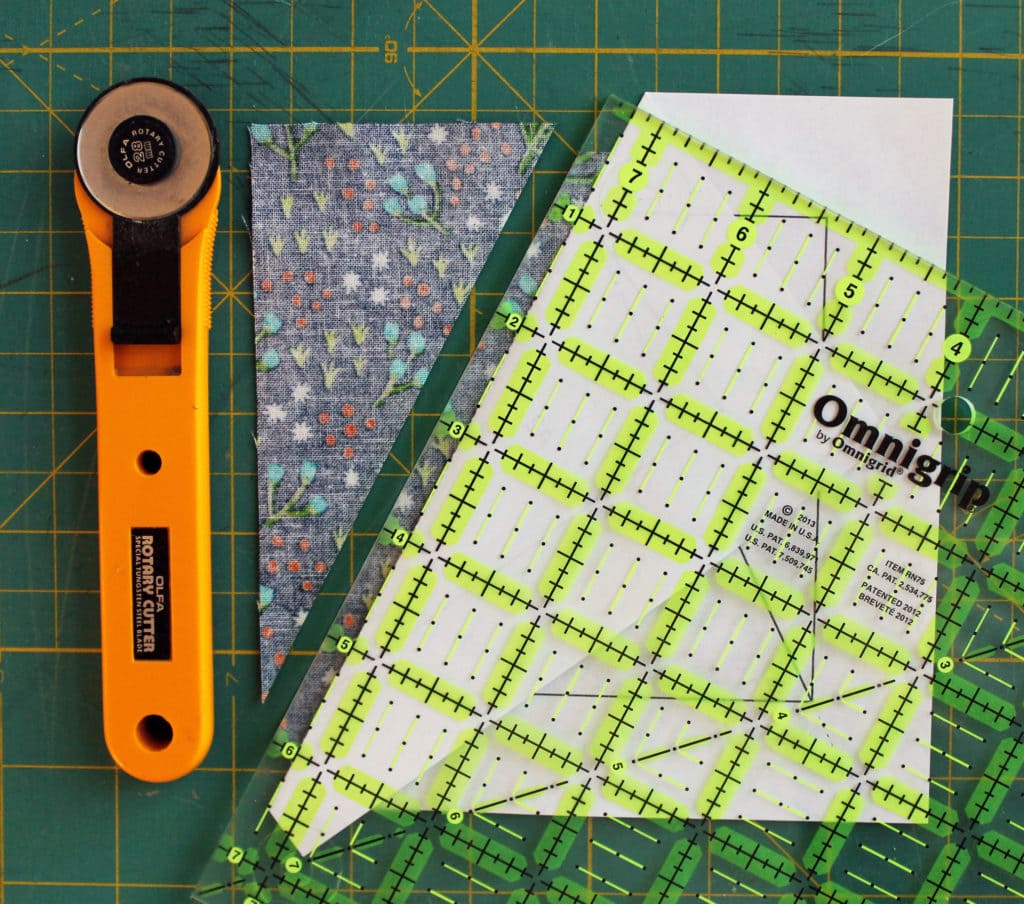
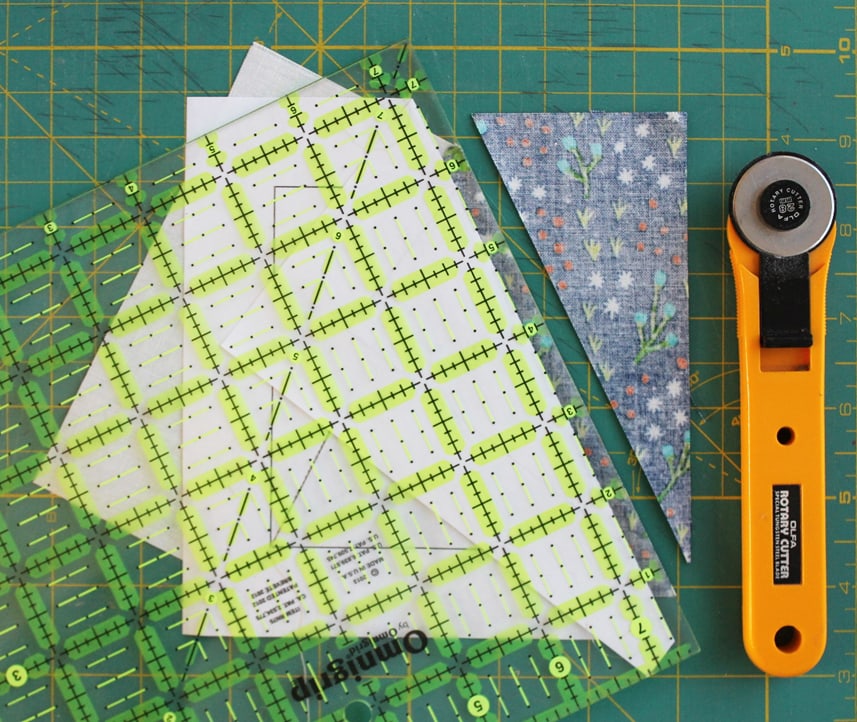
- Press your piece. Often times I like to use a little spray starch when I press these, to give the unit more stability since the edges are on the bias and are prone to stretch. Then with the paper side up, trim on the trim line around the entire perimeter of the square. If you have a 4 1/2’’ square ruler you can use for this, that’s perfect, though any ruler will do.
- And that it’s! Now just carefully remove the paper, one patch at a time. And your triangle unit is done!!!
Feeling overwhelmed? Maybe a little visual reminder of the steps to keep with you at your machine would come in handy? Feel free to download and print my foundation paper piecing cheat sheet to help out in case you get stuck and can’t remember what comes next.
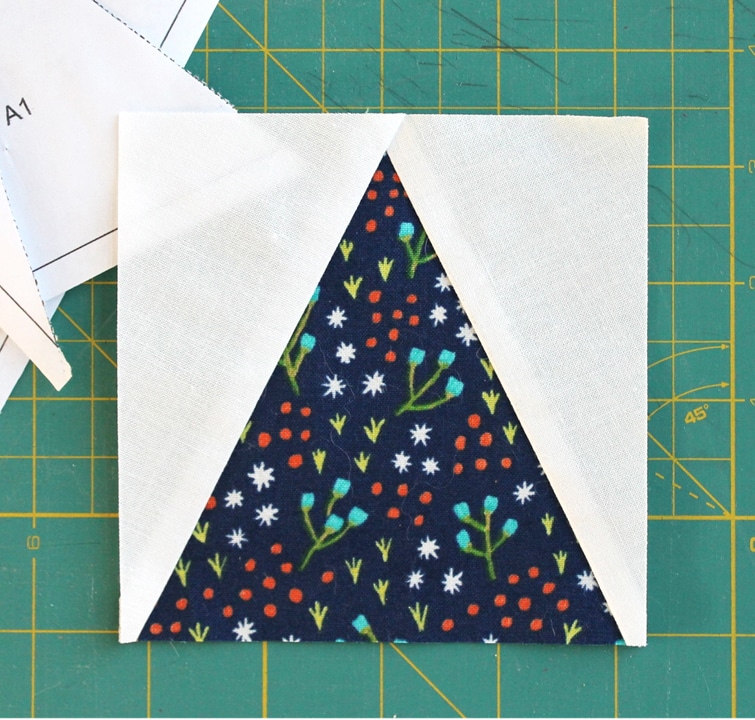
Use all of your 5’’ colored squares and white rectangles to piece 36 of these triangle units. From there, piecing the star blocks is super simple. Just lay out 4 same-print triangles with a same-print 4 1/2’’ square, along with (4) 4 1/2 ‘’ white squares, and stitch them into 3 rows of 3 units each. Press seams toward the unpieced squares. Then stitch the rows together, pinning at seam intersections.
Stitch up 9 of these blocks, then hop on over to page 142 of The Quilt Block Cookbook to frame up your blocks and stitch them into the final layout.
![]() We’d love to see your finished quilt!!! Post photos of your progress on Instagram with the hashtag #TheMeriwetherQuiltAlong so we can all see what you’re up to! Pop on over to my blog and say hi sometime – StitcheryDickoryDock.com or tag me on IG (@StitcheryDickory). I’ll be getting my top quilted here this month and will definitely be keeping you all updated!
We’d love to see your finished quilt!!! Post photos of your progress on Instagram with the hashtag #TheMeriwetherQuiltAlong so we can all see what you’re up to! Pop on over to my blog and say hi sometime – StitcheryDickoryDock.com or tag me on IG (@StitcheryDickory). I’ll be getting my top quilted here this month and will definitely be keeping you all updated!
Happy sewing, friends!
XO
Amy
14 comments
Link to template is not working.
Hello! Thanks for your patience. The template link has been fixed.
I’m really loving this new line of fabric. I have the book so I think as soon as I can buy this fabric I’ll join in!!!
Love your new fabric (those tiny flowers) and the quilt! I’ll have to try your method out one of these days – it looks so pretty. I’ve not worked with the paper foundation method so I’m not sure I can do it, but now I’m tempted. Thanks so much for sharing!
Error.. Template not found?
Anyone else experiencing problem?
We will ask Amy what happened to the template! 🙂
Paper Foundation Piece Template link does not work.
We will ask Amy what happened to the template! 🙂
The paper foundation piece template link still does not work.
Hello! Thanks for your patience. The template link has been fixed.
Lovely tutorial and the “cheat sheet” is great but I’m bummed the link to the template is still not working!!
Hello! Thanks for your patience. The template link has been fixed.
I would love to try this but template is still not working!!
Hello! Thanks for your patience. The template link has been fixed.