
Are you new to quilting or have a little one searching for something they can make? Your search is over! Rag quilts are multiple layers of flannel fabric sewn together in strips and clipped to create fringed seams and edges for a distinctive look. They make for the ideal, cozy project to finish in one day this fall and keep you extra warm.
Rag Quilts are perfect for beginners to make and are nice gifts for baby showers, birthdays, and holidays. Read on for a photo tutorial on making a One Hour Flannel Rag Quilt, PLUS a free video tutorial!
Flannel Rag Quilt Supplies
You’ll need a few things to get started, including:
- FREE One Hour Flannel Rag Quilt Pattern by It’s Sew Emma
- 7 one-third yard cuts flannel for the top
- 1.5 yards flannel for backing
- 1.5 yards of white flannel (for center layer)
- Walking foot for your sewing machine
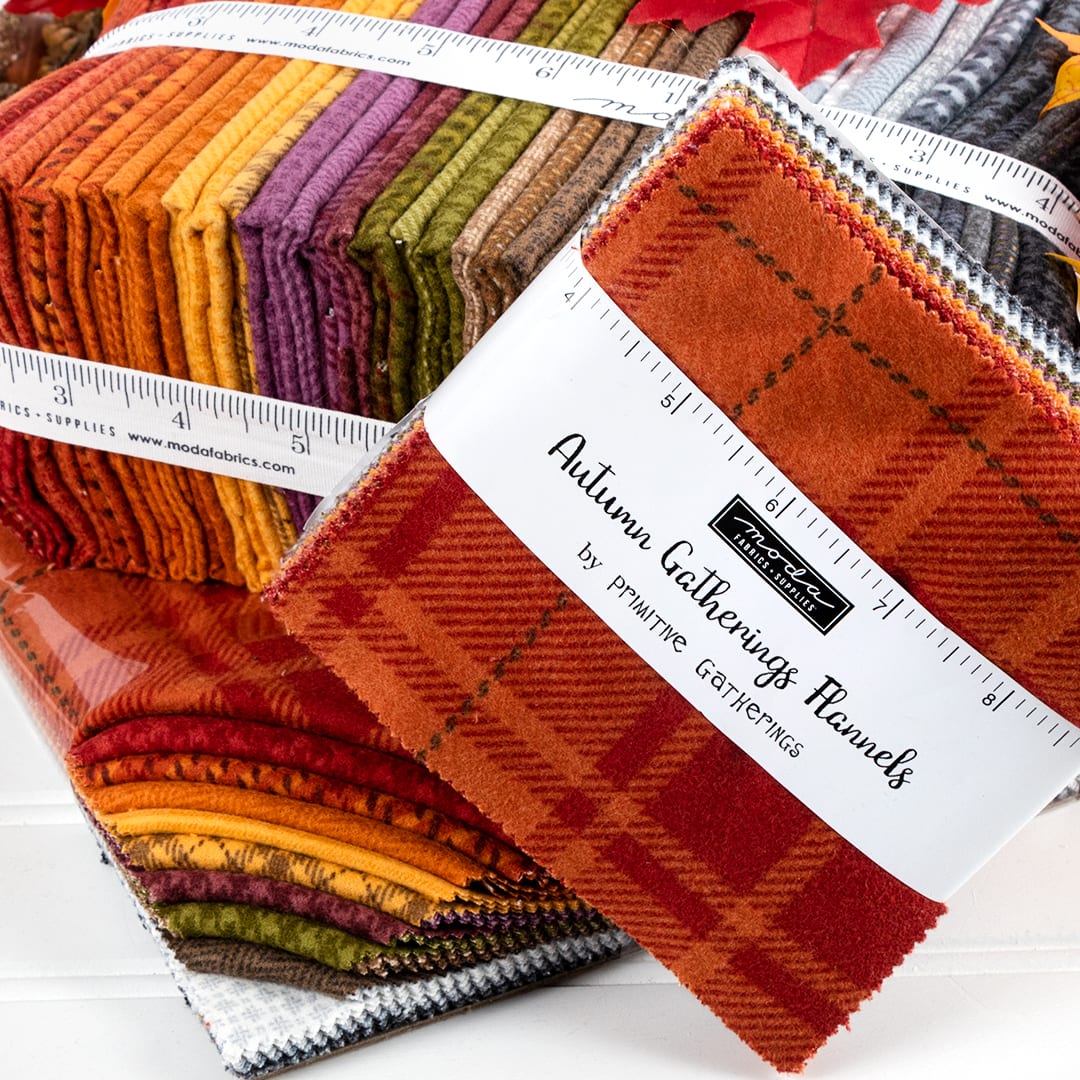
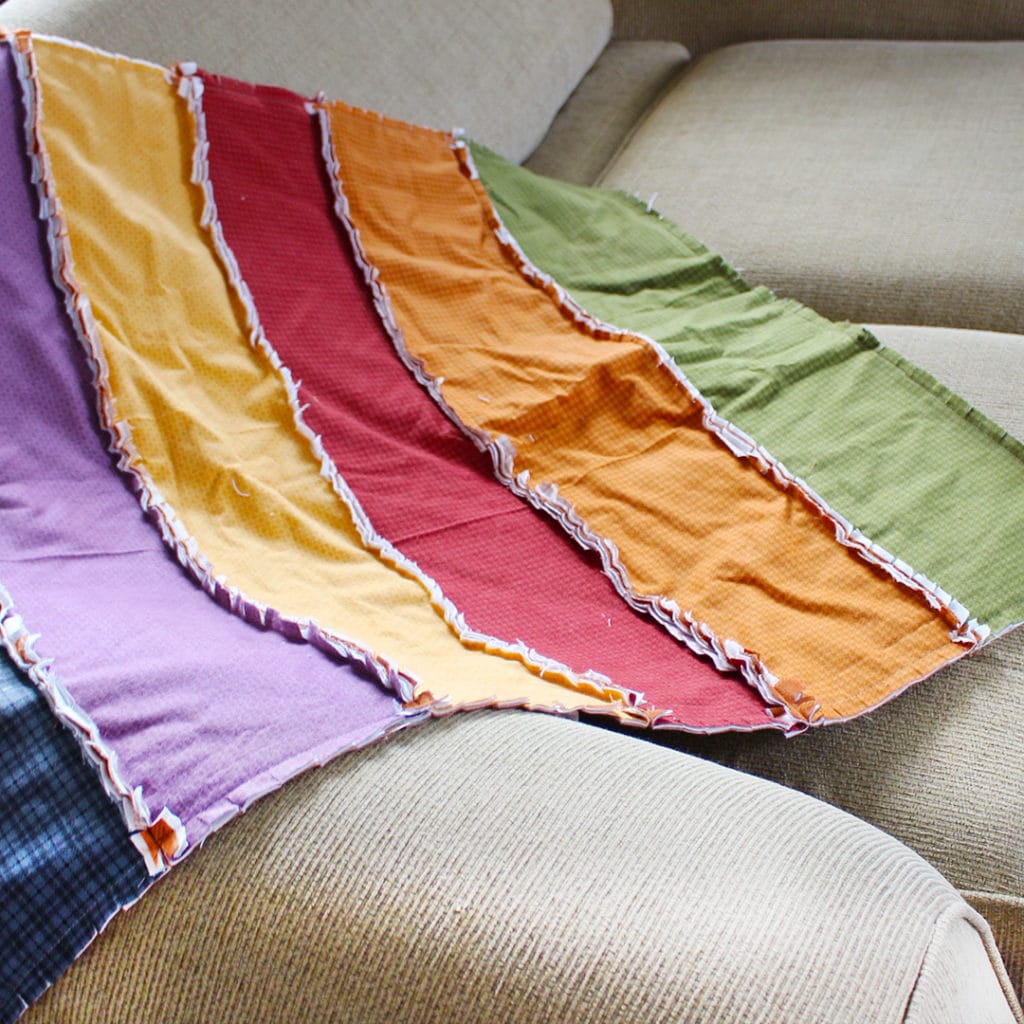
We’re using selections from the Autumn Gatherings Flannels Half Yard Bundle by Primitive Gatherings for Moda Fabrics. The deep autumnal colors made us think of pumpkin treats and cinnamon spice!
Our backing is also Autumn Gatherings Flannels in Butternut.
Instructions for Making a Rag Quilt
You’ll start by cutting several 7.5″ x width of fabric strips. You’ll need seven of your white or center fabric, seven strips of your backing fabric, and then seven other strips, and it’s up to you if they are all different fabrics or if there are repeats. We chose a mix of light and dark fabrics for the quilt top.
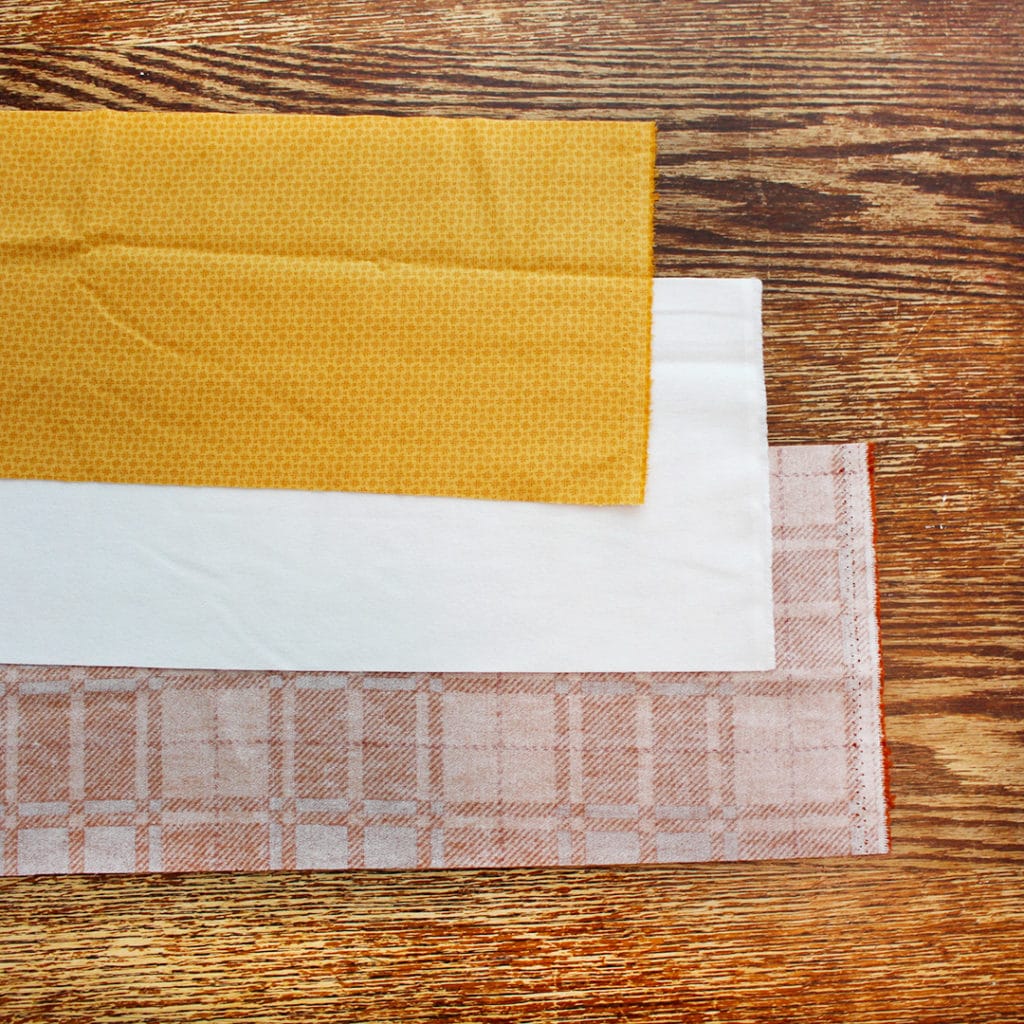
Next, you’ll make quilt sandwiches. To do this, lay your backing right side down, place your center fabric on top, and then your top fabric right side up. The white flannel is used in the middle of the quilt sandwich to give the quilt a little extra body and warmth.
Trim your sandwiches to 6.5″ x 34″, then you’re ready to start sewing! We are trimming to 6.5” x 34” for additional accuracy to ensure the edges are perfectly aligned. However, if your stack of 7.5” X 42” strips is neatly aligned, you can simply trim them to 7.5” x 34”. Your final quilt will be a little longer than the pattern indicates.
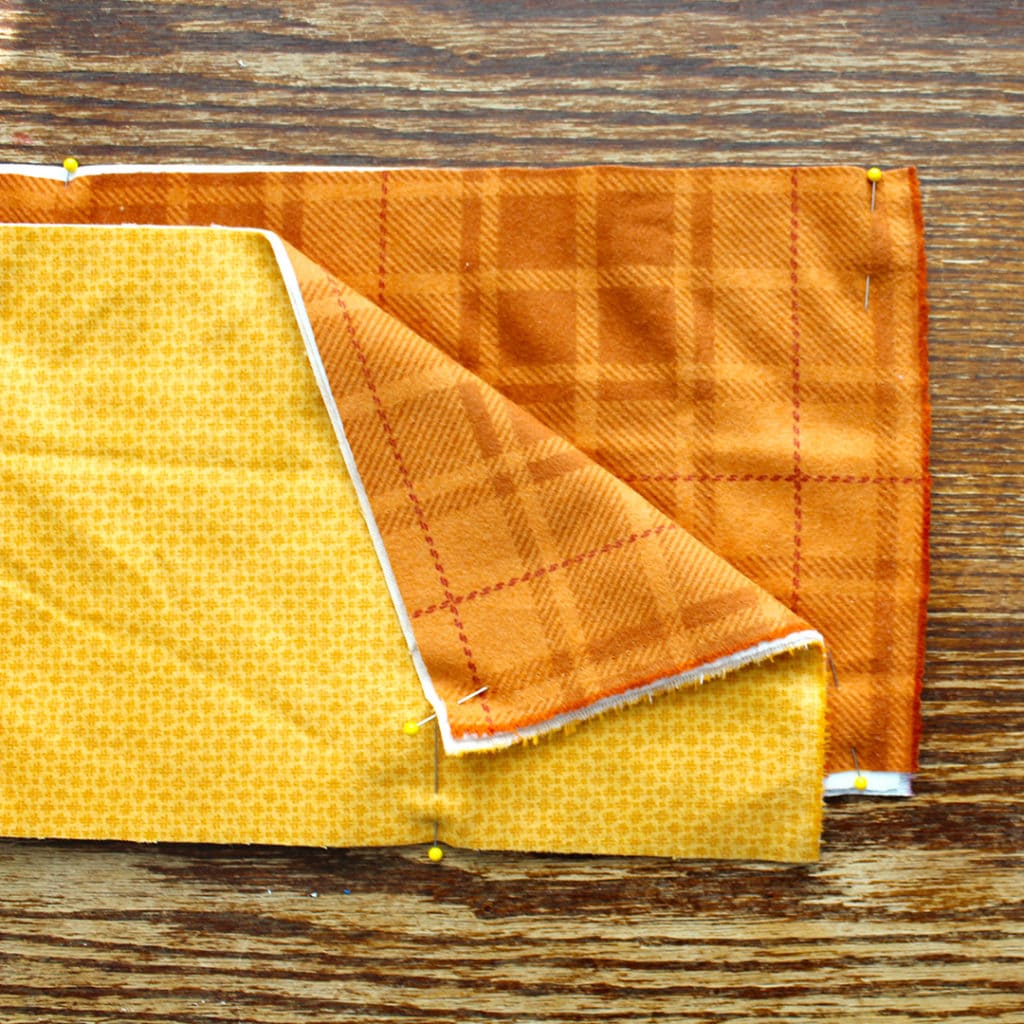
For this next step, you’ll place two of your quilt sandwiches together at a time, with the backing sides together.
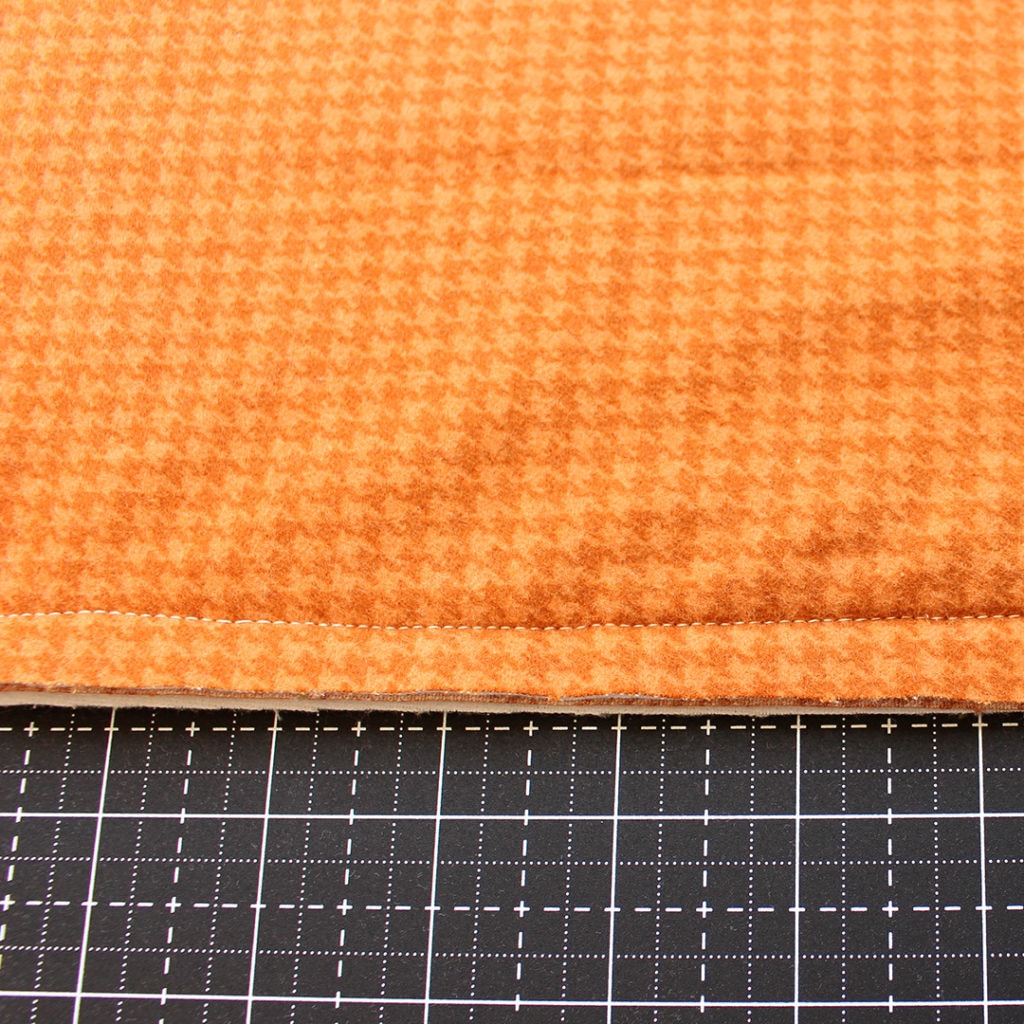
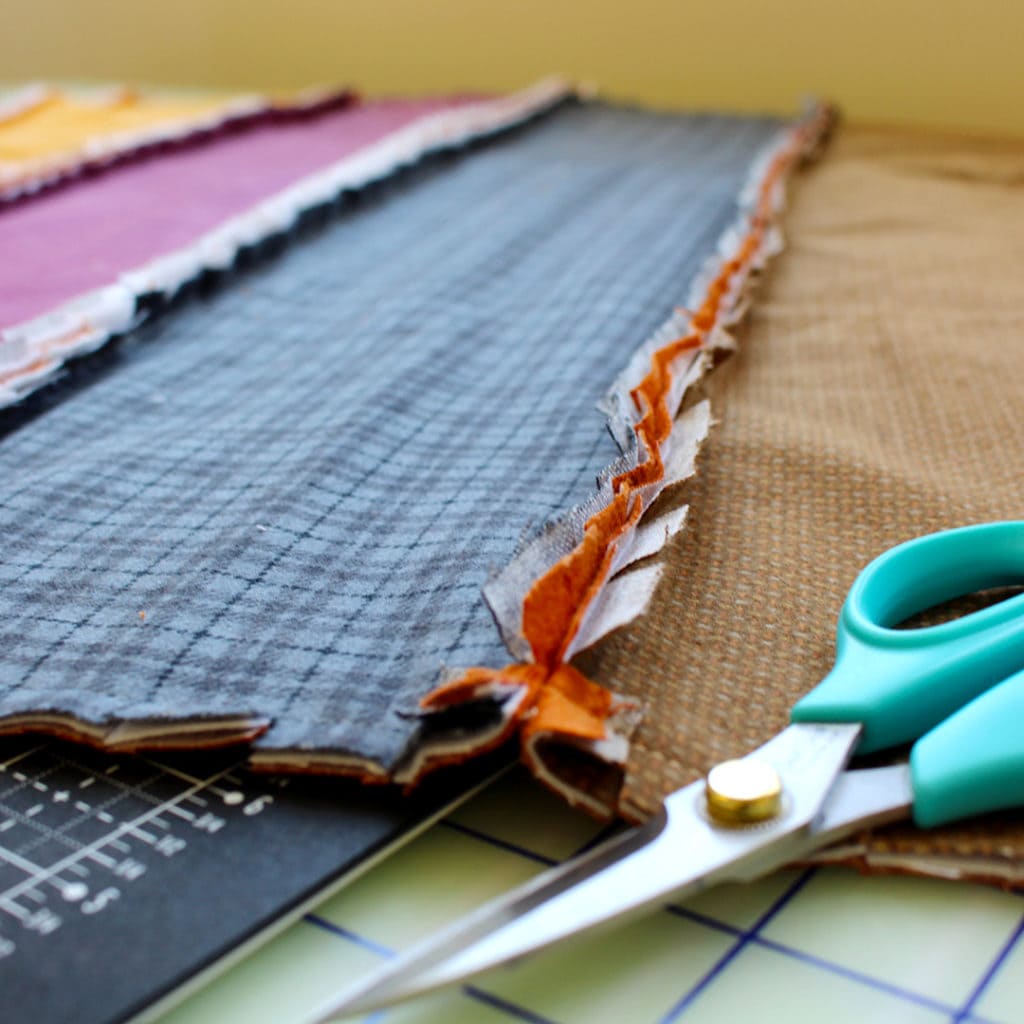
Next, sew these strips together with half-inch seam allowance, being sure to back stitch at the beginning and the end to secure the stitches. Back stitching is important because we’ll be cutting around the seam allowance, and this blanket won’t get the added security of all-over quilting.
Try a walking foot on your sewing machine to accommodate all the added bulk of the flannel layers.
Sew together all of your strips in this manner, and your quilt center should measure approximately 34″ x 39.5″ when all seven rows have been joined.
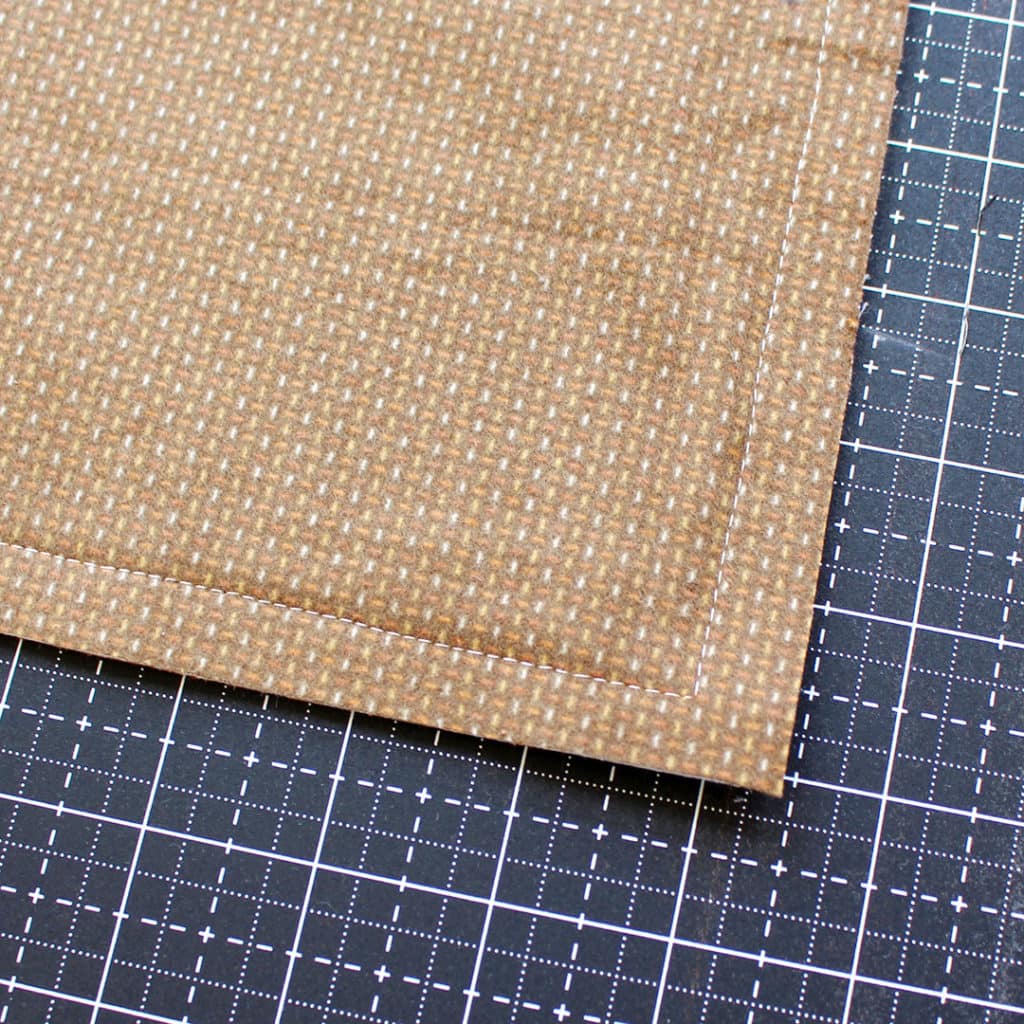
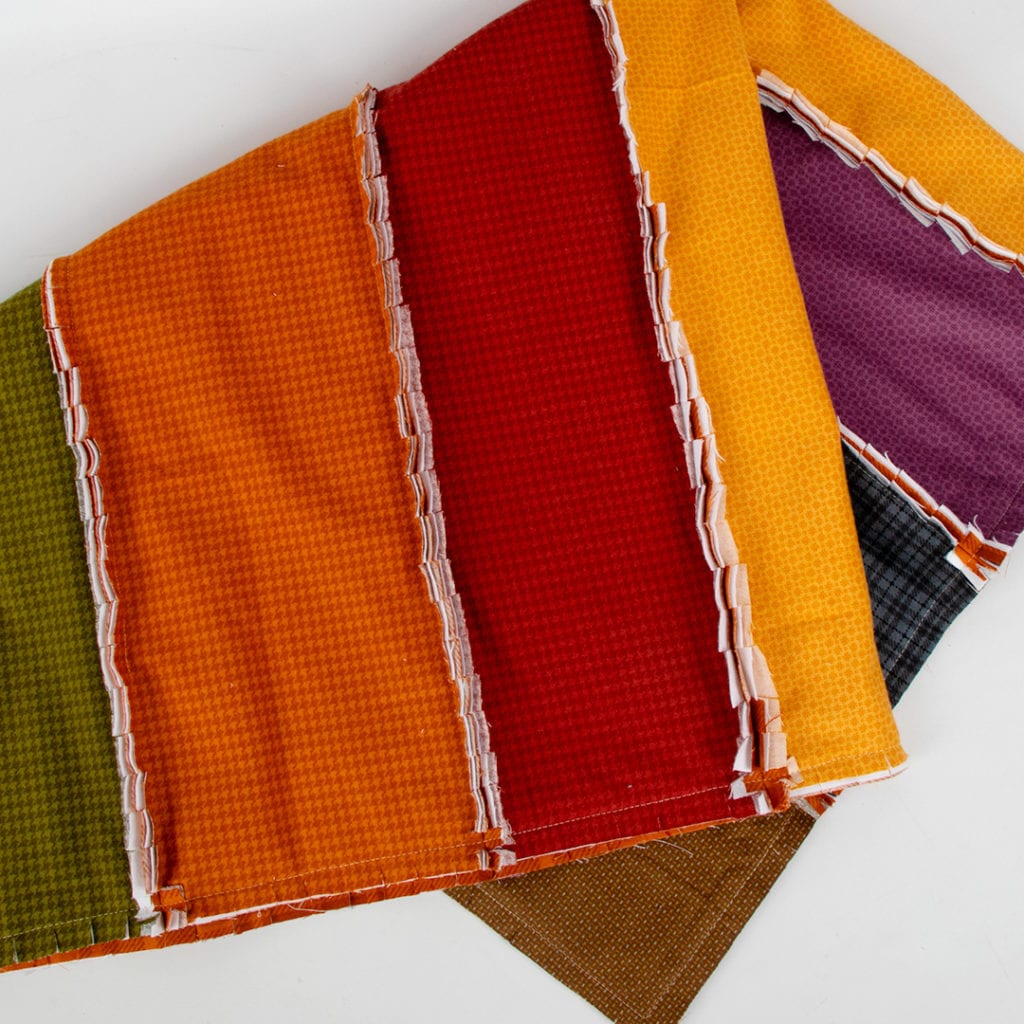
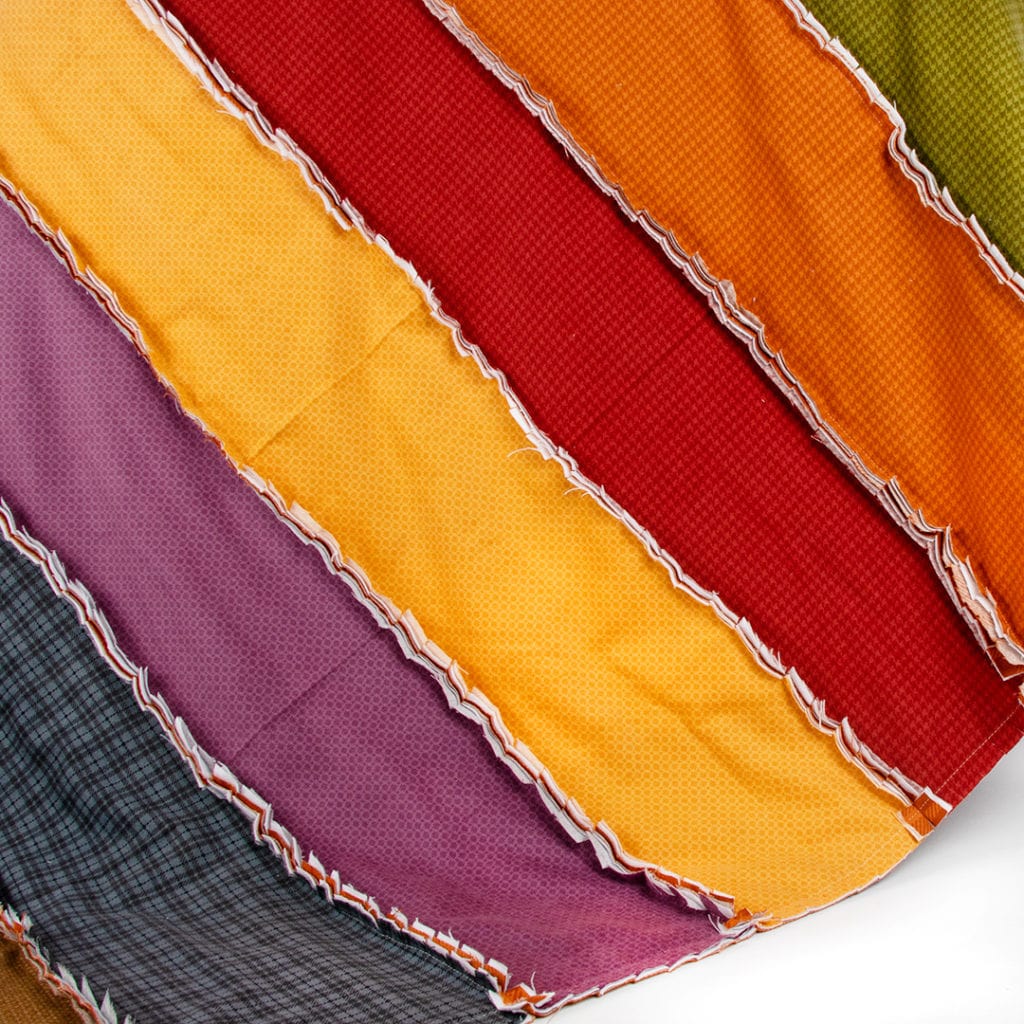
To finish, use a half-inch seam allowance and top stitch around all of the edges, finger pressing the strip seams open as you go. Finally, cut the fringe and edges every half-inch, careful of your stitches.
That’s it. You’re all done and ready to cuddle up with your new Flannel Rag Quilt!
Want someone to sew along with? Watch Kimberly make one in this How to Make a One Hour Flannel Rag Quilt video tutorial from the Fat Quarter Shop YouTube Channel.
If you want more DIY project inspiration, you can visit our tutorial page here on the blog to see more free tutorials. Fat Quarter Shop’s Pinterest and YouTube are full of tips, tricks, and video tutorials for all kinds of projects that you’ll enjoy making.
Share with #FQSFlannelRagQuilt
We hope you decide to make some Flannel Rag Quilts this fall, and if you do, be sure to share them with us on Facebook and Instagram using #FQSFlannelRagQuilt and tagging @fatquartershop so we can see and share your work!
Happy sewing!
Stay connected to Fat Quarter Shop!


4 comments
I’m a little confused. What is the purpose of cutting the strips at 7.5 and then cutting down to 6.5? Why not just cut them to 6.5 from the start? Sorry, feel like I’m missing something. Thank you for the tutorial!
Hi Donna!
We do the additional trimming to ensure accuracy and align all the edges as perfectly as possible. However, if you’d prefer you can leave the strips larger. It’s your quilt to make how you want!
Thank you for the tutorial and free pattern. I truly like using strips. Have always used square patches. Using strips seems so much faster, though I do like the looks of both styles — and I love that there is so much of the beautiful fabric to see rather than breaking it up into squares. I will be using your style next. Thank you for sharing.
I do have the same question as Donna C — i’ve been wondering the same thing myself.
And Kimberly, I absolutely continue to love your coloring choices.
Hi Barbra!
I just replied to Donna but wanted to reply to you as well. We did the extra trimming to ensure accurately aligned sides for the strips. Ultimately it is up to the quilter if they feel this step is needed or not.