This year’s FQS Stitch-tober was a spooky good time for 7 cross stitch-filled weeks! During that time, I stitched up Lori Holt’s Halloween 2020 Mix & Match border and so did many of you! I filled mine with my favorite seasonal patterns from Lori Holt’s Bee in my Bonnet Stitch Card sets and other cross stitch patterns by Lori.
Now, it is time to turn it into Halloween-inspired decor! Lori had the perfect finishing idea and I will show you how to finish it step-by-step.

I stitched my piece using the Lori Holt Halloween 2020 Mix and Match DMC Thread Pack and Overcast 25 Count Lugana Vintage Cross Stitch Cloth by Lori Holt for Zweigart.
Cross Stitch Finishing Supplies
Supplies to Finish Your Frame

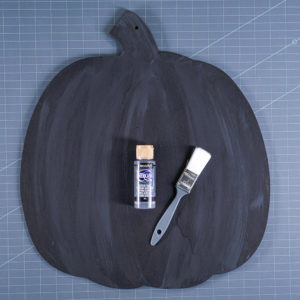
I picked up a wooden pumpkin décor board from Hobby Lobby to use as the base! You can use Lori’s finishing technique on the same pumpkin board or any flat object that gives you the shape and style you want.
- Unfinished wooden pumpkin décor board from Hobby Lobby (not available online)
- Black Acrylic Paint and Gray Acrylic Paint
- Foam Brush and Bristle Brush
- Medium grit sanding sponge
Supplies to Mount Your Cross Stitch
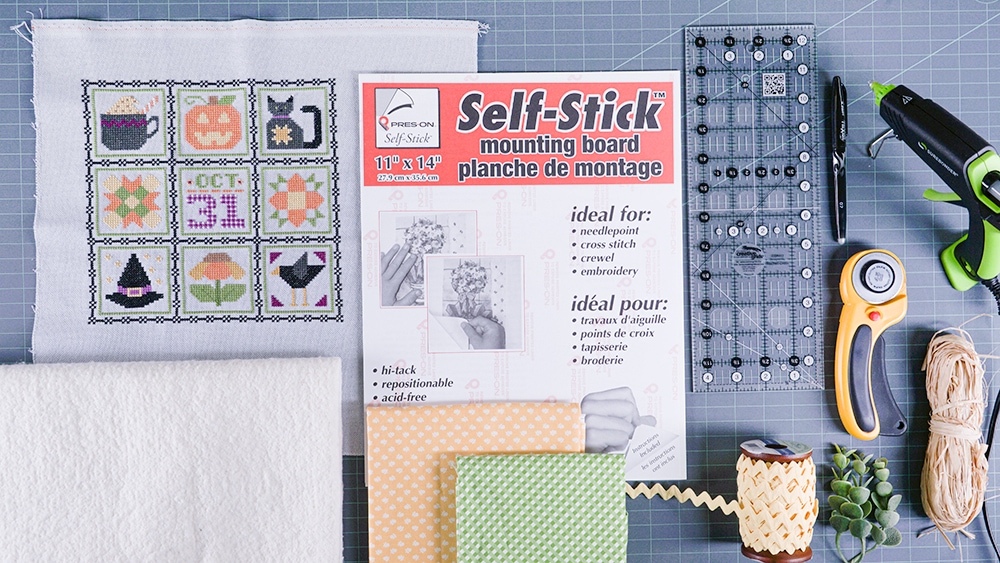
You will likely have many of these supplies in your crafting room already. I use these supplies for finishing my cross stitch all the time.
- Your cross stitch piece
- 2 pieces of 11” x 14” Pres-On Mounting Sticky Board
- ½ yard of Autumn Love Green Gingham by Lori Holt
- Scrap of Prim Daisy Posy by Lori Holt
- Scrap of Happy Cloud Batting
- Beehive Large Vintage Trim by Lori Holt
- Raffia and Foliage for embellishment
- Full Size Dual Temp Glue Gun by Surebonder and Glue Sticks
- Black Frixion Ball Erasable Gel Pen
- Creative Grids 4.5″ x 12.5″ Quilting Ruler
How to Finish Your Pumpkin Frame
Painting the pumpkin is so easy! Lori is known for her vintage flair so we captured that signature look using this technique.
1. Using the foam brush, paint the entire pumpkin black.
2. Using the bristle brush, lightly dry brush the pumpkin with gray paint for mottling.
3. Once the paint is fully dry, distress the edges of your pumpkin with a medium grit sanding sponge to achieve that vintage look.


How to Finish Your Cross Stitch
This step-by-step tutorial covers everything I did in detail. Let’s get started!
Mounting the Cross Stitch Piece
1. Take your stitched piece, a Creative Grids ruler, and a Frixion pen to draw a line on the back of your piece a half-inch away from your stitching on all four sides. Lori decided that a half-inch would look best!
2. Measure the drawn square and it comes out to approximately 9.25” x 9.5”, so cut the sticky board down to this size.


3. Peel off the liner on the sticky board and place the sticky side to the batting. Cut around the sticky board so that the batting is flush to the edges.


- Trim outside of the drawn line about 1” on the stitched piece, which is plenty of room to pull the fabric to the back of the sticky board.
- Then take the sticky board that has batting on it and place the batting right side down within the drawn lines on the backside of the stitched piece.
TIP: Use Wonder Clips to hold the fabric before you hot glue to check the placement on the front.
- Apply hot glue directly on your sticky board and pull your fabric to the back, finger pressing it down. I recommend starting with the top and bottom and then repeat on the left and right side.

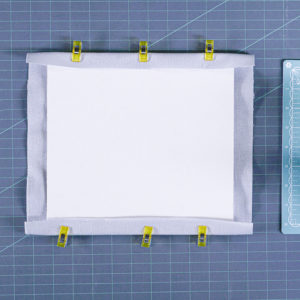


Now my piece is nice and straight! Up next is mounting the fabric piece, which I think is the easiest part.

Mounting the Fabric Piece
- Lori picked a gingham fabric and she wanted to see the green pop on the pumpkin. She decided to leave 0.75” around all sides of the fabric piece to frame the stitch. To do this, take the measurement (in this case, 9.25” x 9.5”) of the mounted stitch piece and add 0.75” on all sides. Cut the sticky board at 10.75” x 11”.
-
After playing around with the gingham placement, Lori chose to put the gingham on the bias. I chose not to add batting to this step.
-
Peel off the liner on the sticky board and place the sticky side to the wrong side of the fabric making sure the gingham is straight. Cut about 1” away from the sticky board. Apply hot glue directly on your sticky board and pull your fabric to the back, finger pressing it down. I recommend starting with the top and bottom, and then repeat on the left and right side.


<
p style=”background: white; margin: 0in 0in 15.0pt 0in;”>It is time to add trim! Lori auditioned her vintage trim colors and sizes with the fabric and stitch piece, and she chose the Beehive Large Vintage Trim.
4. On the backside of the stitch piece, hot glue the vintage trim starting on the bottom. Use the “valley” of the vintage trim as a placement guide.
5. When you get to the corner, fold back the vintage trim and miter the corner. Continue around all four sides and exceed a half-inch past your start.


Putting It All Together
This is my favorite part! I finally get to see the finished look and I love how it turned out.
1. Center the mounted stitched piece on the fabric piece and hot glue it down.
2. Center your mounted stitched piece leaving room at the top for a bow and hot glue it down.


3. For the embellishment, rip a strip from your scrap fabric piece to make a ragged bow, and Lori added a touch of raffia and foliage for a vintage look! Hot glue all three pieces to the painted pumpkin and finish off with a piece of twine to hang.


I am all done! Lori and I hope you enjoyed turning this WIP into a beautifully done Fully-Finished Object. I know I cannot wait for my next finish and I would love to see yours.
Keep up with us on social
Show me your FFO’s on Facebook and Instagram. You can share with #fqscrossstitch. Be sure to tag @fqsxstitch and @beelori1 so we can see and share your work! Get updates from Lori Holt on her blog, Bee in My Bonnet, her YouTube Channel and her Instagram.
Stay connected to FQS!