
An FFO is a “Fully Finished Object!” This means that our stitchy projects have been completely finished, whether they are framed, decorated, and ready to be put on display! Finishing your stitched art can take some time, and it is definitely going the extra mile. Sometimes life gets so busy that our UFO’s (Un-finished Objects) never become FFO’s!
Well for February 2021, we are trying to stay on top of all our cross stitch projects and Fully Finish them…ALL! This month we compiled our Top 5 Finishing Videos that you can use to finish all those stitched pieces you have! You can also find more of our cross stitch finishing videos on our Fat Quarter Shop FlossTube Channel. Make February the month to FFO your UFO’s!
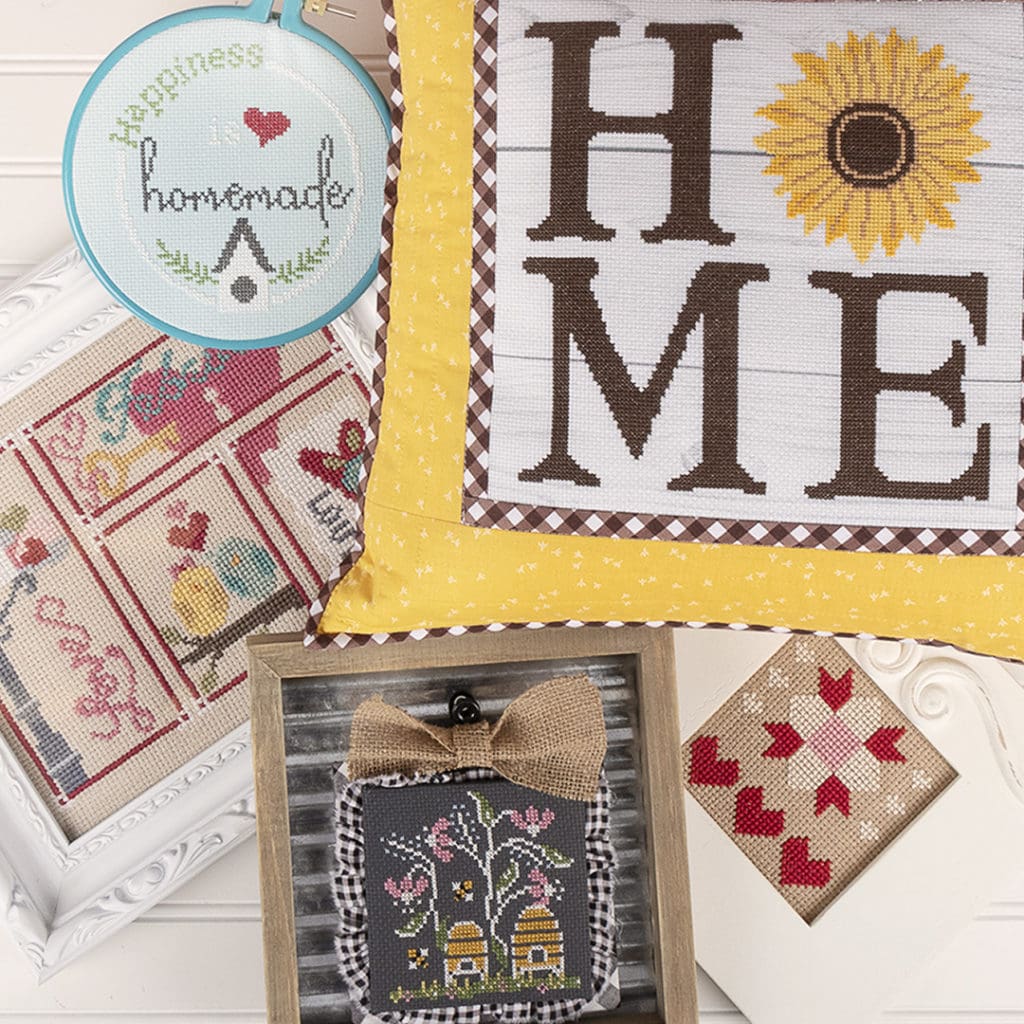
5. How to Frame Cross Stitch
In this tutorial, Kimberly shows you how to finish the Snapshot patterns from our new club into a frame with the option to use glass or not. This finishing is super quick and easy, and your cross stitch will be ready to display in no time!
If you are reading via email, please click here to watch the video.
Supplies You’ll Need
- Snapshot Cross Stitch Club Fat Quarter Shop Exclusive in collaboration with Pine Mountain Designs
- Snapshot Cross Stitch Patterns
- It’s Sew Emma 0.75″ x 10yd Cross Stitch Finishing Tape
- 8″ x 10″ Pres-On Mounting Sticky Board
- 10″ Squares – 12 Pack of 80/20 Silky Blend Happy Cloud Quilt Batting
- 8″ x 10″ frame from Hobby Lobby
4. How to Finish Cross Stitch in a Hoop
In this video, Kimberly will be teaching you how to finish your cross stitch using the Happiness is Handmade pattern, a hoop, and sticky board. You won’t even have to take your cross stitch out of the hoop for this finishing!
If you are reading via email, please click here to watch the video.
Supplies You’ll Need
- Happiness is Homemade Downloadable PDF Cross Stitch Pattern | Fat Quarter Shop Exclusive
- 6″ Hobby Lobby hoop
- 8″ x 10″ Pres-On Mounting Sticky Board
- It’s Sew Emma 0.75″ x 10yd Cross Stitch Finishing Tape
3. How to use Sticky Board to Wrap Cross Stitch project around edges
In this video tutorial, Priscilla and Chelsea, The Real Housewives of Cross Stitch, taught us how to use a sticky board to wrap and display your cross stitch finishes!
If you are reading via email, please click here to watch the video.
Supplies You’ll Need
- Queen Bee Flower Farm Chalk on the Farm Cross Stitch Pattern by Hands on Design
- Pres-on Mounting Sticky Board
- Paper cutter
- Happy Cloud 80/20 Silky Blend Quilt Batting
- Glue Gun
- Vintage Large and Small Trim 12 yrd spools
2. How to Finish Cross Stitch In A Simple Frame
Kimberly shows you how to frame your cross stitch using the Quilty Love pattern, an open frame and sticky board. This tutorial gives you a quick and easy way to finish your cross stitch into a simple frame!
If you are reading via email, please click here to watch the video.
Supplies You’ll Need
- Quilty Love by Lori Holt Cross Stitch Pattern
- Small 4″ Square Vintage Frame
- Pres-on Mounting Sticky Board
- Double Sided Stitchery Tape 60′ Roll
- Happy Cloud Batting
1. How to Turn Cross Stitch Into a Zippered Pillow
Kimberly shows you step-by-step directions on how to transform your cross stitch into a beautiful pillow with a zip closure. In this video we take the Home Grown Cross Stitch Pattern, add fabric borders and backing to make it into a pillow. In this video you’ll learn how to add fabric borders, baste, square up your corners, make a zippered pillow back and make and attach bias binding. Watch this free tutorial to see a versatile technique you can use to set any of your cross stitch pieces into a pillow.
If you are reading via email, please click here to watch the video.
Supplies You’ll Need
- Home Grown Downloadable PDF Cross Stitch Pattern
- 1/2 Yard of Medium Cotton Gingham Brown Yardage
- 1/2 Yard of Farm Girl Vintage Honey Chicken Track Yardage
- Dream Fusible 80/20 Craft Quilt Batting
- White 24″ Handbag Zipper
Share with #FFOFullyFinishedFebruary
We hope you decide to make February the month to fully finish your cross stitch projects. If you do, be sure to share it with us on on Facebook and Instagram using #FFOFullyFinishedFebruary and tag us @fqsxstitch so we can see and share your work!
Happy Stitching!
Stay connected to FQS!


1 comment
Great video! Very detailed for all steps of the project. Basics can be applied to any pillow made starting with a cross stitch project. Thank you Kimberly.