
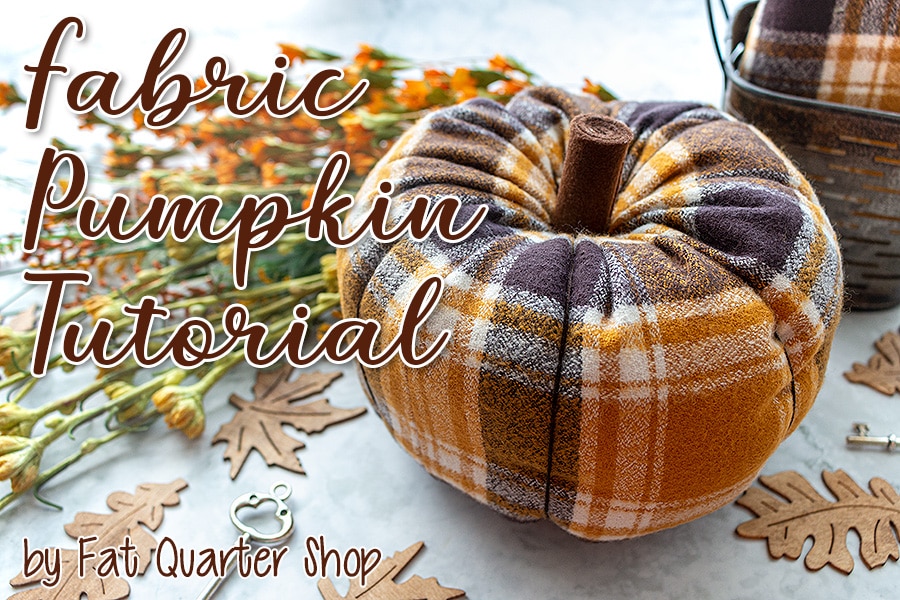
Everything is coming up Pumpkins here at Fat Quarter Shop! We are sew excited to share a new, quick tutorial with you today … DIY Fabric Pumpkin! With a fat quarter of fabric and a few other supplies, you can make one too. My cute fabric pumpkin finishes about 6.5″ wide x 6.5″ deep x 5″ tall.
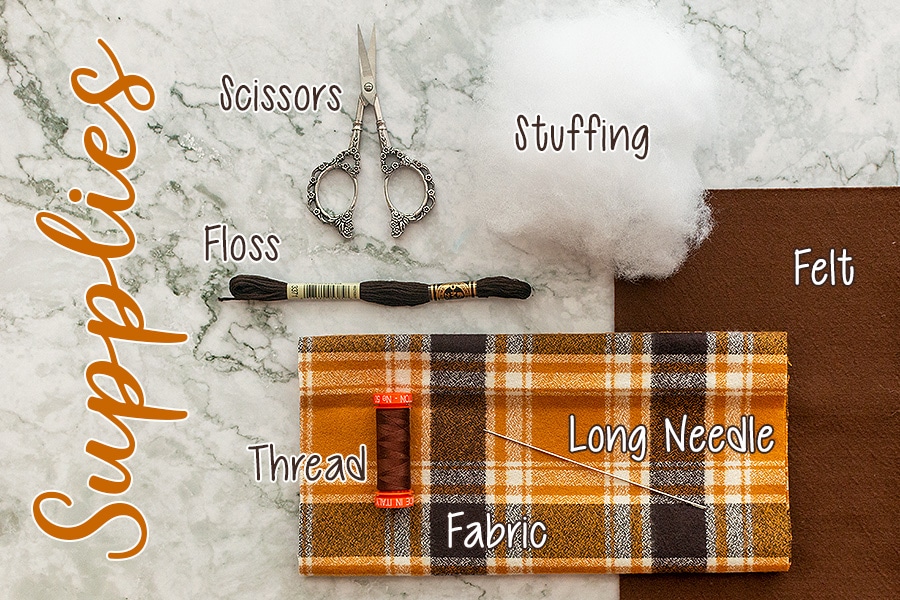
Supplies:
-
- Fat quarter of fabric (Mammoth Flannel Saffron Buffalo Graph SKU# 17605-141)
I think Mammoth Flannel White Small Checkered SKU# 16943-1 would look really great also! - Felt
- Embroidery Floss (DMC 3371)
- Stuffing or FiberFill
- Scissors
- Size 4 Embroidery Needle
- Really long needle (Dritz 5″ Doll Needles)
- Ruler
- Glue Gun
- Fat quarter of fabric (Mammoth Flannel Saffron Buffalo Graph SKU# 17605-141)
Instructions:
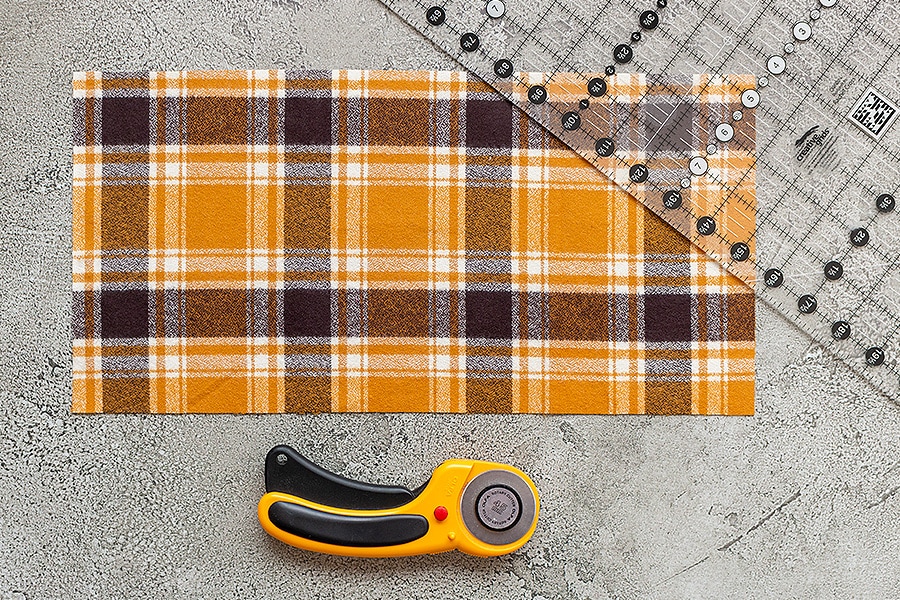 We are making a large fabric pumpkin today, so we are going to cut our fabric to 10” x 20”. You can make these cute little gourds any size you would like, just cut the length double the width!
 With right side facing, fold the fabric in half along the short edge. Using a 1/4” seam, sew the side opposite the fold closed. Press open.
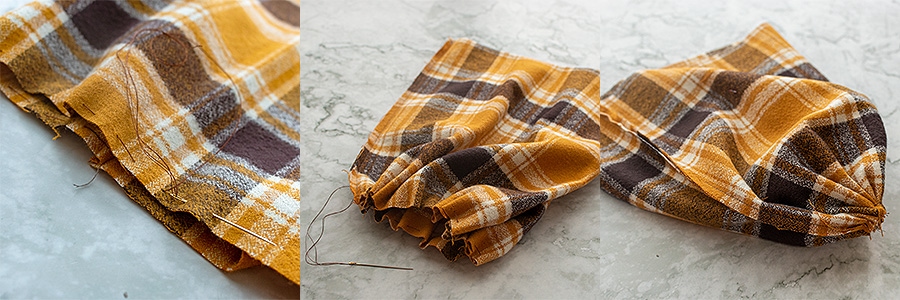 Using a needle and thread, sew a running stitch 1/4” away from the edge to close up one side of the fabric loop. Once you have sewn all the way around the edge, pull the thread to close the opening. Stitch closed.
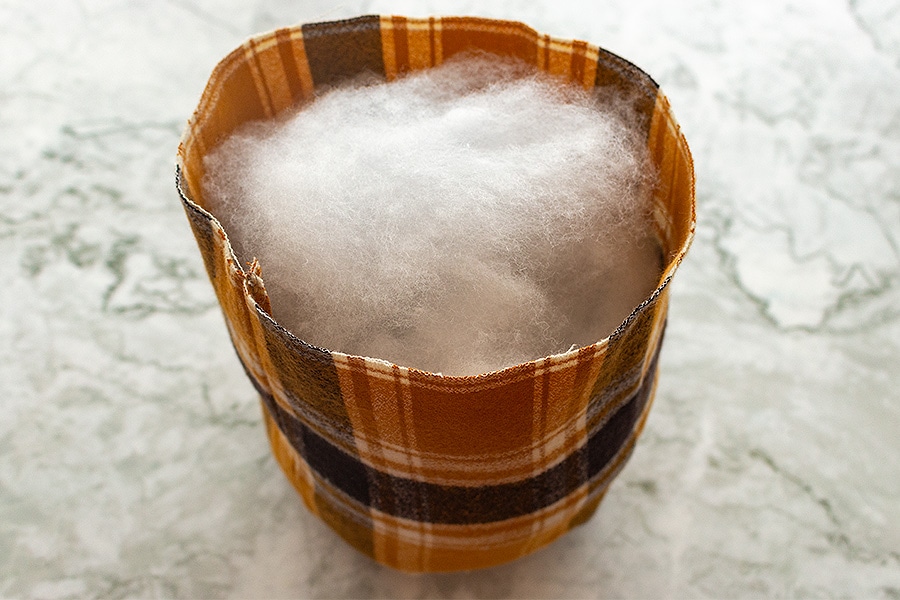 Turn the fabric right side out, and begin to stuff with stuffing. To give your pillows a nice full look, fill it with as much stuffing as you can!
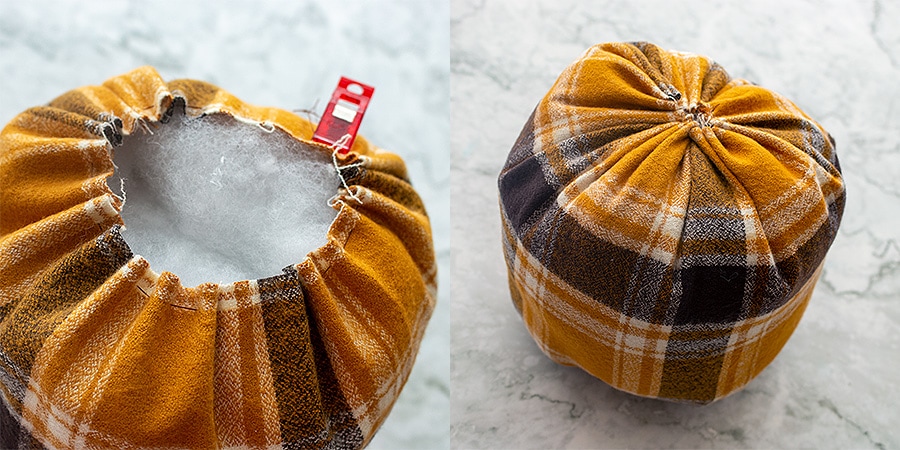 Using a running stitch again, close the top of the fabric pumpkin.
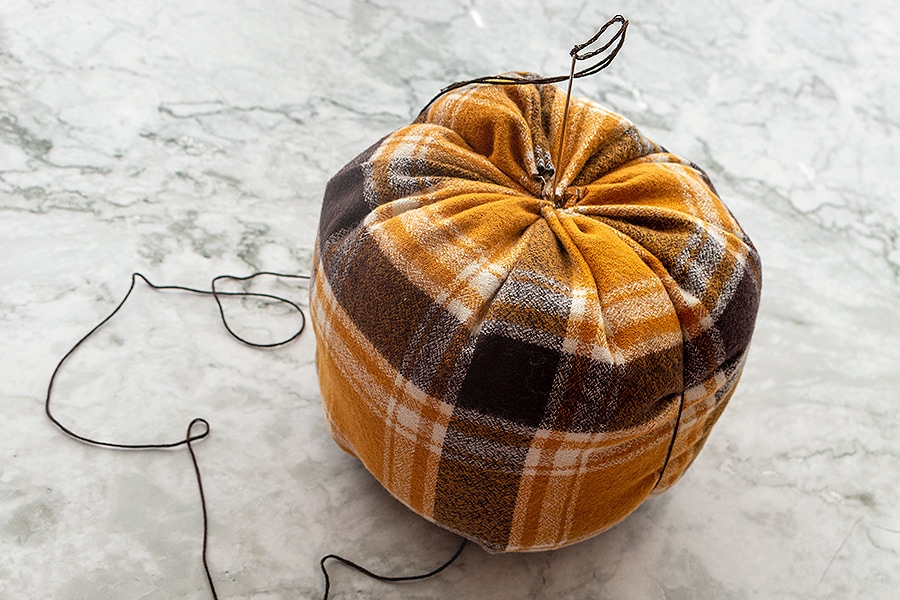 Now it is time to create the pumpkin segments. Use all six strands of embroidery floss. You could also you twine for this, for a different look! Pull the thread tight each loop around the pumpkin.
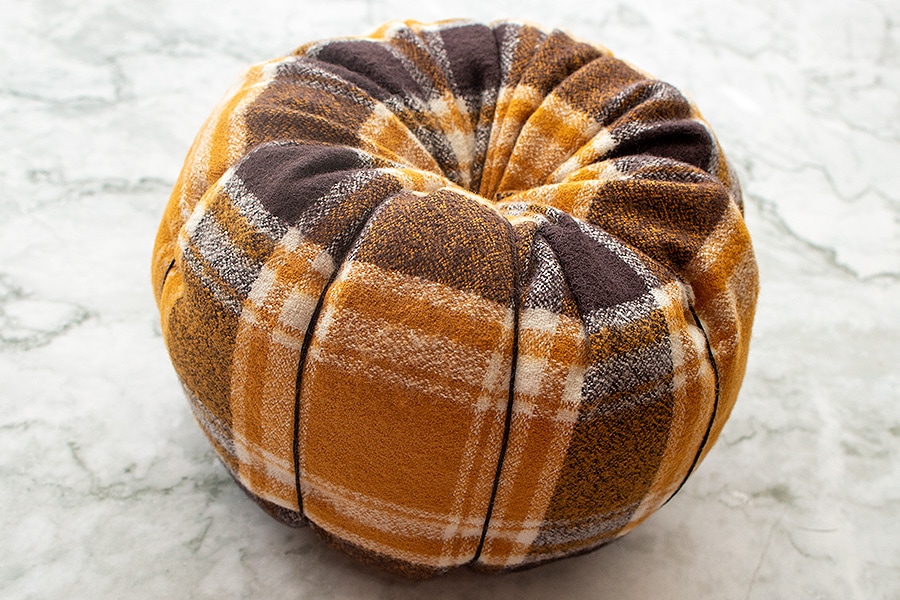 I did eight segments, and tied it at the end.
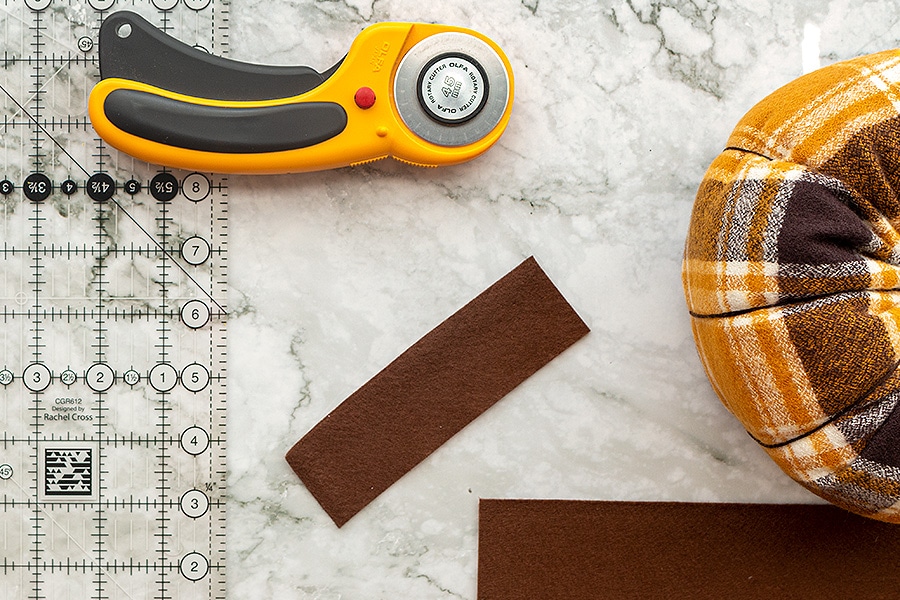 Cut a 1.5” x 5” felt strip to turn into your pumpkin stem. If you make your pumpkin smaller, you might want to make your stem a little smaller also.
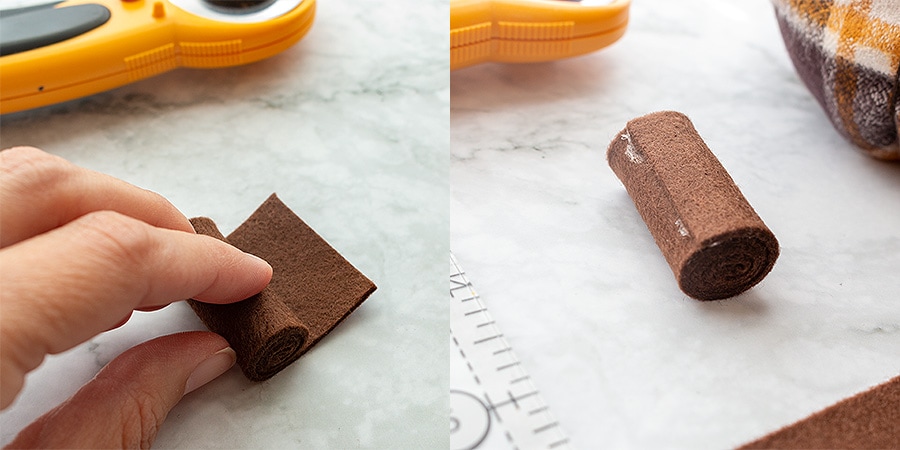 Roll the stem lengthwise to create the stem, and glue the opening closed.
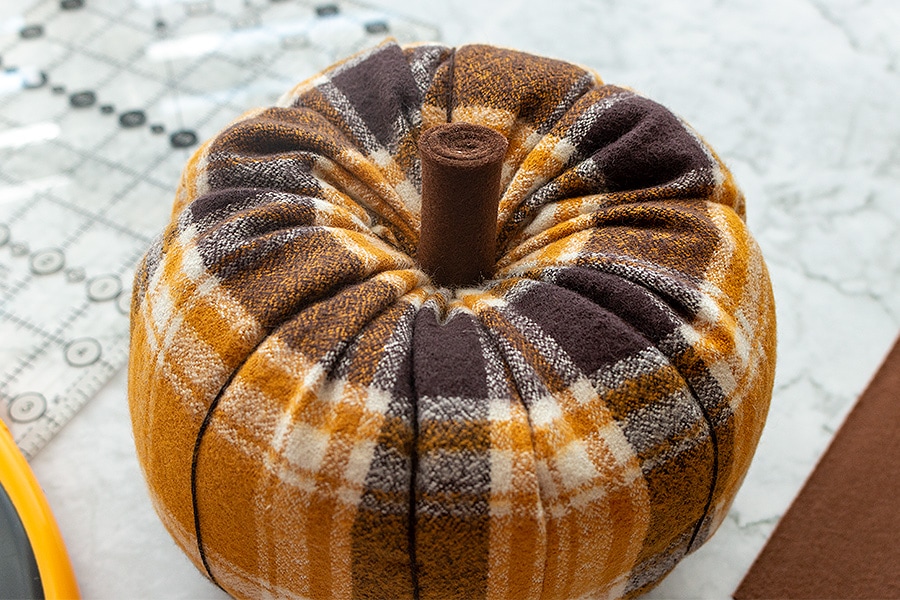 Now it is time to attach the pumpkin stem to the pumpkin! Pick your favorite side of the pumpkin and attach the stem so the stem seam is facing in the back. Using the glue gun, secure the pumpkin stem in place. You have to always put your best foot forward, even when you are a pumpkin. 🙂
Tada, you’ve turned your fabric and felt into a pumpkin! Try not to make another one … I dare you!
Share with #fabricpumpkins
We would love to see your next project – be sure to share using #fabricpumpkins hashtag and tag us (@fatquartershop) so we can see and share your work!
6 comments
Thank you so much for this tutorial. I made these years ago and forgot what the formula was for the size of fabric. Golden years…really?
I made mine of cotton Fall prints. My stem of choice was sections of windblown limbs from the yard. To get “fancy” I hot glued fall-themed pics with leaves and grapes, etc. in with the stem.
Everyone I gave them to still pulls them out every fall to decorate their homes (even my sister-in-law!). Thanks again!
I love the idea of real tree limbs and leaves from the yard. How neat!
I’ve made a bunch of these pumpkins, too. So cute, are they not? One thing I did was use a Cinnamon stick for the stem. And in some of my pumpkins I added potpourri with the stuffing. There is absolutely no way you can make one. Before you know it, you have a pumpkin patch of your own.
I have been looking for the instructions for the pumpkins. I display leaves and pumpkins in my home every fall. I am so excited to be able to make some of my own. I plan to crochet some leaves for my pumpkins but I like Julie’s idea too. Thanks again.
Thank you, Debbie!