

Hello quilters! We are wrapping up the Deck-ade the Halls quilt along. We are sad to see this fun series come to an end, but hope you had fun celebrating our 10 year anniversary with us!
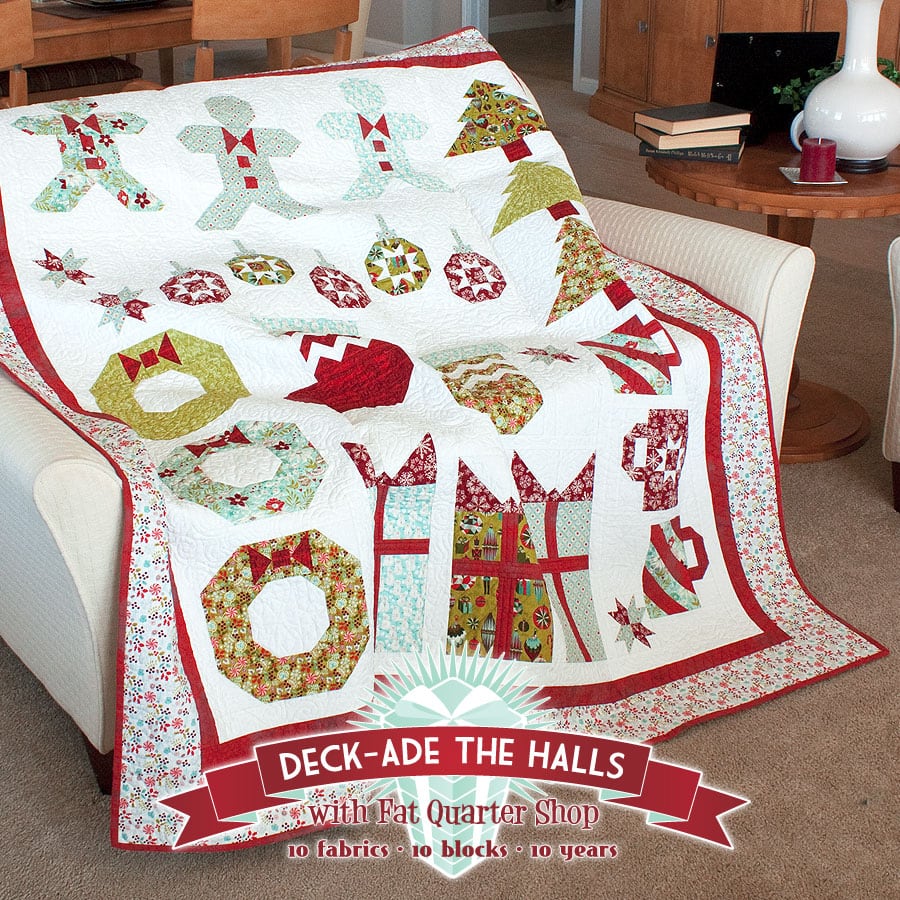
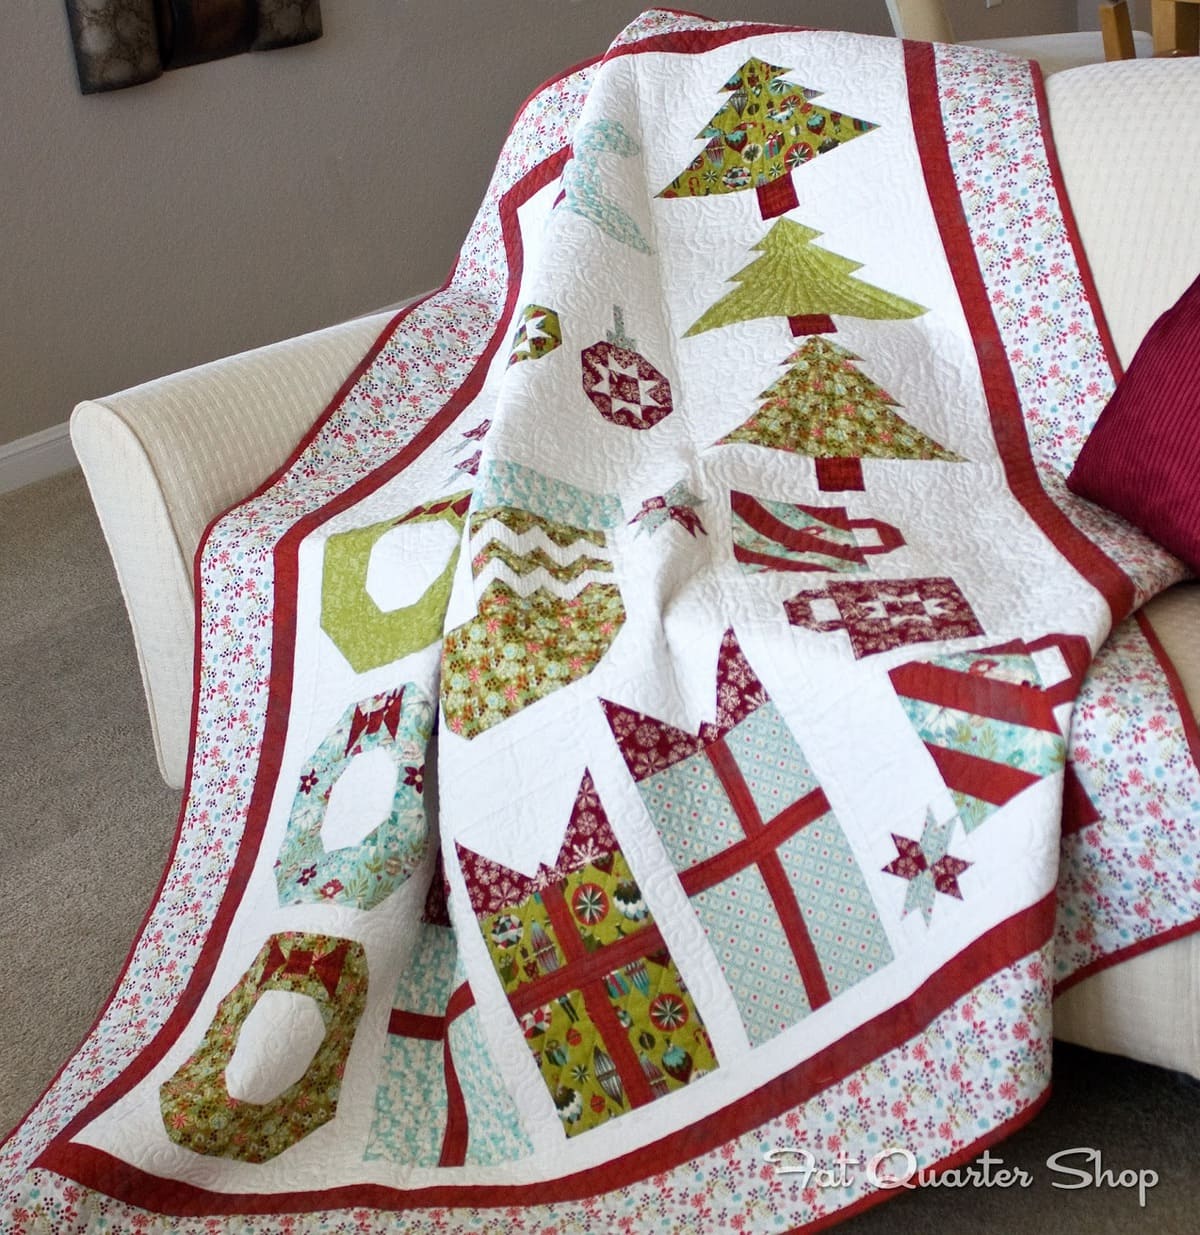
You can find all the patterns for this fun novelty Christmas quilt in our Peppermint Lane Block of the Month Book. To set this quilt, Jocelyn spaced the blocks in interesting ways, giving the quilt a jumbled look. Some blocks are straight set, like Trim the Tree and Holiday Homecoming, and some are offset, like Vintage Ornaments. And to round it out, we included a white inner border, a middle border of the grunge red found throughout the quilt, and a fun, printed outer border.
In our instructional video, Kimberly will show you her unique method for cutting and attaching borders. You will definitely learn something new and you just might pick up this new technique!
You can find all the patterns for this fun novelty Christmas quilt in our Peppermint Lane Block of the Month Book. However you choose, we hope you have fun making the Deck-ade the Halls quilt! These blocks are so versatile and can easily be made into a festive table topper or wall hanging. Be creative and use Deck-ade the Halls in your Christmas decorating.
Thank you to everyone who has sewn along with us! We loved seeing your progress on Flickr. It has been so great to celebrate the past 10 years with you, and here’s to 10 more!
9 comments
What a fantastic video!! I would love to try this! One question: Where would I get a large cutting mat like the one in the video? The largest one I have seen and own is 36 inches. Thank you so much!
Thank you FQS for hosting this wonderful Christmas pattern sew-a-long. I finished my top this afternoon and will put it on my longarm in a week or so. It's been fun and its beautiful!
Hi, I'm Lee from Singapore. Thanks for the lovely Xmas pattern although we have no snow but I still love the snowman. This is for CathyK, I also have a 36 inches cutting mat. To cut 56 inches, I first measure 7the fabric strip at 0 to 36 inches and insert pin X at 36". Next, move pin X to 0 then measure another 20 inches. You will get 36+20 = 56 inches. I use this method even when I sew bed sheets of 90 inches. I just keep repinning and start at 0". Hope this helps. I use this tip from Lori Holt ( bee in your bonnet).
Thank you so much, Lee!!! That is a huge help!!! 🙂
Really like the video. I'm going to try doing my binding that way. My question for you is where did you get your 1/2 ruler? I have checked several stores here in St George and no luck in finding one.
Free Facebook Likes, Twitter Followers, Twitter Tweets, Twitter Re-Tweets, Twitter Favorites, Google Plus Followers, StumbleUpon Followers, Youtube Views, Youtube Likes, Youtube Subsribes, Pinterest Followers, Pinterest Likes, Pinterest PinIt, Free Website Visitors.
Just Join now and Free Increase your Social Media Networks.
GetLikeFast.com
@Maxine, our 1/2" ruler is from the Omnigrid Ruler Trio, found on our website at this link: http://www.fatquartershop.com/nli.asp?iid=98649
CathyK,
Our mat is by Quilter's Rule! You can find the mat here: http://www.quiltersrule.com/mats/index.html
Thank you!!!