
Hey all, Kimberly here! I hope all of you got a chance to tune in to the livestream I did a couple of weeks ago, the Behind the Seams: Flying Geese Tutorial! I turn flying geese into a pillow. For this project, I used the Autumn Love collection by Lori Holt. I used the left overs from the Charm Pack in my Great Granny Squared Book Livestream (check out the book HERE) to make this easy, scrappy project!
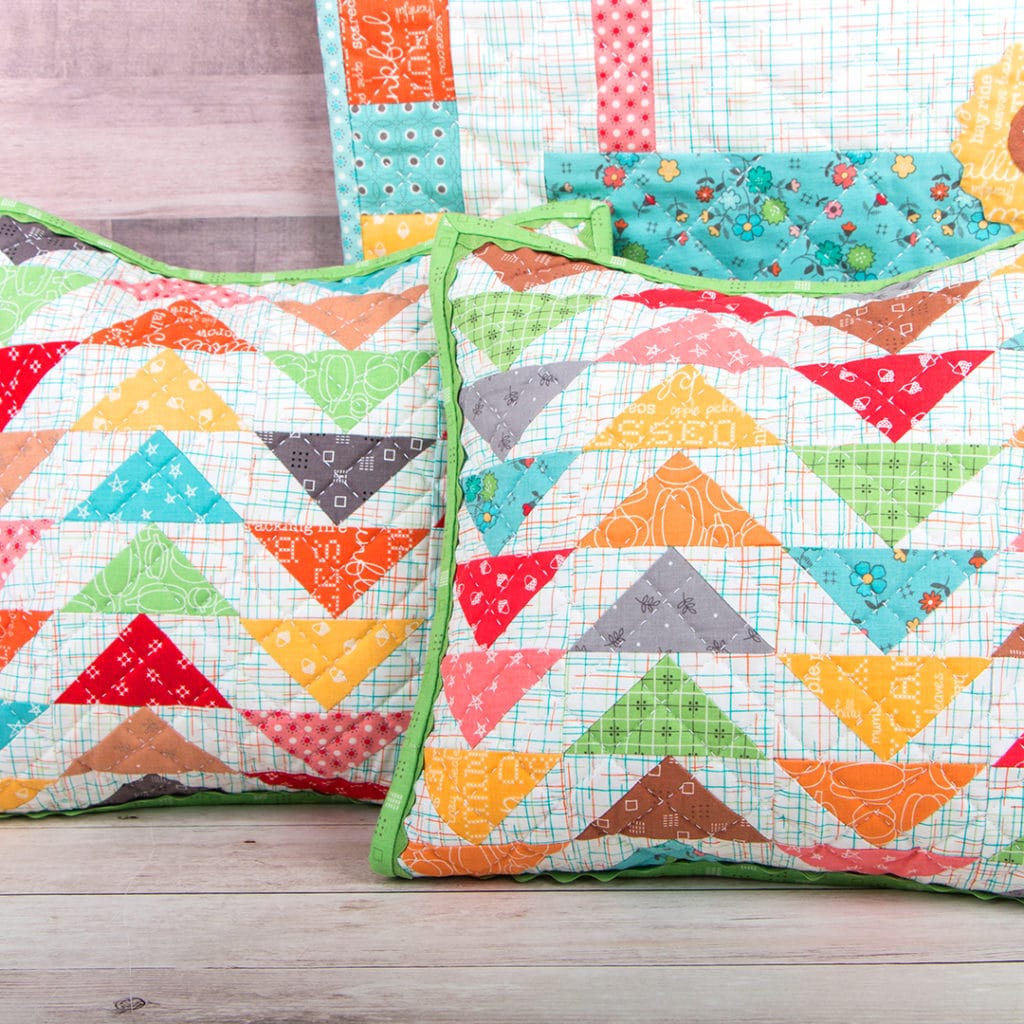
Fabric Requirements
- 8 charm squares
- 1 yard Background Fabric (SKU# C7362-CREAM)
- 1 yard Backing Fabric (SKU# C7362-CREAM)
- 1/4 yd Binding Fabric (SKU# C7367-GREEN)
- Ric Rac (Green Ric Rac HERE)
- 12″ x 12″ Pillow Insert
- Flying geese ruler (can find Large one HERE)
- Soft and Stable ByAnnie
Instructions on how to make the pillow

1. Take a 6″ background square and a 4.5″ print square and put them right sides together. Pin together. Use the quarter inch line on your ruler and draw two lines a quarter inch away from the center. Stitch on the drawn lines (TIP: it will turn out better if you stitch just inside the lines the center and not directly on the lines).
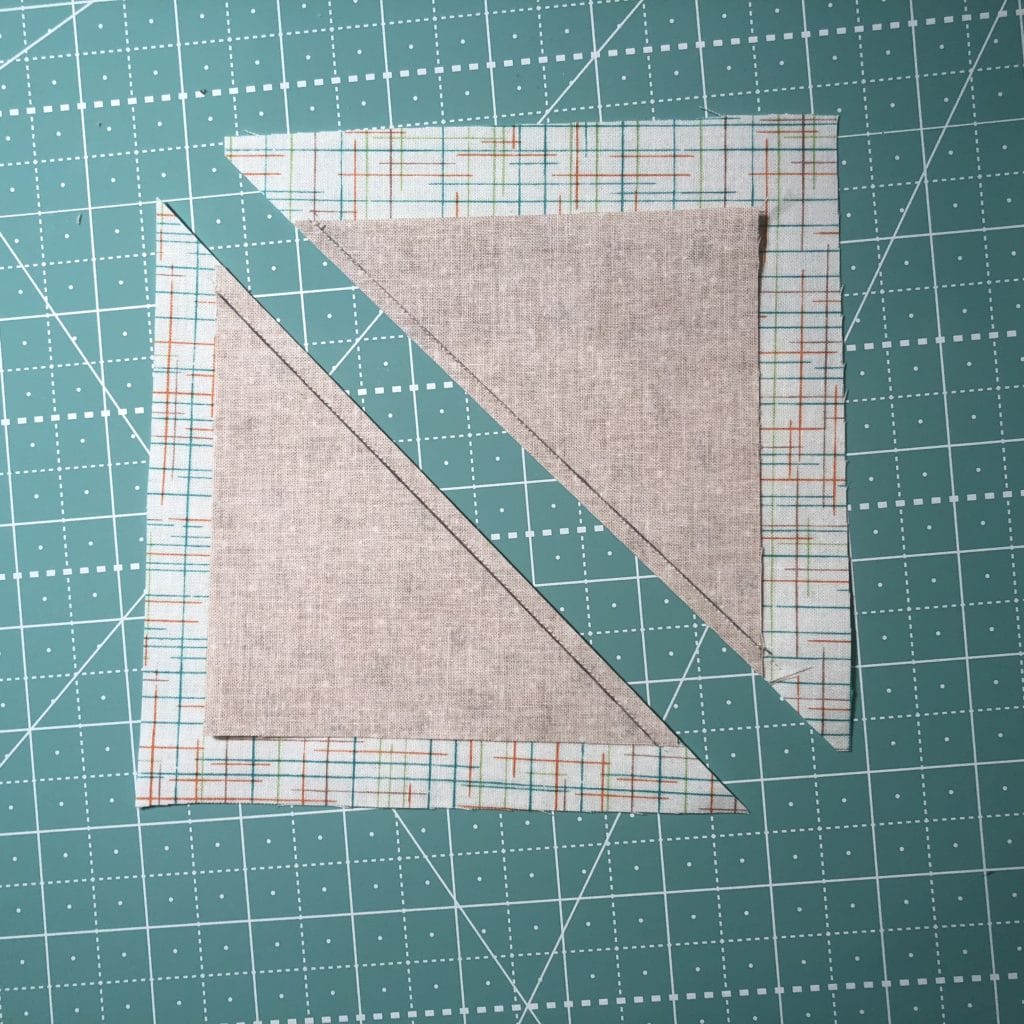
2. Cut down the center so you end up with 2 units. Set seam and press.

3. Place both units together so both seams are going the same manner.

4. Pin. Make two lines (like in step 1) and sew in the same manner

5. Cut again on the center line and press. You can press to either direction.

6. You will end up with 4 flying geese like this. Place the flying geese on the ruler in line with the triangle and cut one side, flip, and then cut the other side. Repeat for all 4 flying geese.
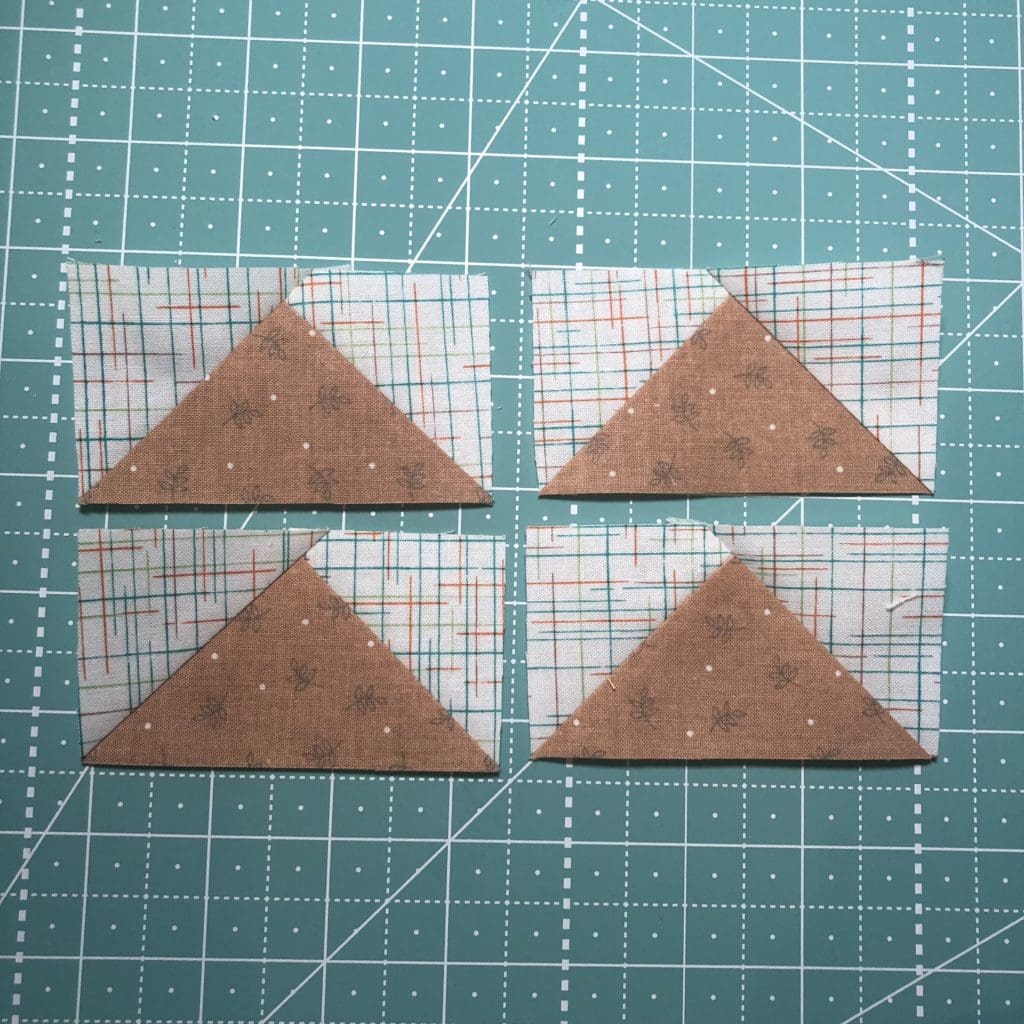
7. Repeat with a all 8 charm squares to make a total of 32 flying geese.

8. Sew the flying geese into four rows of eight.
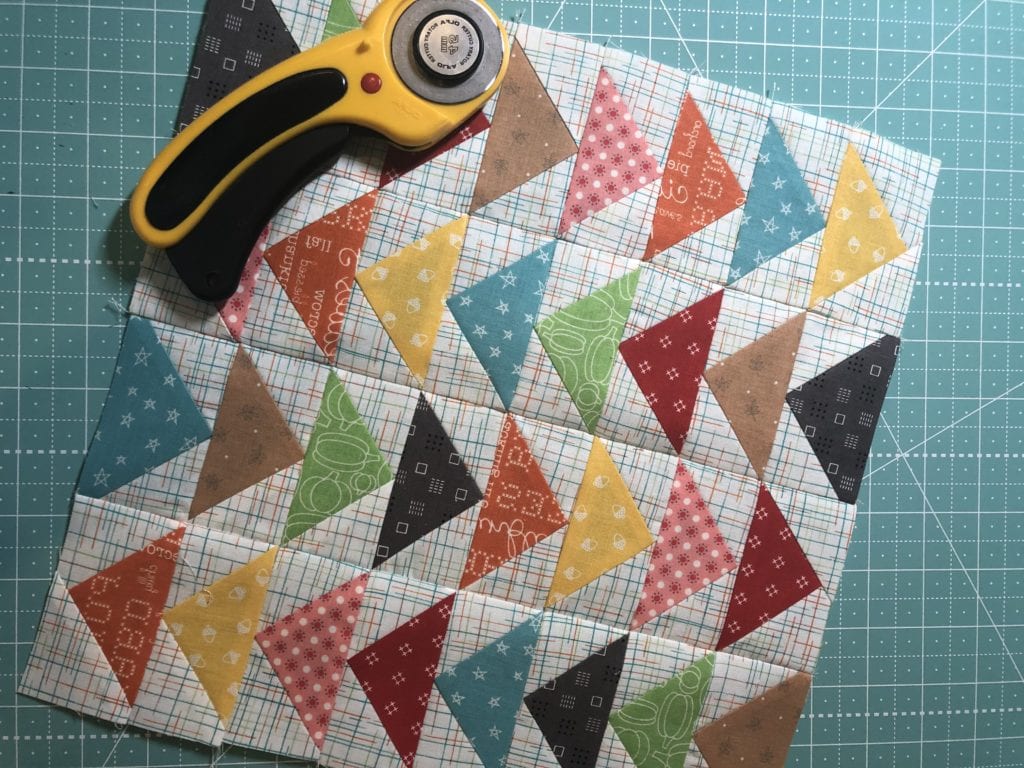
9. To quilt, use a Frixon pen or your favorite marking tool to draw straight lines 1″ apart diagonally across the top.
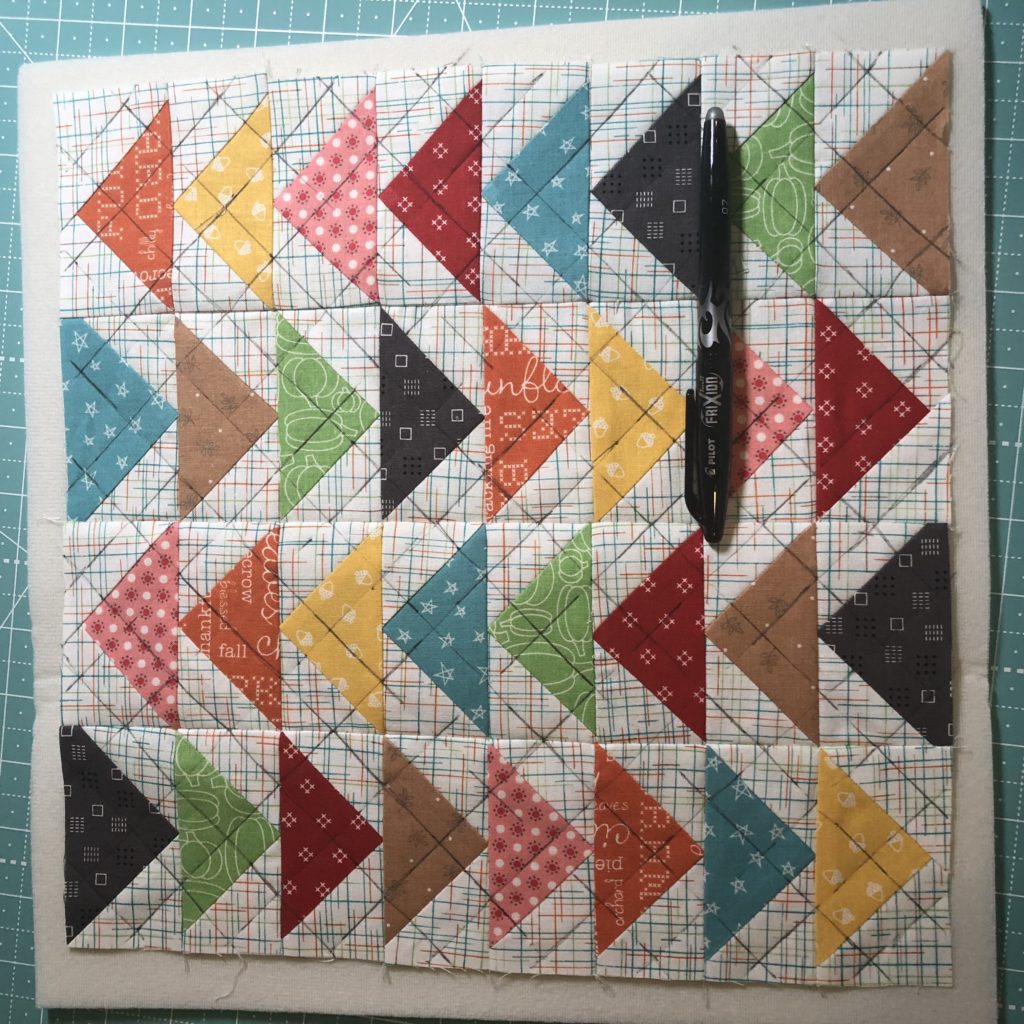
10. Repeat to draw straight lines 1″ apart in the opposite direction. On the back, we used the By Annie Soft and Stable since it does not require pinning. I cut the Soft and Stable about 1” larger than my pillow top, so it extended about 1/2″ past on all sides.

11. Stitch along the diagonal lines (We used 50 wt white thread, which worked really well)

12. Trim the Soft and Stable to 1/4″ away from the quilt top. Pin the Ric Rac along all 4 edges, just inside the edge of the pillow top, and baste stitch into place. Place and stitch backing and binding onto quilt top and insert pillow for finished piece. (TIP: To see our preferred method of how to maek and envelope back, watch our Sew Solid Castle Pillow video!)
And that’s it! The pillow took me two hours to make and I’m sew happy with how all of it turned out! I hope that you do your take on this pillow to use up your Charm Packs and if you do, please make sure to tag @fatquartershop and use the hashtag #flyinggeesepillow so we can see and share your work!
Happy Quilting!


10 comments
I like this way of making flying geese but what is finished size of an individual flying geese block supposed to be? 1.5″ by 3″?
I am also wondering what the finished size would be and also what size the background square would be if we started with a 5″ charm. 7″?
6.5″ for the large square (sky) if you use a 5″ charm for the small square. Your Flying geese unit would finish to 3.5 x 1.75.
All I can say is that if you got this done in two hours you must be able to work miracles.
The finished size of the Flying Geese (goose?) is 1.5 X 3.0.
Check out the instructions for the Flying Geese Ruler at this site for other measurements: https://www.quiltinaday.com/freepattern/complimentary.asp
The calculation for squares appears to be:
(1) for small square(goose) : add 1.5″ to finished width
(2) for large square(sky): double the finished height, then add 3″
Try these calculations out on ONE flying geese first to see if they are right — don’t make 50 all at once.
I thought the same thing. This is a weekend project for me.
The formula for this method of Flying Geese appears to be:
(1) Small Square (goose): Add 1.5″ to finished width
(2) Large Square (sky): double the finished height, then add 3″
Thank you so much!
Darling pillow. I’m going to try and make. Can you tell me what the actual geese size should be using your directions. I do not have a lot of piecing experience.
Hi Kimberly. Thanks so much for sharing your Flying Geese pillow tutorial. I am sure our readers will love it! I’ve included your post in our latest craft inspiration roundup on Crafty Like Granny. Cheers Jodie 🙂